We have a full complement of tuning and upgrade products for various Vespa machines which we will fit and analyse over the coming months. The goal is to help you make an informed decision on what upgrades and components are right for you. We began with a standard PX125, explored the SIP exhaust upgrade, then a few ‘home tuning’ options, and last month upgraded to the BGM 177 kit. This month we take a look at the fit and dyno of the BGM ‘long-stroke’ 60mm crank…
Time for a brief recap
We started with a bog-standard PX125, a 2015 Euro 3 compliant model. The aim was to select a swathe of ‘bolt on bits’ which are often selected by end-users, and to see what (if any) power gain each gives. The SIP Road 2 exhaust was first up and gave a tidy power gain across the board. We later combined this with a ‘home tweak’ to the 125 cylinder and achieved further gains, and finally we fitted the BGM 177 kit last month and progressed once again. The power of a standard machine was 6.3bhp and by the end of last month with we had reached 10.9bhp with the use of these components.

The next item… and why we want to use it
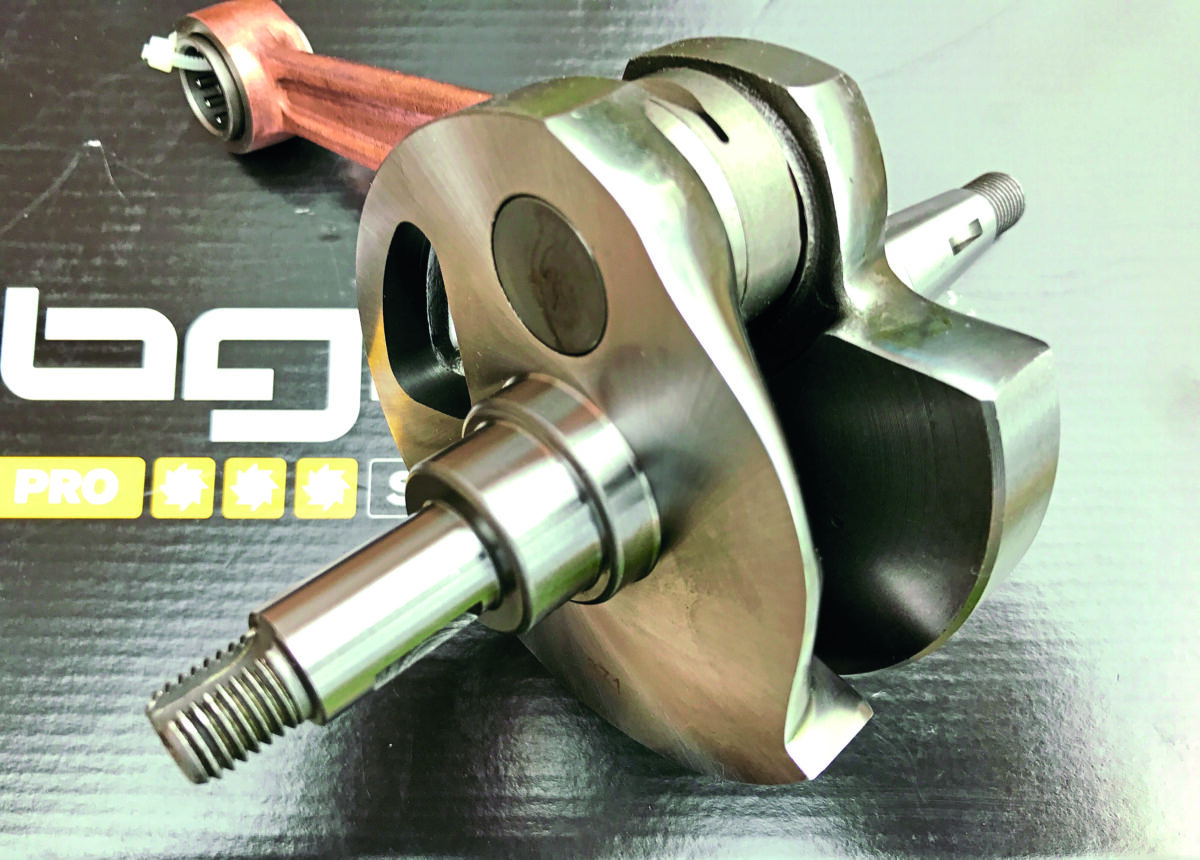
So this month I wanted to ‘plug and play’ with a BGM 60mm crank. The reason I say ‘plug and play’ is because I’m trying to just ‘bolt stuff on’ in a manner of a home user who doesn’t have access to porting tools and other specialist equipment. You may want to try and experiment with it yourself. The reason for selecting the crank is three-fold:
Enjoy more Scootering Magazine reading every month.
Click here to subscribe & save.
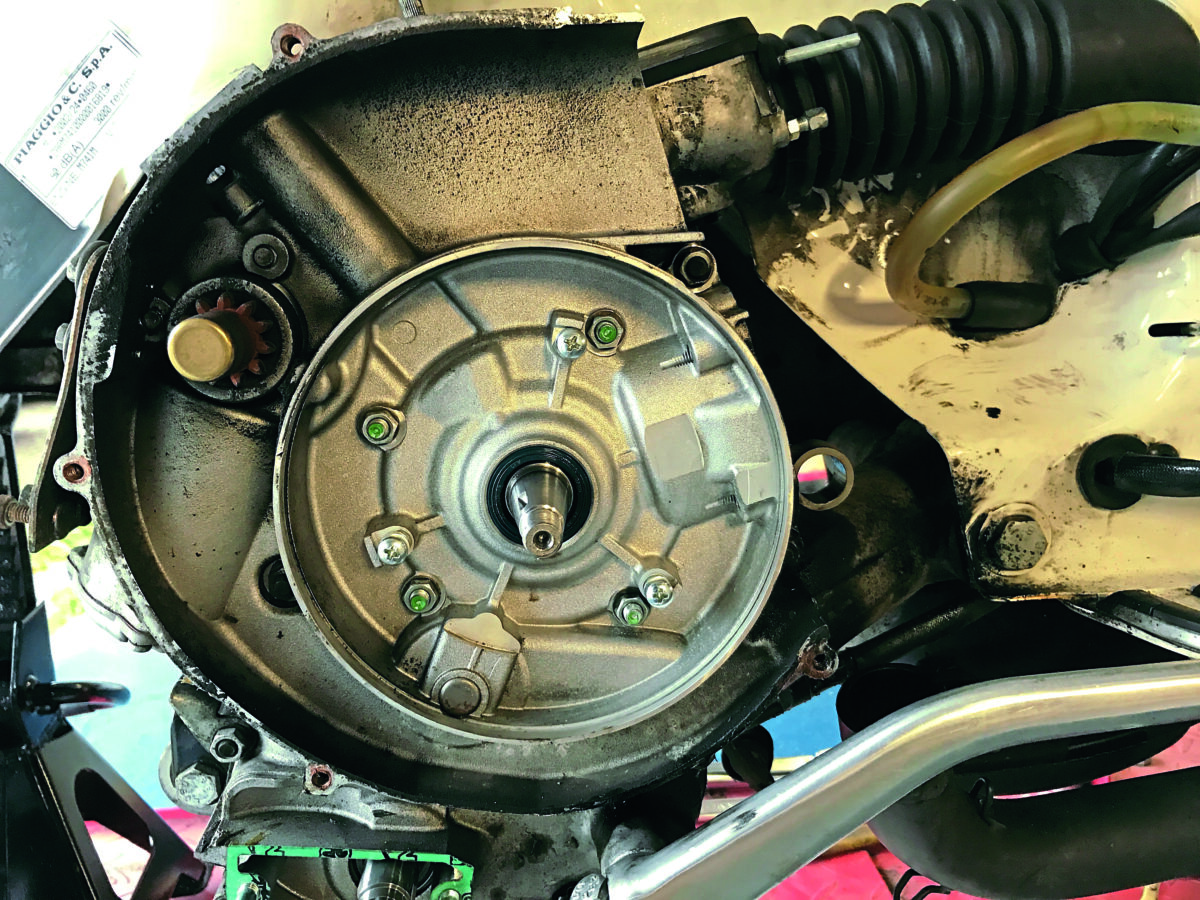
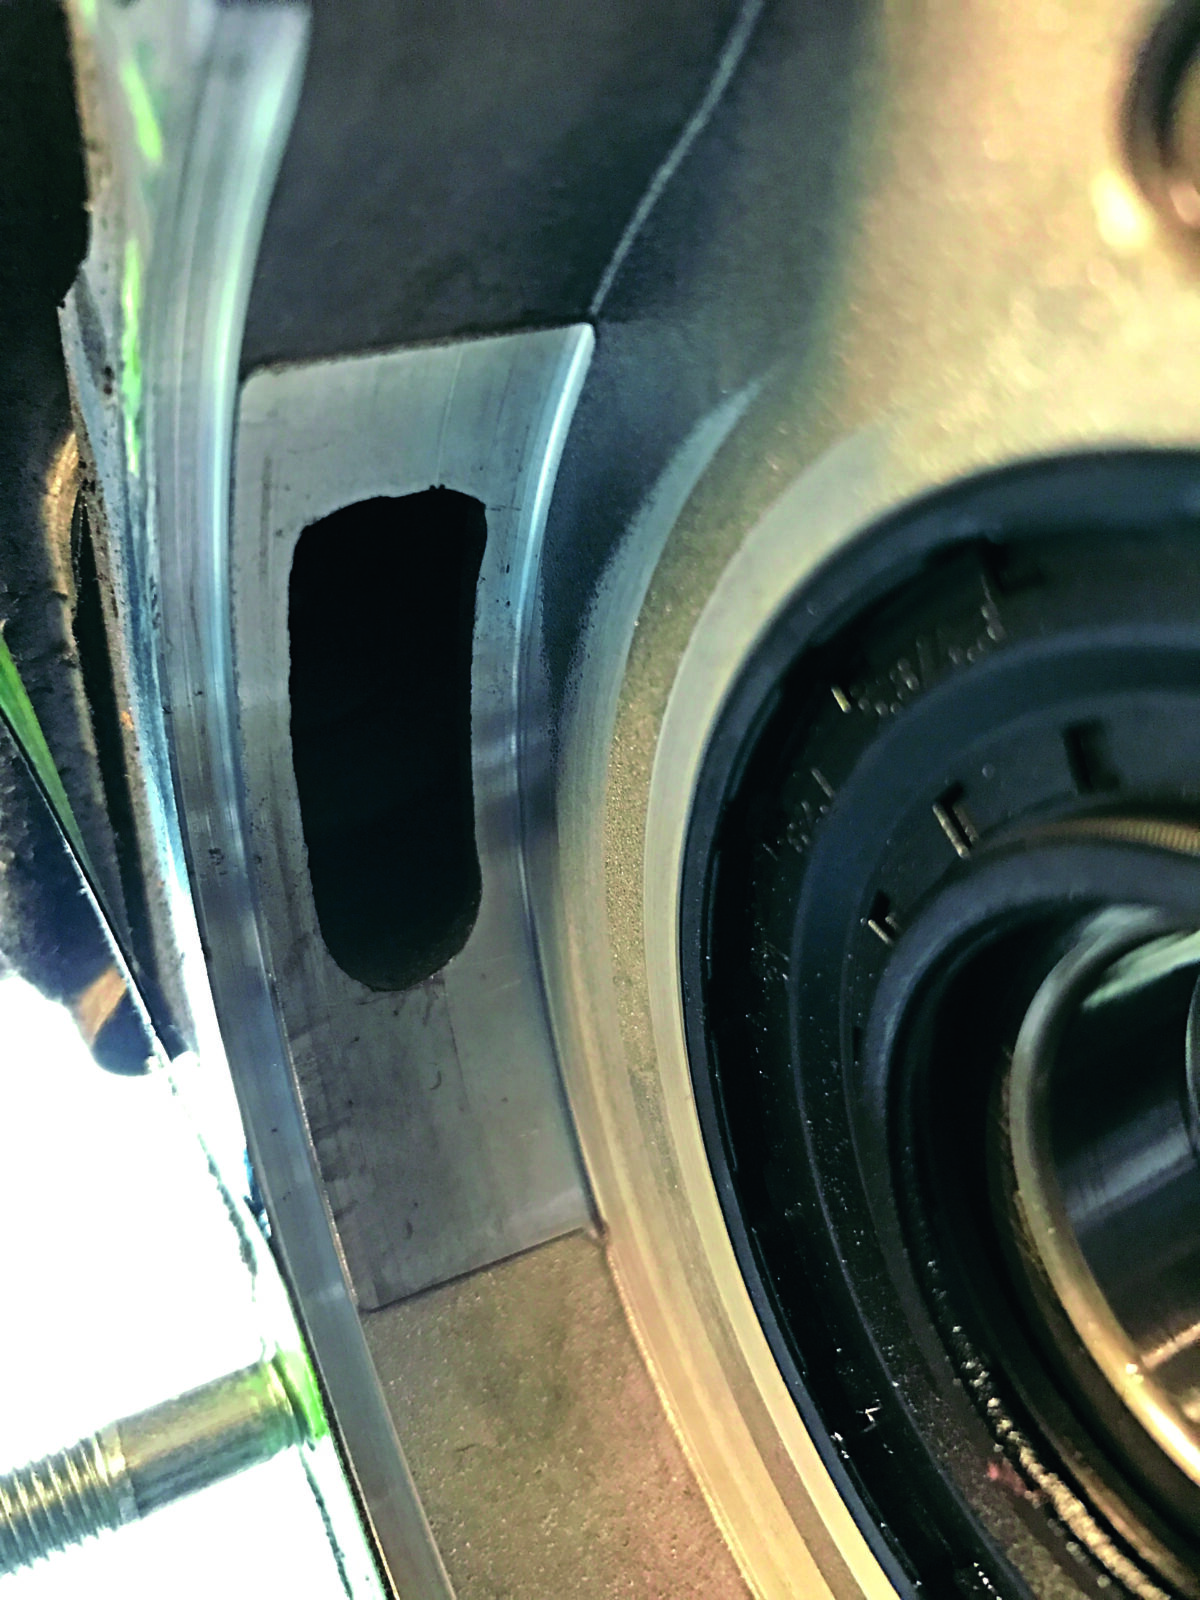
1: The Vespa PX works off ‘crank induction’ which basically means it draws its fuel/air mixture in though a cut-out in the crank webs. The carb sits on a small inlet hole in the engine casing and the cut-out in the crank allows the inlet to open/close accordingly. If the inlet duration is increased on the casings and/ or the cut-out on the crank enlarged, then this will result on an increase in the inlet timing. The BGM comes ‘pre-cut’ with larger than standard inlet timing and so does exactly what we want it to do, without having to cut/grind the item. The cases would benefit from having the inlet port enlarged also, but I’ll come to that later.
The Euro 3-compliant item was showing 140° of inlet with a standard crank, the BGM crank took that to 160°. Ideally we would want around 180° (achieved by porting the casing inlet) but that will have to wait while we conclude our ‘plug and play’ tests first.
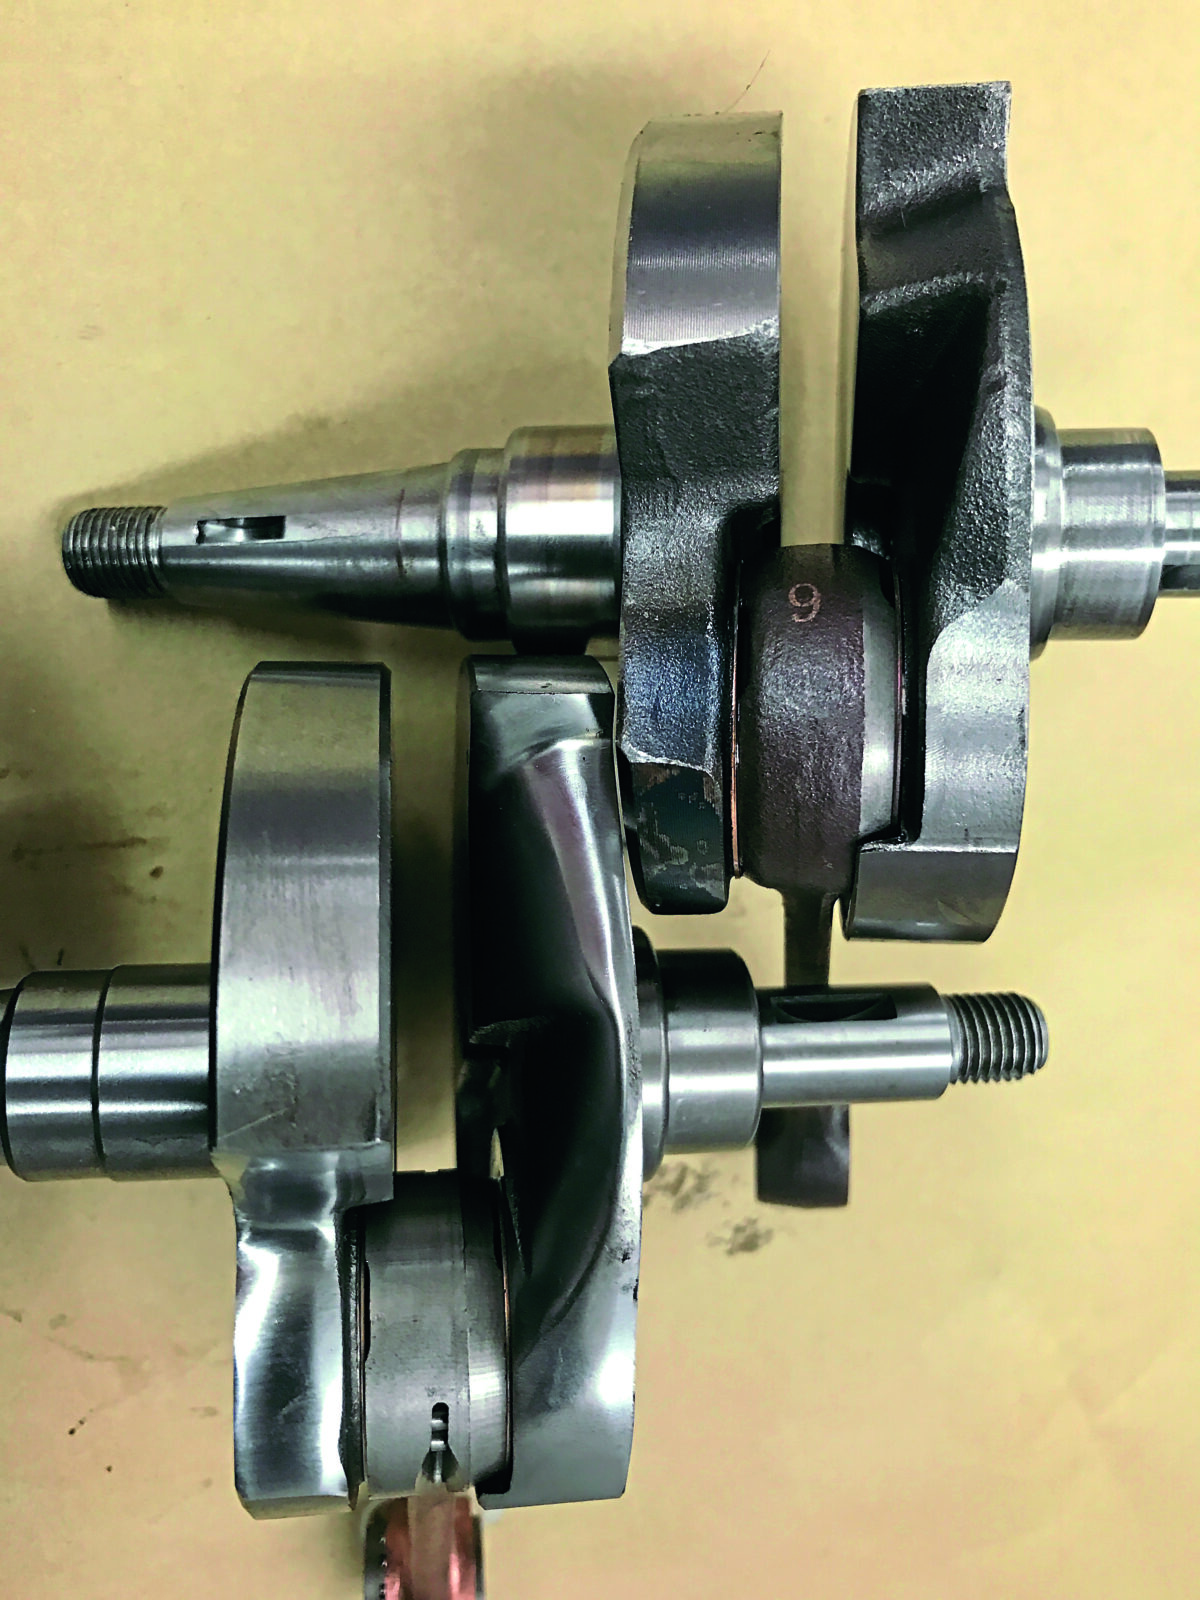
2: The second reason we selected this item is because it is ‘long stroke’ so not only do we get the benefit of increased inlet duration from the bigger cut in the crank, but we also get an increase in cc at the cylinder end from the longer stroke. A standard kit is 177cc with a standard 57mm crank fitted, the 60mm crank takes that up to 187cc.
3: The third and final reason is that with the longer stroke also comes higher port timings, so our transfers increase from 118 up to 123, and our exhaust increases from 171 up to 173.
These three items, inlet duration, cubic capacity, and port timings are all welcome adjustments and are conducive to increases in power across the board. As a side note, the chamfer on the crank is also favourable compared to a standard item, and helps with gas flow, so overall we are looking at a quality item here which ticks a lot of boxes.
The fitting — give it a go
Okay, for your average home mechanic fitting a cylinder kit or bolting on an exhaust seems like a much easier prospect… and as the gains are cheap and easy, people are more inclined to do those items first. So when we come to the fitting of a crank, people might shy away slightly, but it’s not rocket science and I would encourage anyone at home with a bit of common sense and methodical working practices to give it a go. My only hesitation on that suggestion though, is that I don’t want to turn this article into a practical ‘how-to’ session, and would rather stay on focus of the options/price/power/results feature it is intended to be. I will still give a simple overview though, so readers know roughly what is involved and can then deduce for themselves if this is a job they would feel comfortable tackling.
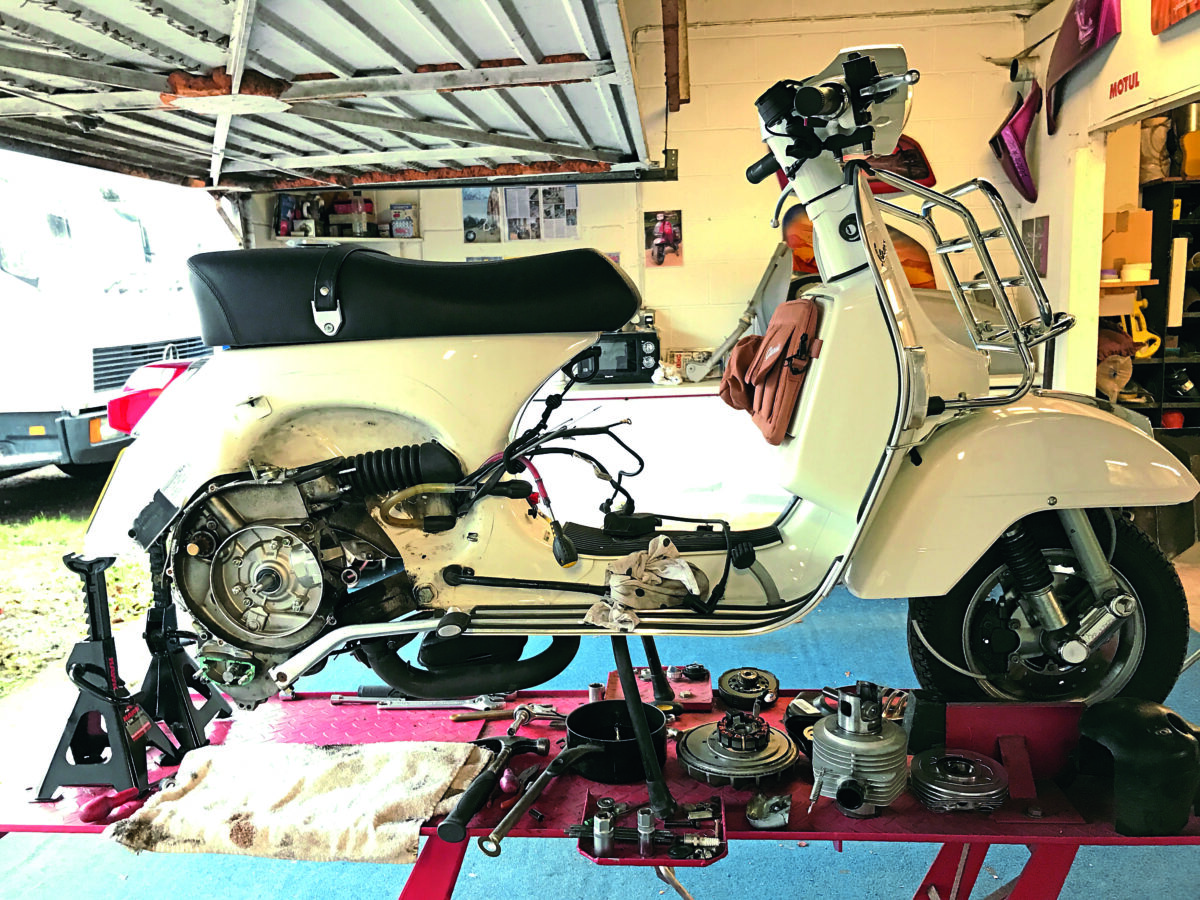
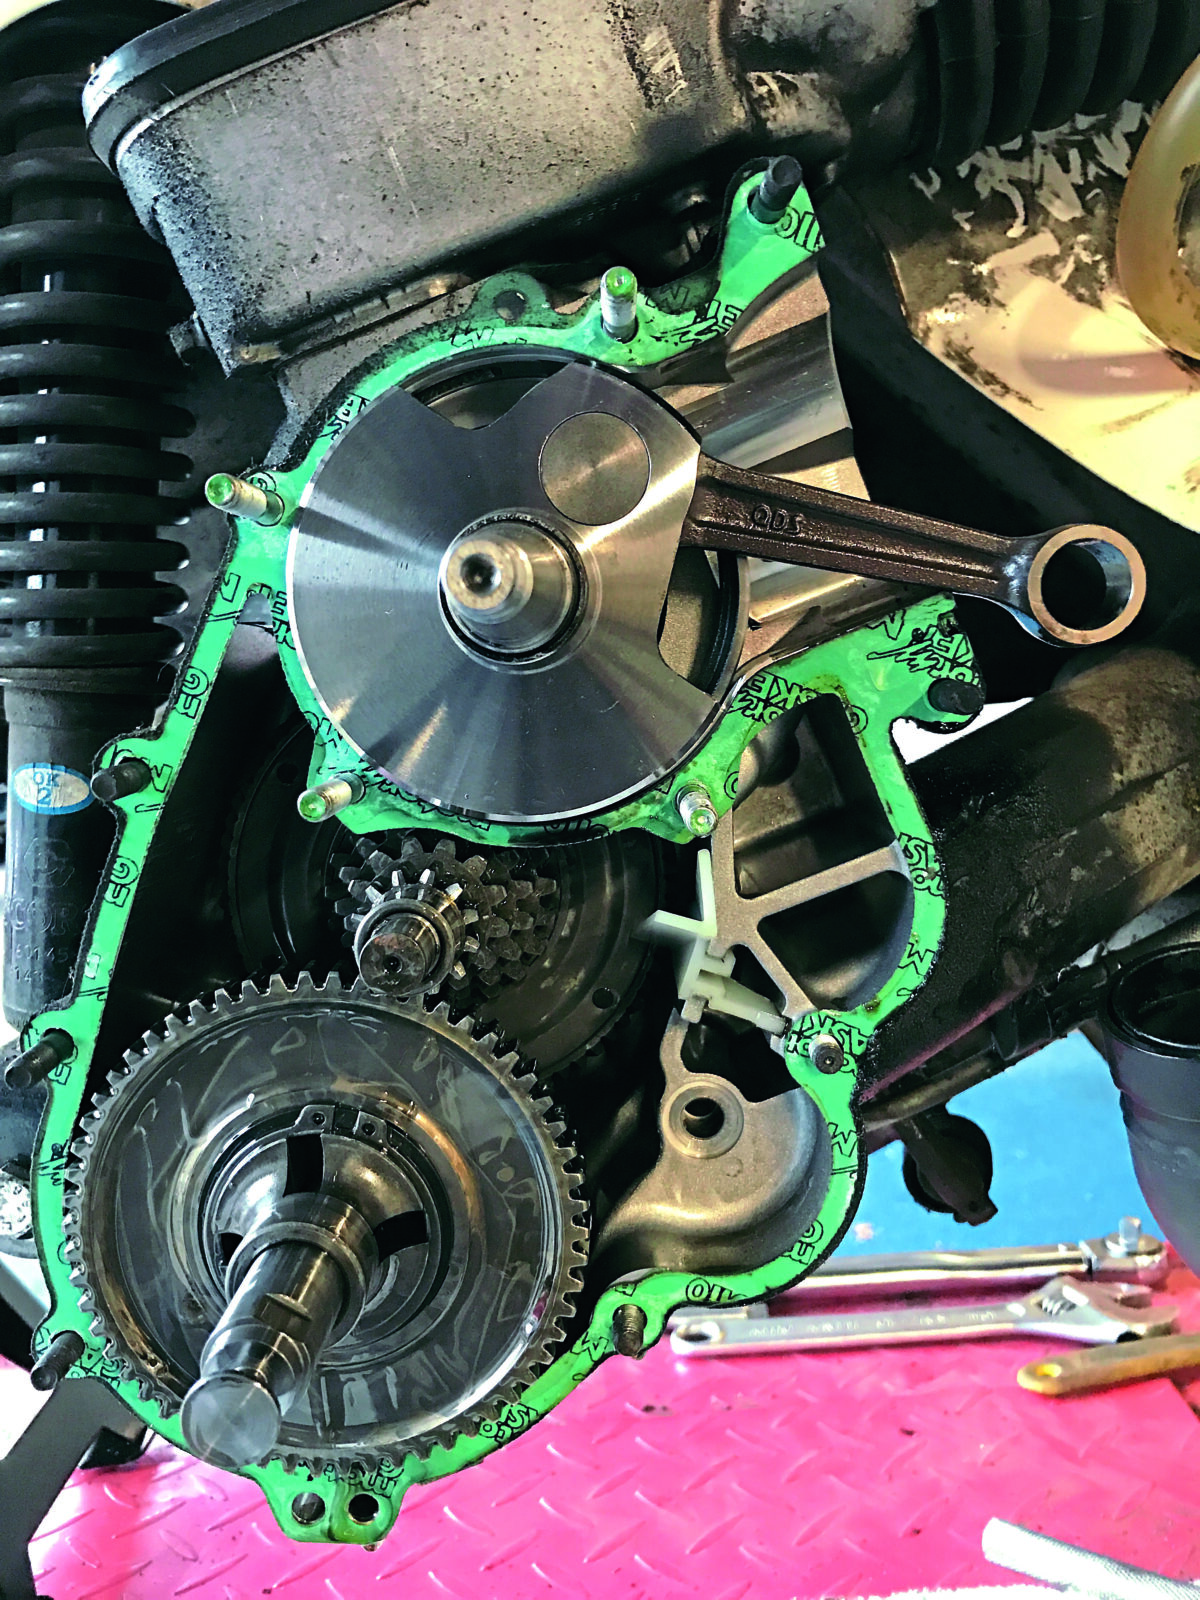
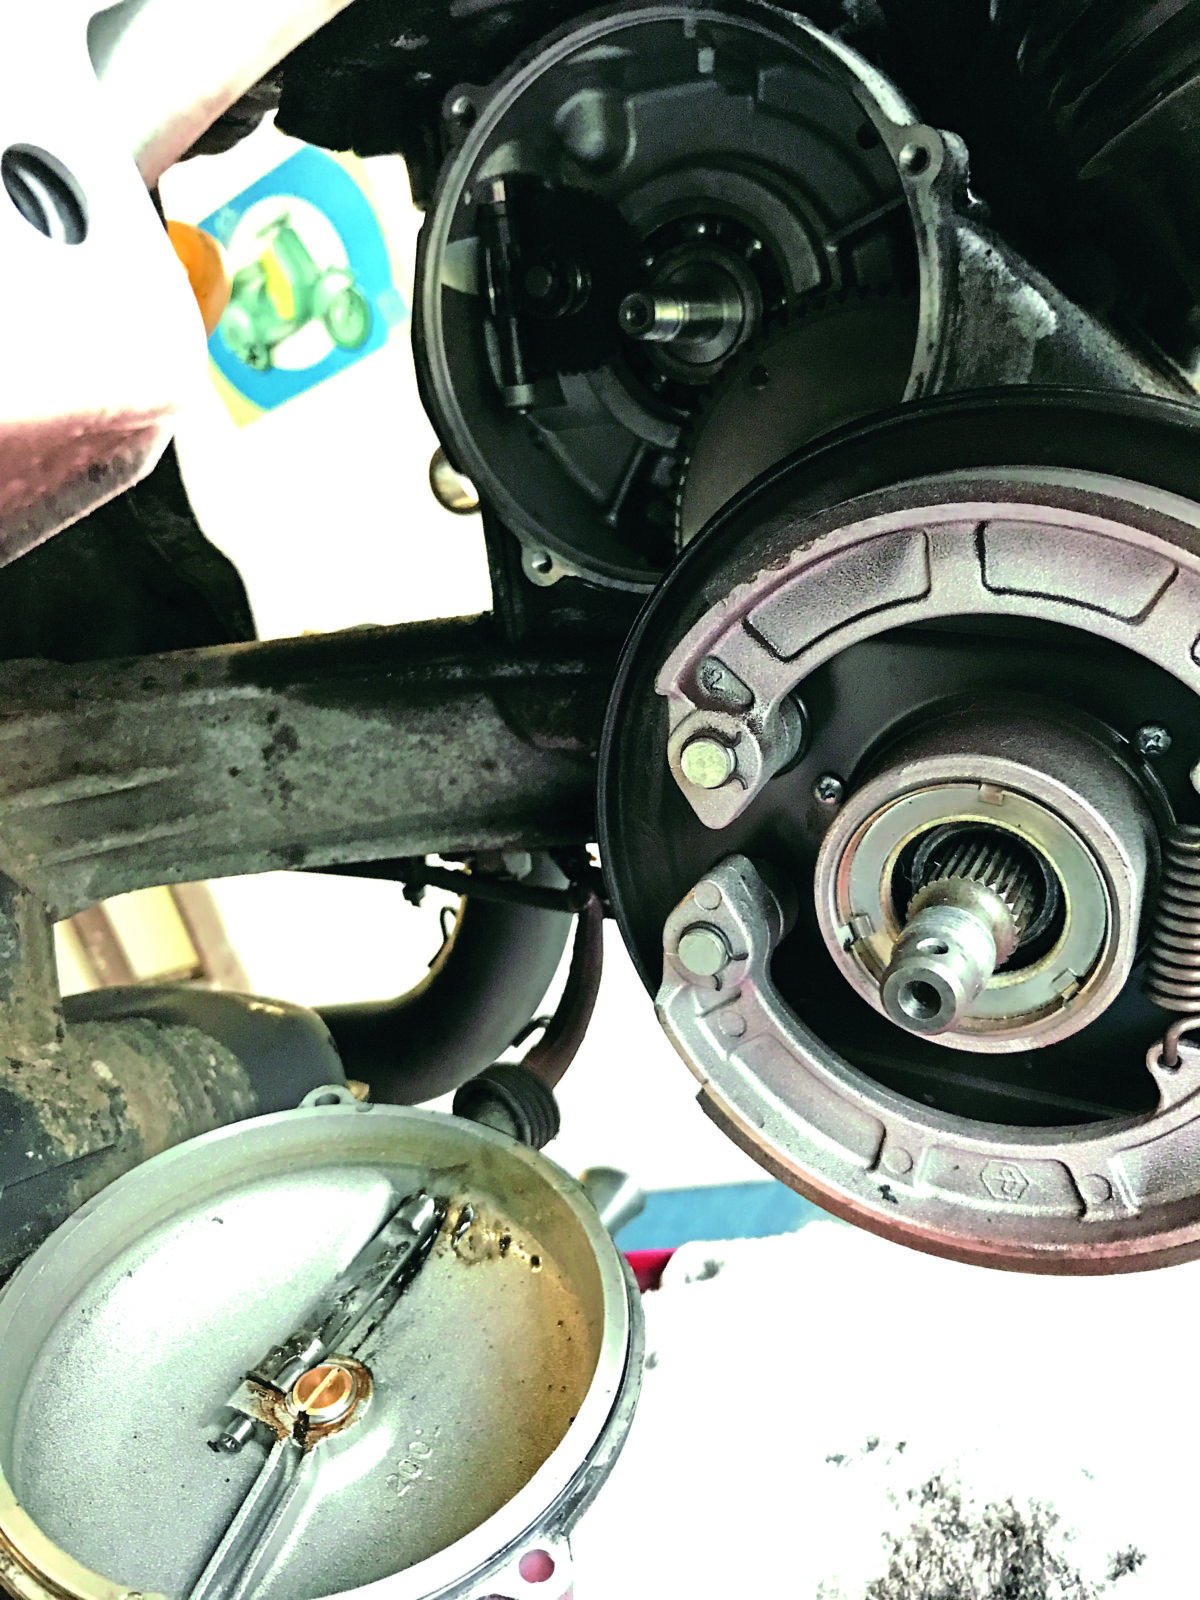
This is the process: cowls off, slacken exhaust and drop it off the cylinder stub, cylinder head off, double-nut the studs and remove studs/cylinder/piston. Whip round the other side, remove spare wheel, rear wheel, clutch cover, clutch unit and oil drive spacer cog. Back to engine side, drain oil, remove flywheel and stator, undo the selector box and split the engine casing. With the removed flywheel side engine casing, fit a new bearing and oil seal, so that you have a new bearing sleeve to slide onto your new crank. Remove the old crank, pop the new one in (use a puller — don’t hit it) and re-fit the case and build back up. There… sounds easy, don’t it? For those needing a bit of guidance a workshop manual and the Scooter Techniques DVDs can assist very well and can be bought online easily. Go on: give it a go.
Dyno test. Houston…we have a problem!
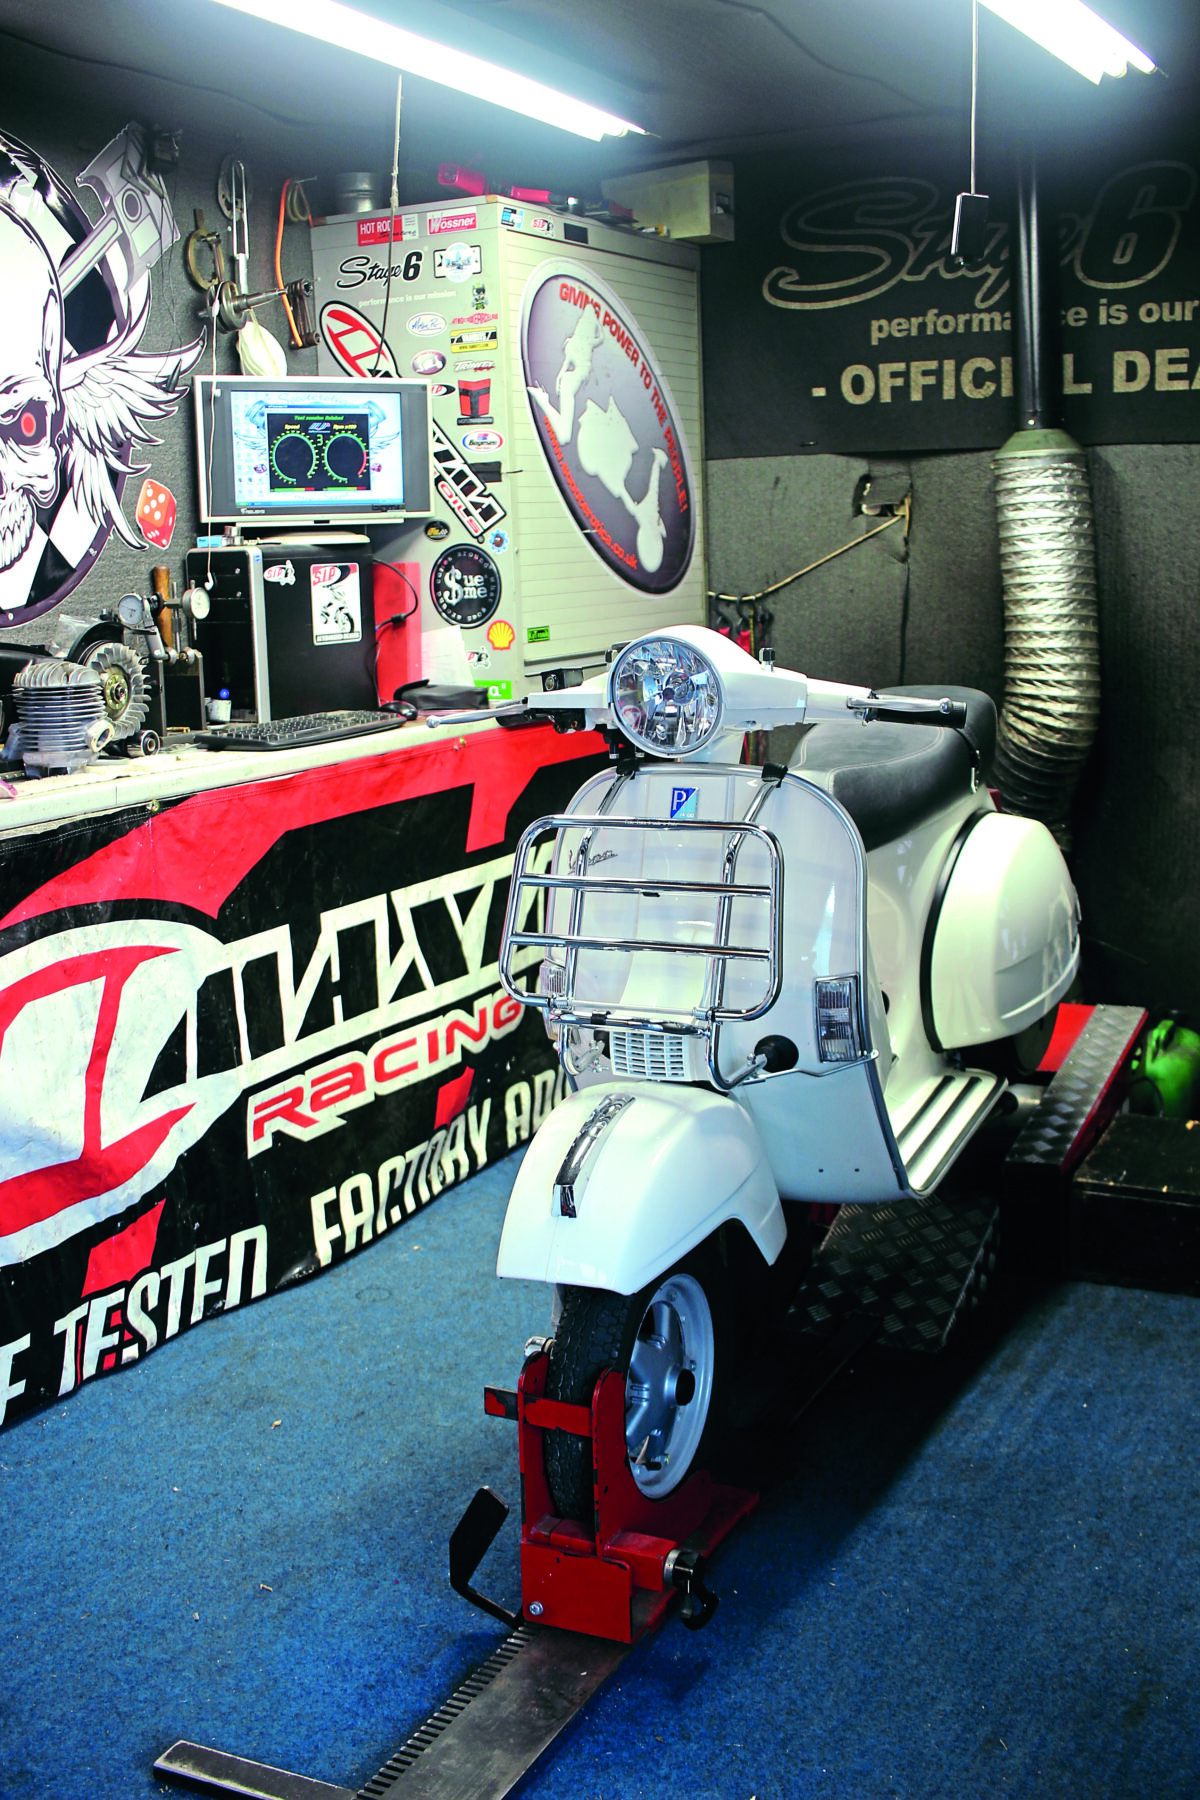
I love fitting stuff with pre/post dyno testing — it eliminates any marketing hype and gives clear figures showing what does or does not work, and what the actual increases are. Given my previous experience on Vespa engines, and knowing the value of increased inlet duration, cubic capacity and port timings I had fully expected a power increase from this exercise. Why wouldn’t I? In fact, without a power increase, there seems no point in fitting the item. So imagine my surprise when after a full engine strip/rebuild and the addition of the new crank, we had a power increase of, well, nothing. Zip, nada, zilch, diddly squat! The dyno power graph was 100% identical to the pre-crank graph. This does not compute. I was aware that we were still running the small 20mm carb, also that we had not ported the casing, plus we hadn’t yet tried the BGM exhaust, and finally that we hadn’t addressed the 7000rpm rev limiter on the standard Euro 3 ignition. So I hadn’t expected to release the full power of the kit yet, but I had definitely expected some sort of gain. This was a conundrum.
What next: carb – ignition – inlet – exhaust!
For next month I had originally planned to fit some aftermarket shock absorbers, wheel rims and tyre upgrades to help with ride and handling as well as an SIP speedo to eliminate the clearly inaccurate readings of the standard Piaggio item. But the huge annoyance of fitting a performance crank and achieving no gains has now got the bit between my teeth!
So I need to work through remaining restrictions in order to deduce and clarify what is holding the power back before we go any further! So my first port of call next month is the plug and play Zeus CDI from Readspeed, as this item eliminates the shabby performance and rpm restrictions of the Chinese monstrosity Piaggio have installed in favour of the original item. Once that is tested with pre/post dyno results, we will try the BGM exhaust and confirm dyno results on that when compared to the current SIP item. These are both easy and quick tests.

Following that we will look at the 26mm Spaco carb option, which again we can confirm dyno results of, to find out if the bigger carb benefits performance on un-ported casings. Finally, and I can’t promise this will be done next month, but at some point we need to strip the engine again, and port the casings to both a) match the cylinder kit and b) increase the inlet timing to circa 180°. Once I’ve satisfied myself as to what is holding the crank performance increase back, we can then get back on track with the other upgrades. Stay tuned.
Words & Photographs: Dan Clare