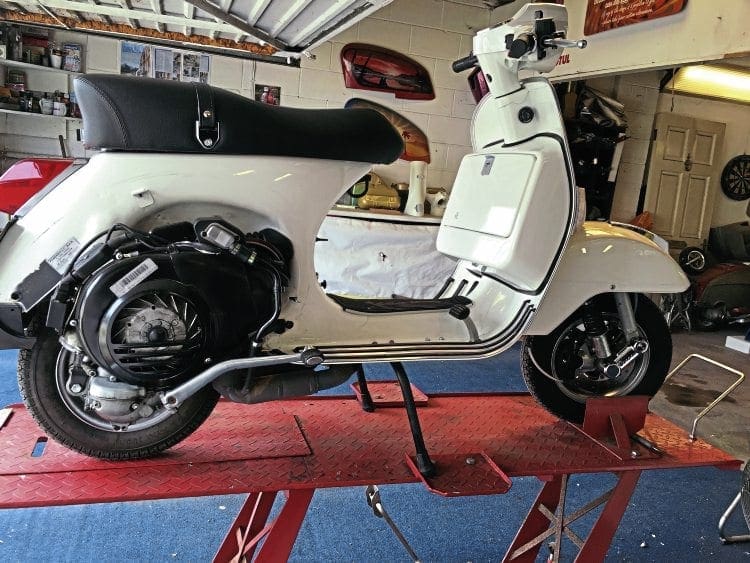
As outlined last month, we have a full complement of tuning and upgrades coming for all sorts of Vespa machines, and we started the journey with a SIP Road 2.0 pipe upgrade for the PX125 as our first item. With the results in from that, we now move on to a simple two-stage tuning modification which can give another welcome power boost.
A quick recap
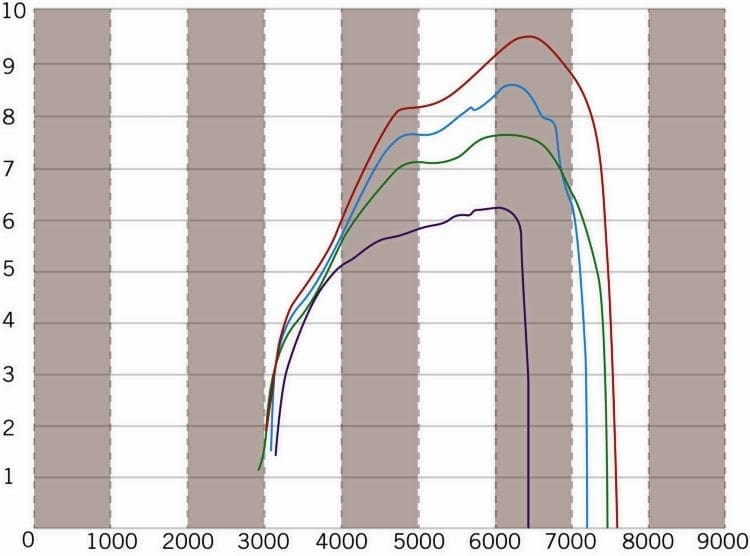
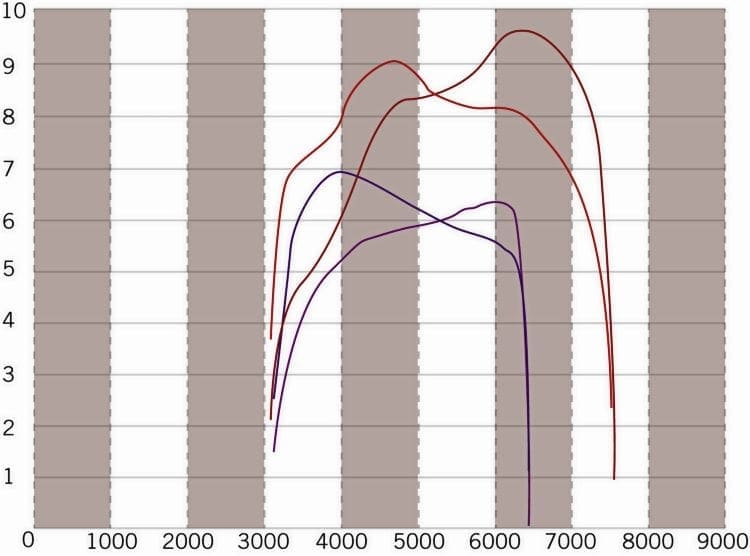
Last month we established a baseline figure of 6.3bhp for a 2015 PX125 fitted with cat exhaust. The power peaked at 6000rpm and offered no over-rev. Thus it took around 29 seconds to accelerate from a standing start up to 50mph on the flat. The standard machine would wheeze out 45mph uphill, 50mph on the flat and only 52mph downhill. After fitting a SIP Road 2.0 pipe, we gained 1.5bhp, nearly 1000rpm of over rev, dropped nine seconds off the 0-50mph, and although uphill and on the flat speeds only changed by 2mph, the top speed downhill gained 5mph due to over-rev now being available.
Enjoy more Scootering Magazine reading every month.
Click here to subscribe & save.
What’s next?
Okay, not everyone wants to (or can afford to) fit cylinder kits and other exotic items… so before I go skipping joyously through the playing fields of Nikasil kits and long stroke cranks, let’s take another look at what could be done with the standard 125cc unit.
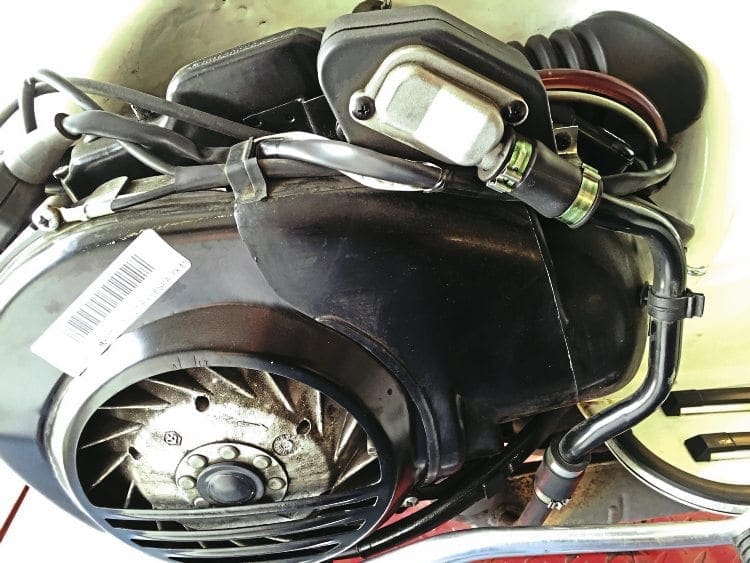
Step 1: Good head
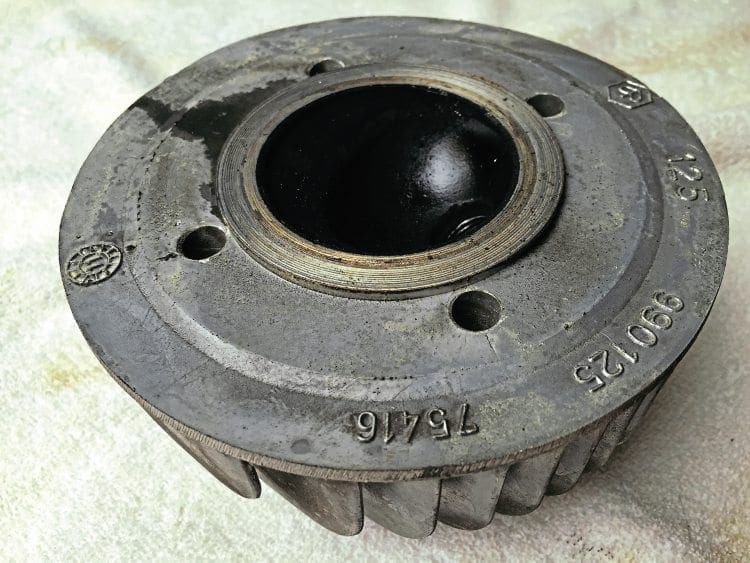
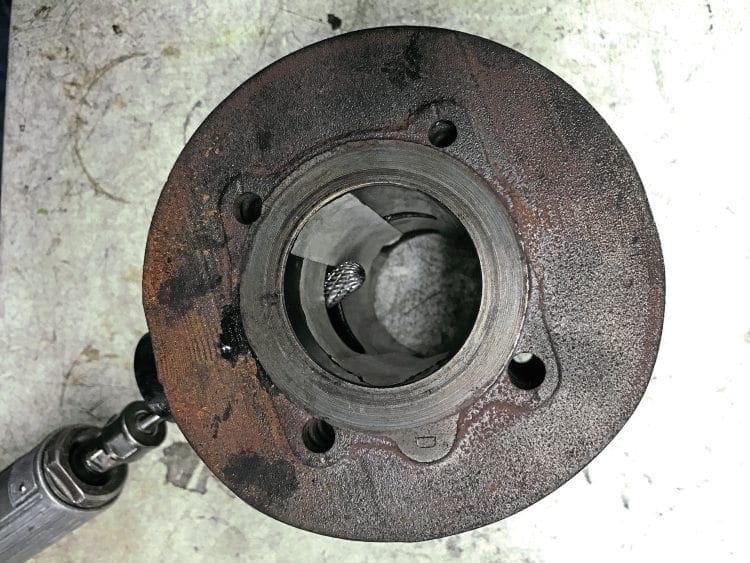
Measure the squish (gap between cylinder head and piston crown when piston is at top of its stroke) on a new PX125, chances are it will be huge; our model came in at around 2.6mm. A better squish measurement which works well is 2% of stroke, which would be 1.14mm on this scooter, so the factory figure is miles out and actually won’t be very efficient at all. Looking at the cylinder head on a PX125 though, you will see that it has an inner recess of around 2.6mm which is roughly the same size as the huge squish. Then, looking beneath the cylinder, the standard base gasket is a metal item at 0.2mm thick, so with these items in mind, here is the solution; post the cylinder to the local machine shop or scooter dealer (we used Chiselspeed) and ask them to ‘zero deck’ the head, thus removing the 2.6mm recess. Remove the four cylinder studs, pop the cylinder off and remove the old 0.2mm metal gasket (do not discard it yet though, you’ll need it later).
While we waited for the head to come back from the shop, we ordered a 1.5mm base gasket from SIP. It’s actually 1.55mm when measured, but will compress to 1.5 when fitted. Using the old gasket we traced out the line for the transfer ports and used a craft knife to cut these out, the gasket then matched the casing properly. Once the head came back we simply popped it all back together, now discarding the old base gasket. Upon refitting everything we now had a squish of 1.3mm and the cylinder ports were all sitting 1.3mm higher than before, which helped increase their relatively low timings.

Port measurements
The standard machine had port timings of 112° of transfer and 153° of exhaust and 20.5° of blowdown (the duration of exhaust before transfers open). A CONSERVATIVE figure for a low-power/mass-produced/off-the shelf touring machine might be 122° transfer, 168° exhaust and 23° blowdown. So again, the standard factory figures were way out. However, by fitting the 1.5mm packer (instead of the 0.2mm item) we now have 119° transfer, 158° exhaust and 19.5° blowdown. So although this has slightly reduced the blowdown timing, both the exhaust and transfer are raised in one simple manoeuvre.
And the results
For the cost of having the cylinder head machined and fitting a base packer we have gained 1bhp, going from 7.8bhp up to 8.8bhp. Given that on my dyno a factory PX200 puts out around 9bhp we are not doing too badly with the little PX125. On the road the extra 1bhp is just detectable, the engine seems happier to rev, the 0-50mph time has dropped another second on average (to 19 seconds), and the top speed on the flat and downhill has gained another 1mph (going from 52mph to 53mph on the flat and from 57mph to 58mph downhill.) It’s all small incremental gains, but they are cheap and easy modifications, the results of which can actually be detected on the road.

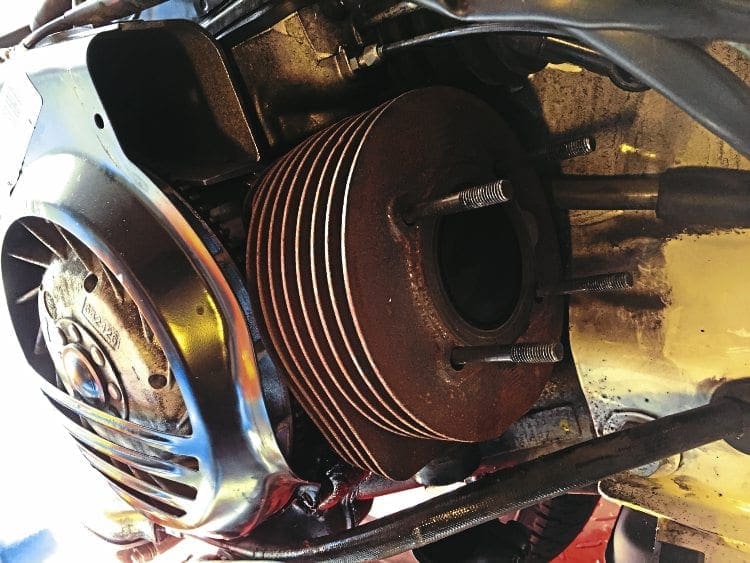
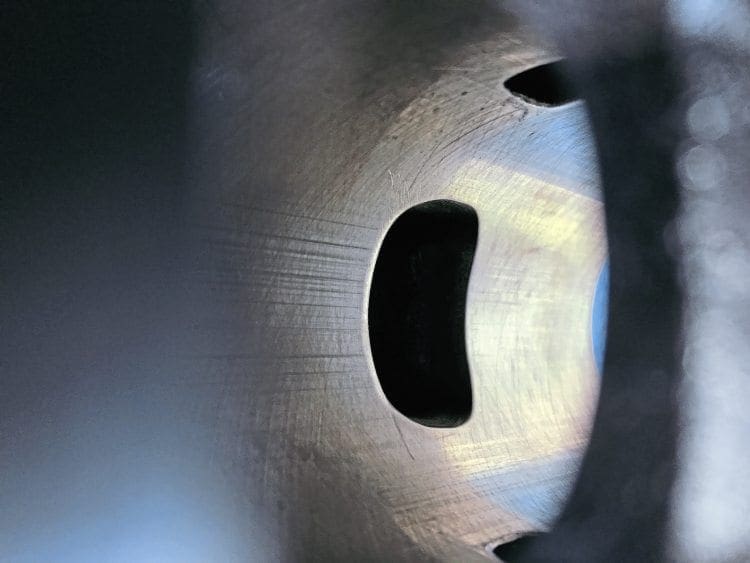
Step 2: Use Grinder
No not the ‘social’ app… a porting tool. The second you mention porting some people seem to phase out, as if it’s an art or skill beyond them. Well let me tell you, there are lots of situations surrounding tuning/porting where in-depth skill and knowledge matter; this isn’t one of them. Quite simply you can widen, and raise, the whole PX125 exhaust port by 1mm with a £10 long-shaft tungsten carbide burr. The burr will fit in a home hand drill, or an expensive grinding/porting tool alike.
I wouldn’t advise a home-tuner to get involved in tuning expensive Nikasil-lined kits, one chip of the liner or one slip of the porting tool and it can spell disaster. But these cast iron Vespa kits are cheap, and tough! Plus there’s no Nikasil liner to chip. Simply use some masking tape to mark out the rough 1mm boundary that you don’t want to go past at the top and sides of the port, and then gently ream the port out until you have added 1mm all the way round (not the bottom of the port). After that, just get a round hand file, and hand-chamfer the edge of the port, and then finish by hand with some fine grade wet n’ dry. Job done. Once the cylinder is off and in hand for the head/ gasket procedure, the porting job only takes an extra 20 minutes all in… go on, try it… you know you want to.
More results
Guess what, you’ve now added another 1bhp, taking you from 8.8 up to 9.8, the 0-50mph has dropped to 18 seconds, the scooter will sit at 54/55mph on the flat all day long, and once up to that speed… it holds it far more comfortably when you hit a headwind or slight incline. The motor is now 55% more powerful than standard and just has the edge over a standard PX200 on the dyno… plus, the downhill ‘over-rev’ speed just hit 60mph. Not bad.
More port timings
The packer and cylinder head mod saw us go from 112° transfer, 153° exhaust and 20.5° blowdown, to 119° transfer, 158° exhaust and 19.5° blowdown. This latest porting mod leaves the transfers where they are (which is fine on this 125cc) and ups the exhaust figure to 163°, thus raising blowdown to 22°. Everything is going in the right direction.
More home tuning?
At this stage I considered how far I could take the standard cast iron kit and other components. But it was looking a bit unrealistic in terms of cost vs time vs benefit. Quite simply, I always look for bang for buck when I’m tuning, and the simple changes highlighted in parts 1&2 of this feature offer that. I considered sending the cylinder away for a rebore and to be fitted with a GranSport piston to increase the cylinder to 177cc. But once you realise a Malossi 166 kit can be bought for around £170, then the cost of GranSport piston, plus rebore, machining to head, postage each way etc, starts to look like a close call. I also didn’t want to bog this down in technical detail. So with that in mind, next time we’ll compare the BGM exhaust to the SIP exhaust, and then bolt on the BGM 177 kit and see what that can bring to the party. Plus, now we’re faster, perhaps it’s time we started looking at tyres, brakes and handling? The SIP shockers look like a good place to start. That’s all for now, stay tuned.
JETTING
Last month I skimmed over the jetting, and ended up receiving a few questions on the matter, so here’s a hit more in-depth info: This is a 2015 catalysed PX125, due to the cat exhaust and other Euro 3 emission friendly restrictions it runs this jetting as standard: Si 20/20 carb with 140 air corrector — BE5 atomiser — 96 main, and a 45/145 pilot. When fitting the SIP Road 2.0 exhaust, I changed the air corrector to a 120 and the pilot jet to a 50/100. All else remained the same. This did give ever so slightly rich readings, especially lower down the rev-range, but that’s how I like to run things… nice n’ safe. The net result is, that it’s lovely and rich when cruising at full revs, and still nice and safe when you throttle off. Plus, if/when the additional running modifications in this article are carried out, still no further jetting changes were required! The air/fuel reading reads perfect, and the throttle can be held wide open, at peak rpm for miles. Back-up plug chops show a nice dark plug. For the paranoid and eternal doubters, feel free to fit a 98 main.
Words & Photographs: Dan Clare
Thanks to SIP Scootershop and BGM -Scooter Centre for their support on this article.