Customizing a Lambretta is nothing new; ever since production began owners have altered them one way or another. The 1980s saw the big explosion in customization which still continues strongly to this day. The problem though is coming up with something new or different the like of which hasn’t been seen or done before…
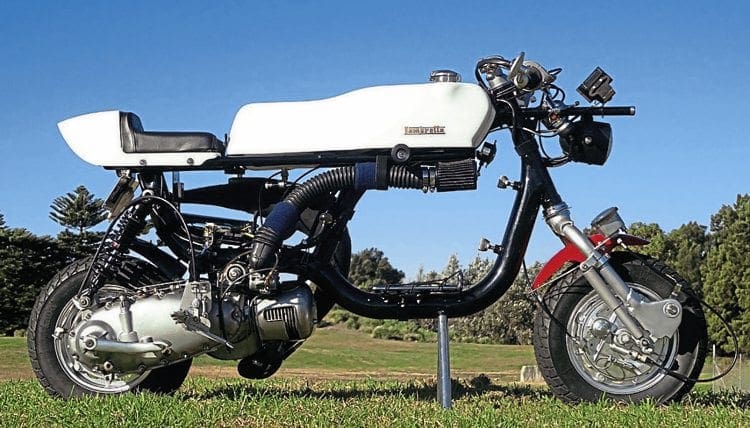
With its long flowing bodywork the Lambretta is a painter’s dream. Over the years some stunning art work has adorned many Lambretta chassis. While its aluminium engine and wheels have seen subject to chrome and finely detailed engraving. So it comes as a bit of a surprise when a Lambretta that is totally unique and different surfaces and has none of these attributes, in fact quite the opposite. The paintwork is quite plain, chrome and engraving are nonexistent and modern day electronics are missing. What it does have though is some very clever engineering and the ability to take an old design and interpret it successfully.
Enjoy more Scootering Magazine reading every month.
Click here to subscribe & save.
25 years in the making
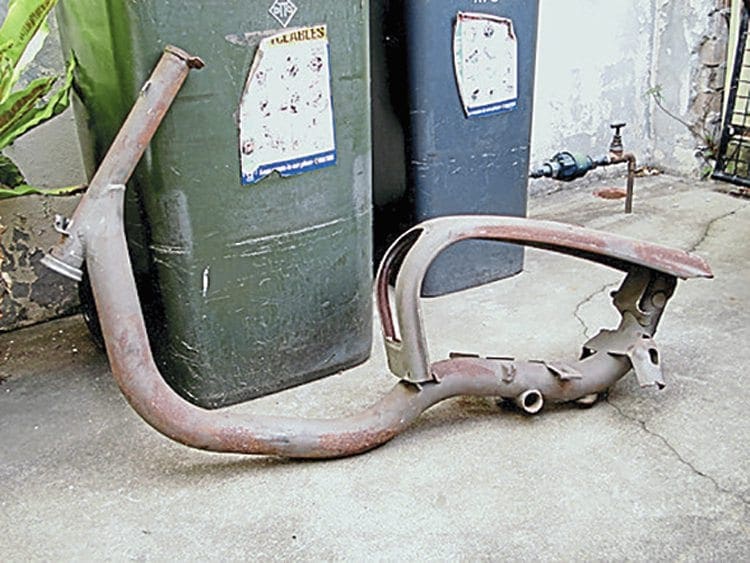
James Pennington was born in England but immigrated to Sydney, Australia, some 30 years ago, taking his love of Lambrettas with him. In the later part of the 1980s James picked up a job lot of Lambretta spares. Among the many items a set of motorcycle ace bars and set of Dave Webster rear set foot pegs. With the purchase of a GP 150 frame, minus the back end that had been cut off, the idea was to build a cut down or Group 6 race replica. Like many of us accumulating parts for a project, sometimes that enthusiasm can wear off. With other restorations on the go James put this one on the back burner for a while — 23 years to be exact.
After several garage clear outs the frame and spares were on the brink of being sold. It was at this point that James finally decided to proceed with the project.
Change of mind
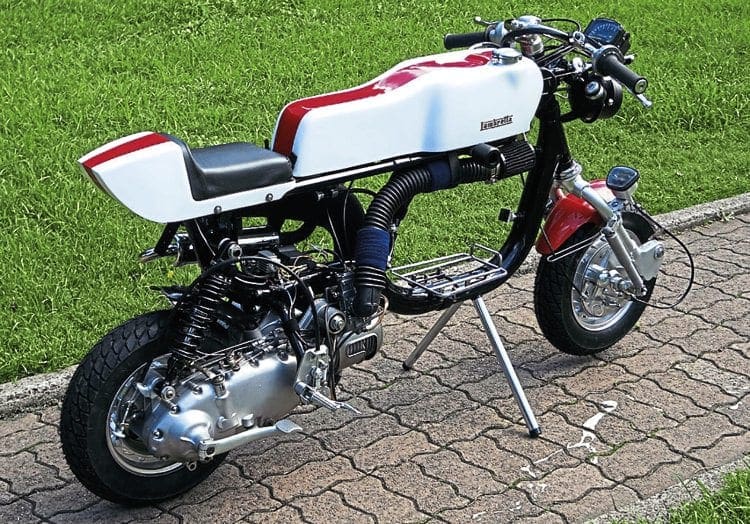
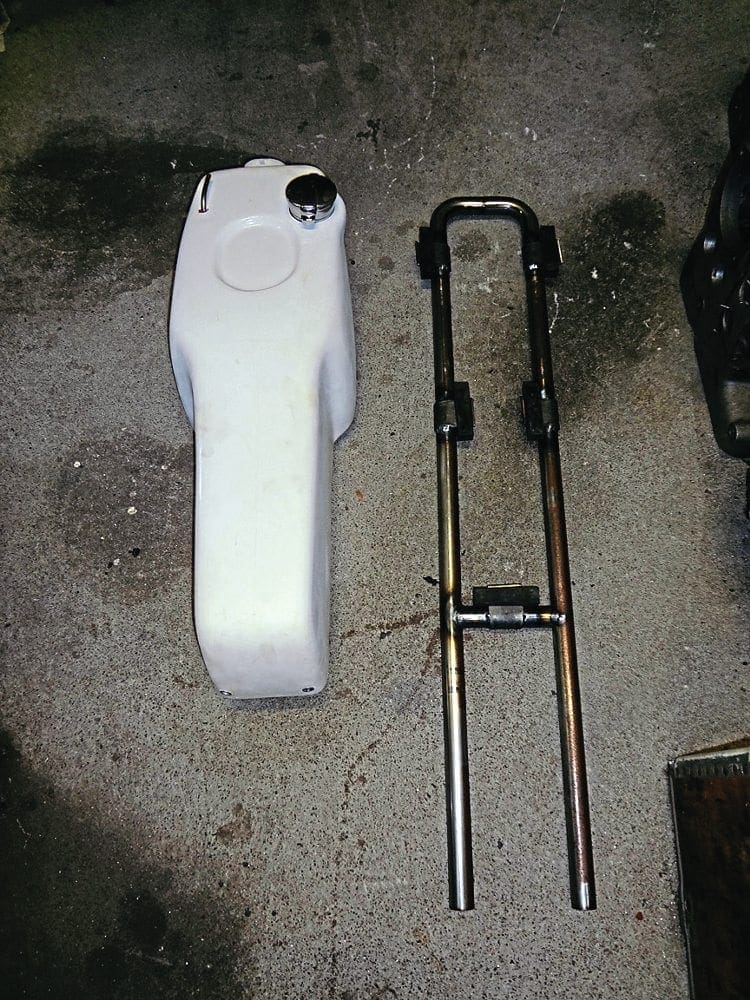
The idea of the cut down soon evaporated after seeing an article about the Milan-Taranto Li 125 that had been featured in a previous edition of Scootering. This Lambretta used a long-range tank that was mounted to the frame similar to that of a motorcycle. By adding a small seat unit this would form the basis of the project. Though it would require a subframe to be mounted, James still wanted it to be recognisable as a Lambretta. Scouring the Internet for a suitable donor tank and seat didn’t take long with the Yamaha TA 125 offering the best option. A design from the early 1970s, the long sleek tank and narrow seat fairing would be a compatible fit.
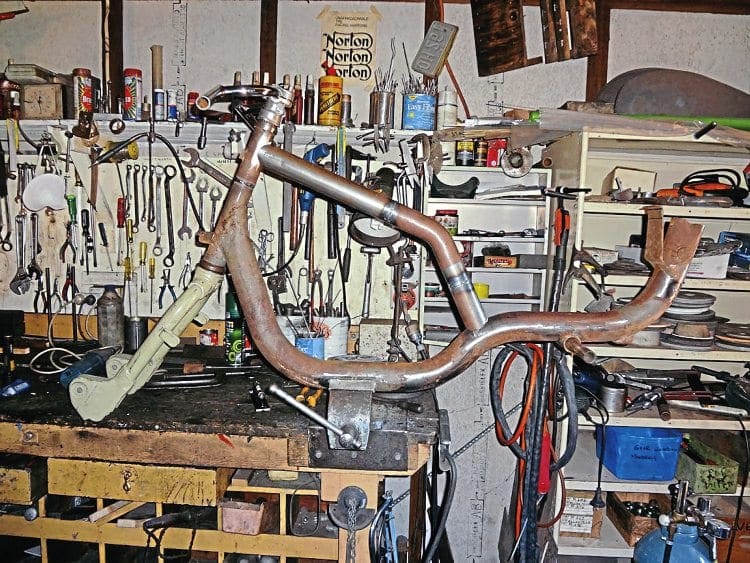
Frame and geometry
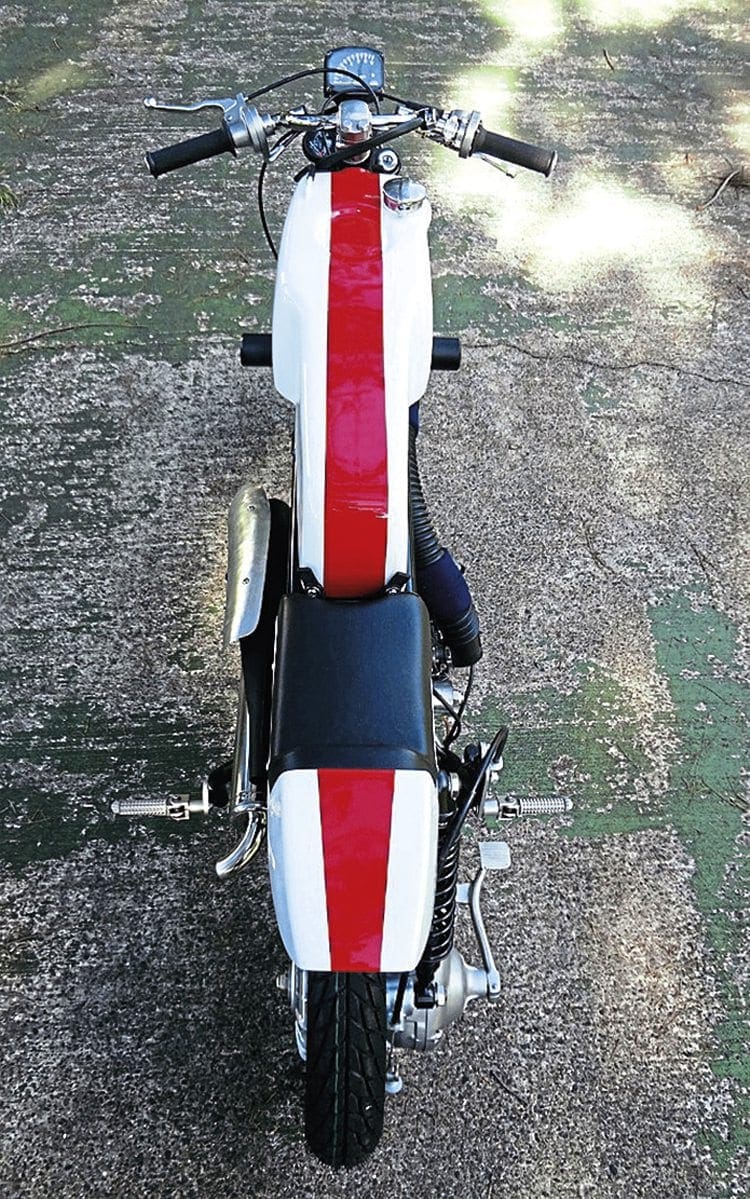
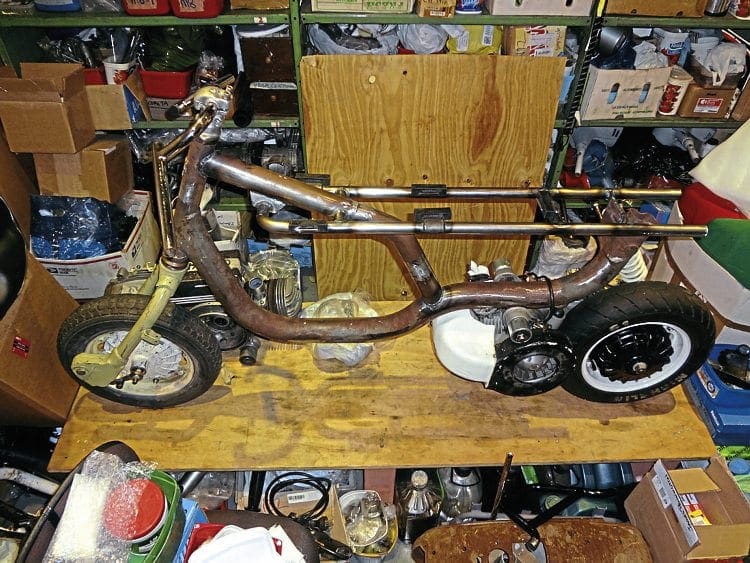
Now there was a base to work around, fabrication of the sub frame could begin. With the seat frame sitting lower, the fork stem would need to be shortened to give a balanced ridding position, with approximately 4in of the column being removed. With the ace bars in position this could now determine exactly the correct height the subframe needed to be. Using the triangulation theory for strength a tube similar in diameter to that of the main frame was welded between fork stem and frame where the tool box normally sits. The tank and seat mounting could now be welded to this at one end and the other where the original top shell was mounted. Once fully welded in to position this gave in effect a double triangulation making the chassis extremely strong.
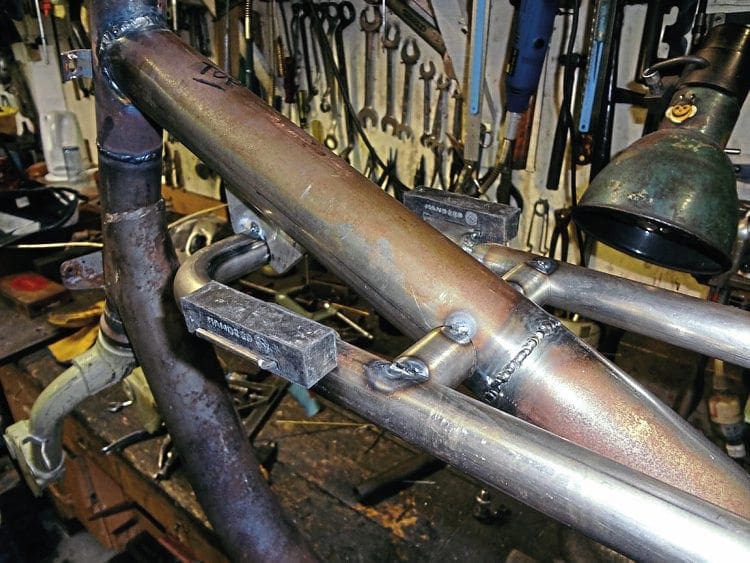
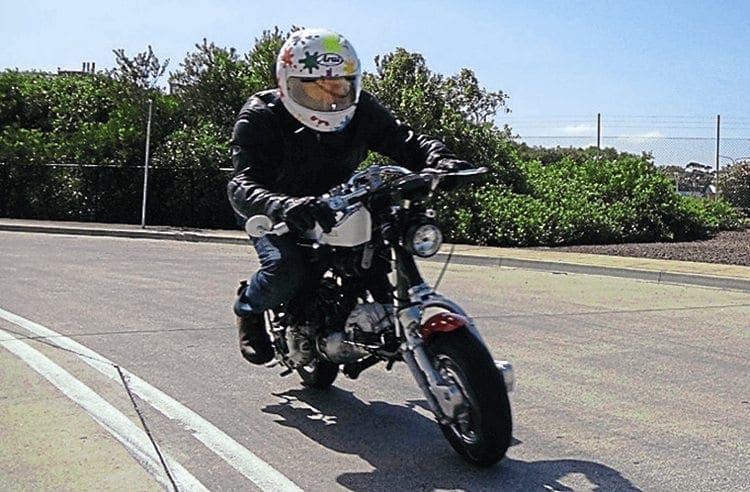
With a dummy engine, wheels, seat and tank fitted it was now possible to see if all James calculations were correct. With the ace bars connected to forks via an LD handlebar clamp the correct angle and height was easily adjusted. Though the bars were too wide this was easily solved by sawing several inches off either side to make them narrower. Happy with the riding position, a few final tweaks were made before moving on to the foot pegs. Some temporary ones were fitted to get the correct position. Once this was sorted a pair from a Yamaha R1 were modified to finish it all off. This did create another problem with the routing of the rear brake cable. The position of the brake pedal meant its orthodox route was no longer usable. A cable stop bracket was welded to the shock absorber mounting to allow the cable to go up and over instead.
An engine to suit
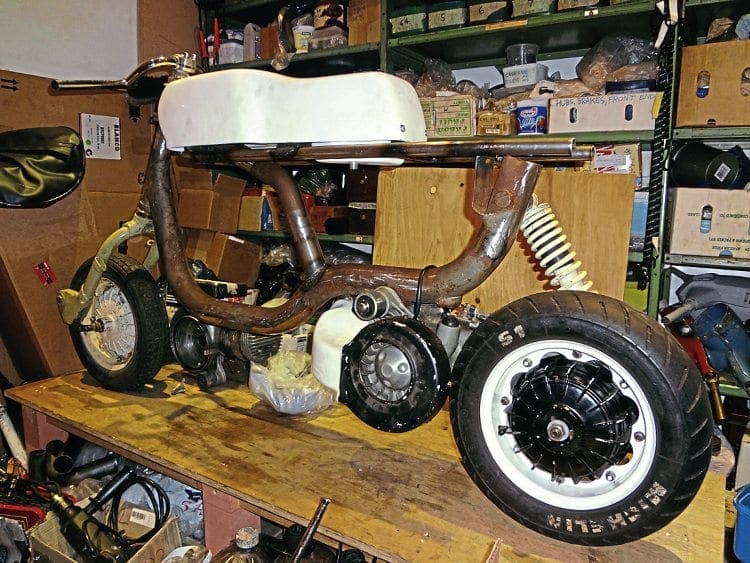
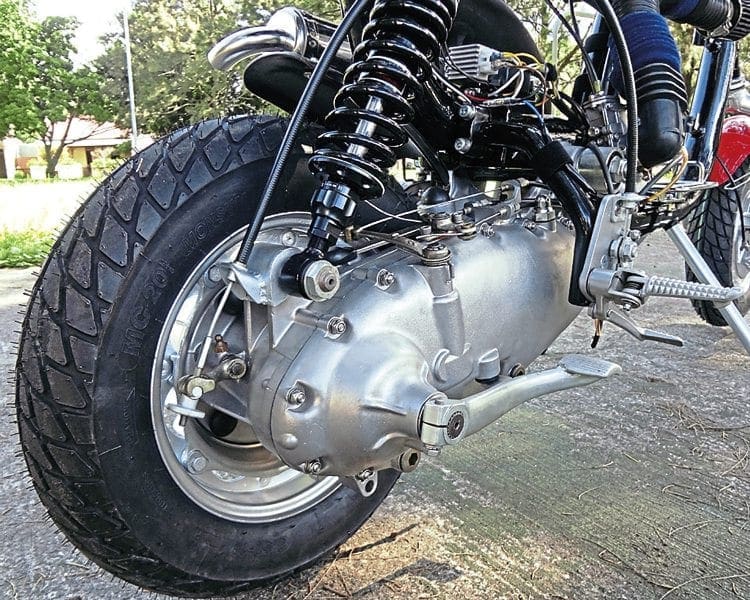
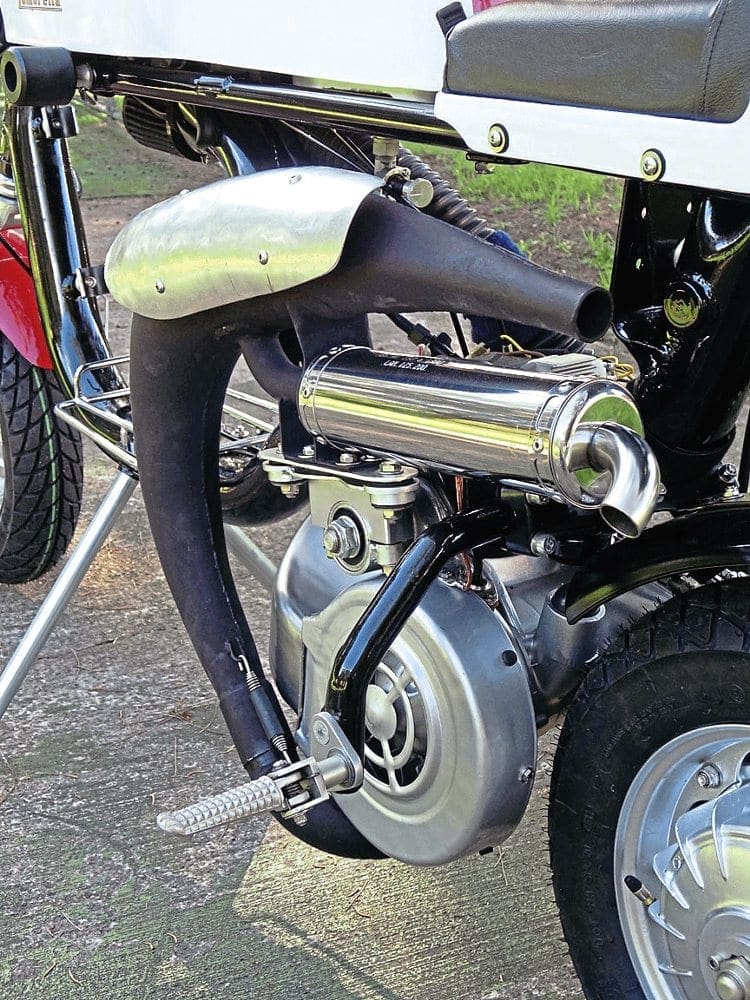
While a tuned engine was a must it didn’t necessarily need to be to over the top. With the overall weight of the machine greatly reduced, acceleration and top speed would be dramatically improved. Based around a 200cc TS1 cylinder (number 312) fitted with a Yamaha piston and con rod for reliability. The carburettor is a Mikuni TM28 which has a K&N air filter. The filter sits just underneath the petrol tank and connects to the carburettor mouth via a hose to supply pressurised air.
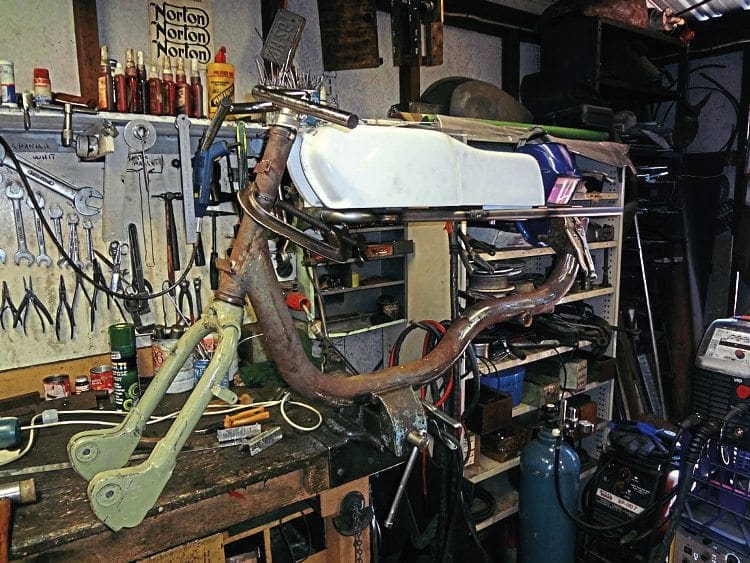
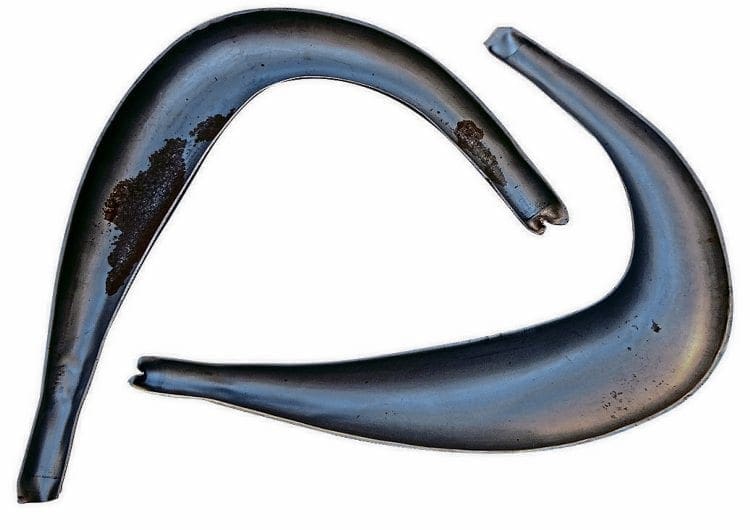
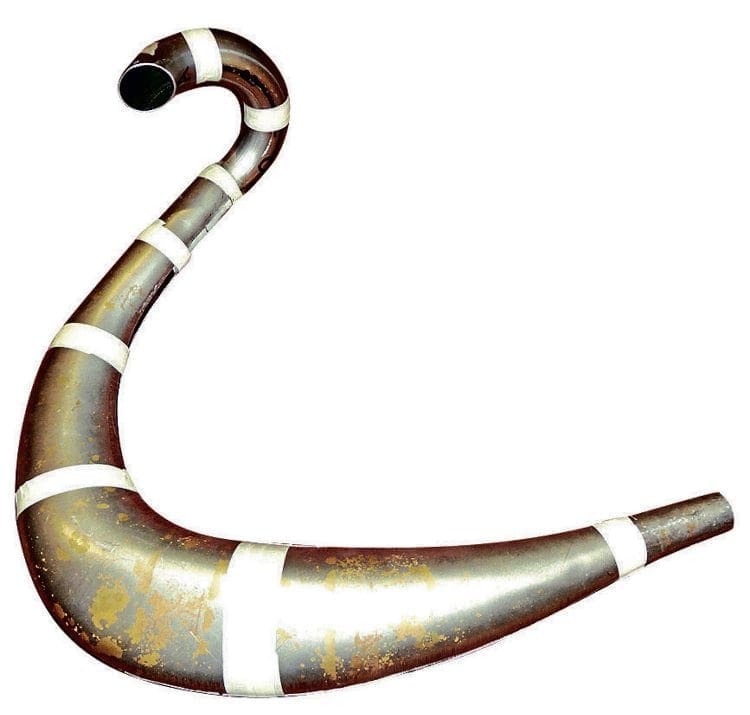
The complicated part came with the exhaust design because a standard one would not fit due to the position of the foot pegs and rear set brake. The only option was to design an up and over expansion similar to that of a Group 6 bike. Purchasing a set of MB Devtour expansion pressings, James set about making a pipe that would fit. The most bizarre arrangement on the exhaust was the exit of the tail pipe.
Normally this would be situated at the end of the tapered cone but due to it being suspended high up there was a worry this could snap off. James’ answer was to sit the tail pipe directly under the main body of the expansion area with the stinger pipe connected centrally. The original outlet from the cone is now sealed off completely. After much research James found out this design has only a small effect on performance while at the same time making it much quieter.
Controls
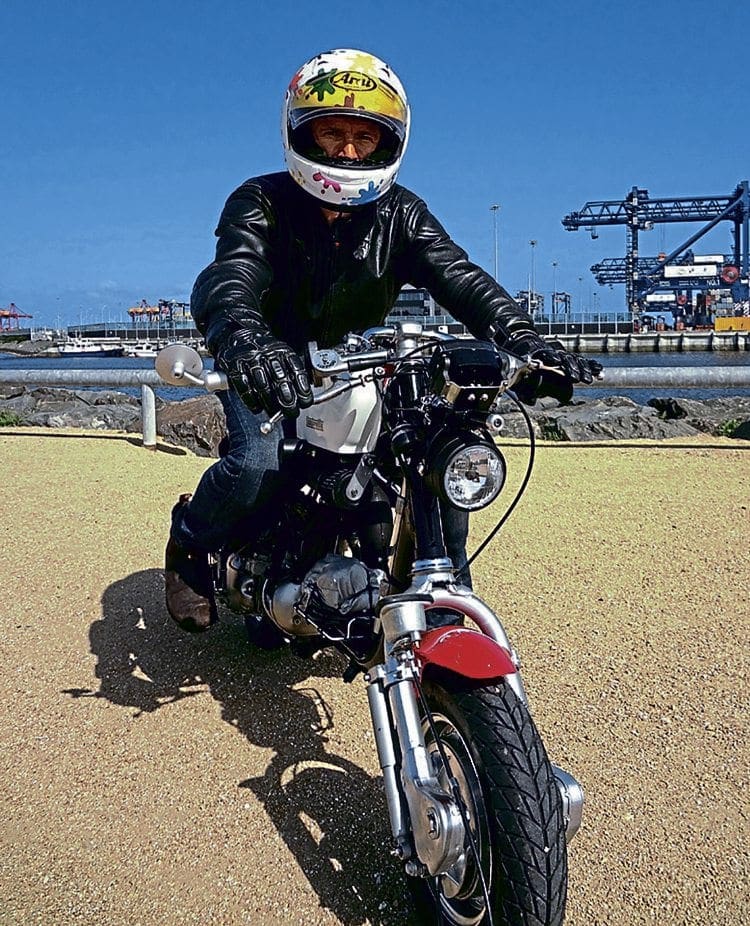
Any radically designed vehicle is likely to need its control mechanisms reconfiguring and the Lambretta is no exception. The ace bars use an MB custom gear changer and Doherty quick action throttle (remember them from the 1980s?). The speedometer is now fitted to the fork leg. Whether this is legal or not who knows but one can’t imagine it is easy to read while riding. However there is a Krober rev counter situated centrally on top of the fork stem. As long as James has worked out his gearing correctly he will be able to calculate his speed from that.
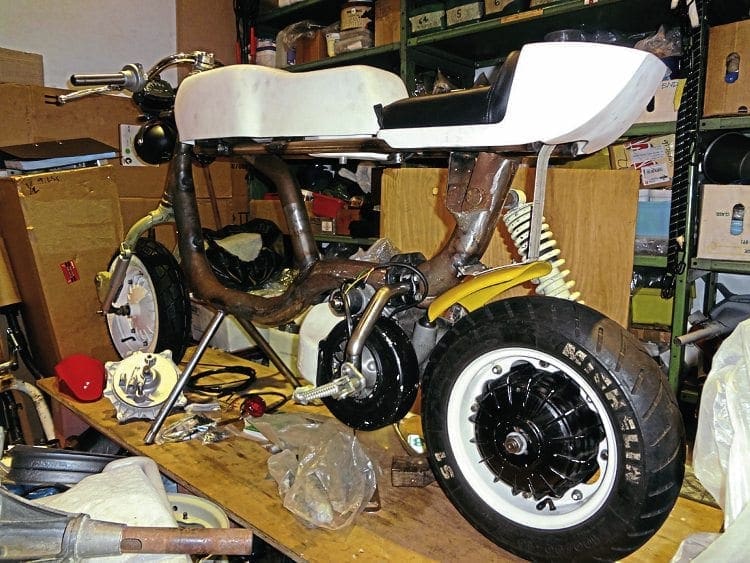
As with any type of cut down scooter the lights can always be a problem in respect of looking ugly and out of place. James’ answer to this was to fit a legal headlamp that was a similar colour to the frame and hide it below the rev counter. The result is impressive to say the least, while the headlamp does its job it fades in to the frame looking totally unobtrusive. The rear light was a more simple procedure and sits nicely underneath the rear seat frame. With the horn and ignition placed just below the rev counter the electrics not only look neat but clutter free. The custom built wiring loom in its black sleeve subtlety disappears into the main frame.
With everything in place there was still one problem — that of the kick start pedal. Due to the position of the rear set brake this meant it was way too long and would foul the brake pedal. James decided to shorten the kick start enough to clear it. There were doubts this would work as it was nearly halved in length. However there is still enough leverage to turn the engine over with ease.
Finishing touch
A traditional front cable-operated disc brake was the chosen option for stopping power. While most modern day Lambrettas use a hydraulic disc brake it would look out of place on this type of machine. While the cable-operated disc brake does not have the best stopping power due to the reduction in weight it copes admirably.
Looking for a suitable front mudguard became a nightmare as they can look rather flimsy at the best of times. Having scoured the internet for a suitable option, James finally found the answer by using one off a Monkey bike. It’s not too wide in diameter but is strong enough to do the job. The rear mudguard was a hugger from a Suzuki off-road bike which sits nicely just above the rear wheel.
With the main frame tube painted black it was natural to paint the forks hubs and rims in silver. The main tank and seat frame are white with a red sports stripe across the middle and offset the machine beautifully, similar to that of the Yamaha TA 125 which the tank and seat frame are based around.
Does it work
Since completion James has covered a total of 600 miles on the Lambretta. With its lower of centre of gravity and more compact riding position handling is greatly improved. However the seat is not the most comfortable design and after a stint of 50 miles or so it’s enough, defiantly not a touring machine. With the overall weight coming in at 82kg acceleration and braking are greatly improved over that of a standard Lambretta, even with a modest 20bhp.
As for the design, well that’s another story. What James has created is something unique, not in the sense that it hasn’t been done before, after all the idea came from a vintage Yamaha. But in the sense that it hasn’t been done to a Lambretta before. When taking an idea and interpreting on to something else the end result doesn’t always work, but in this case it does. Well thought out, well-engineered and well executed.
Words: Stu Owen
Photographs: James Pennington
This article was taken from the September 2016 edition of Scootering, back issues available here: www.classicmagazines.co.uk/issue/SCO/year/2016