The majority of Lambrettas now have a hydraulic disc brake fitted but fitting the right hose length can sometimes be a real nightmare…
These days there are more and more powerful engines being produced for Lambrettas and stopping power is absolutely essential. The simple answer is to fit a hydraulic front disc brake, but more often than not getting the hose length and fixings right can be a real problem. This can lead to issues when putting the system in, or at a later date if it has to be serviced or removed for painting. A few easy steps can make all of this much easier and make for a much better looking and serviceable hydraulic hose.
DOES LENGTH MATTER?
Before thinking of ordering a hose or having one purposely made, you need to have the correct length. If it is too long it will look stupid and chances are it will rub and fowl somewhere. If it is too short then quite simply it won’t fit and be scrap. The problem is the length can vary for lots of reasons.
Enjoy more Scootering Magazine reading every month.
Click here to subscribe & save.

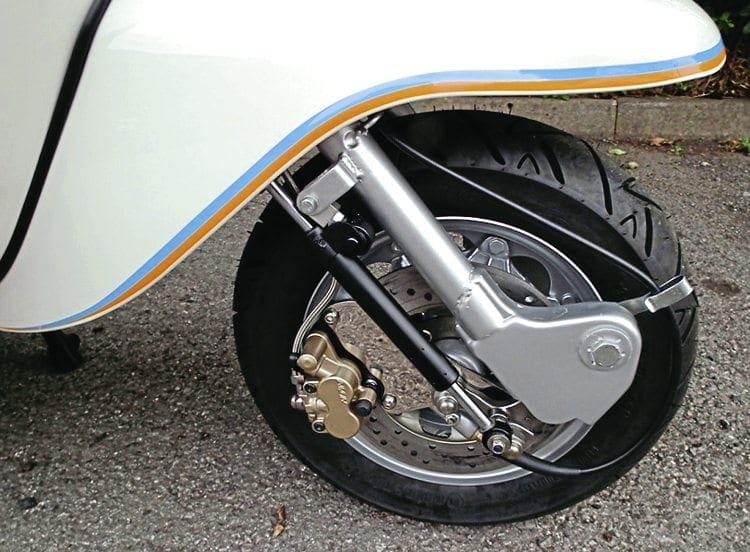
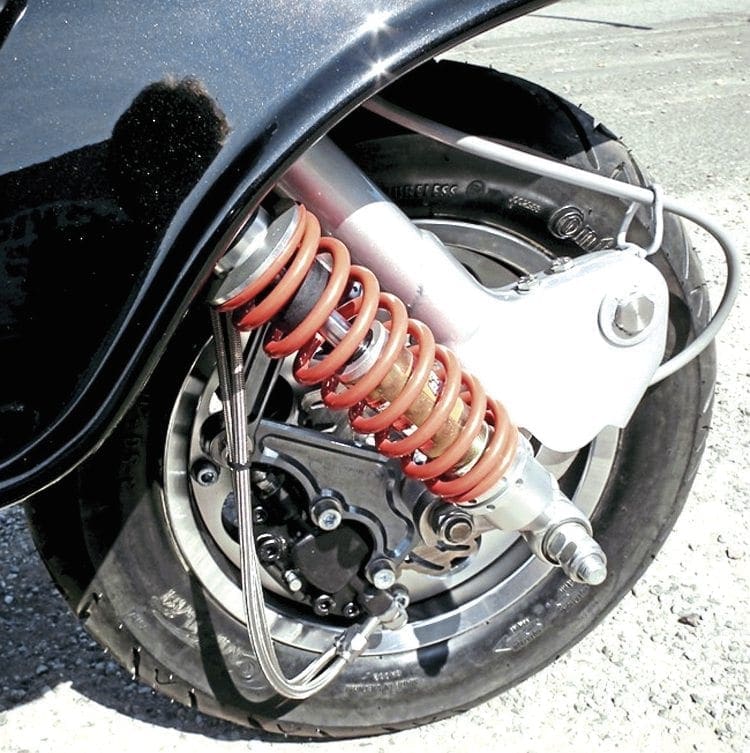
It will be different if fitted to a GP compared to any other series three model due to the shorter fork stem. If fitted to a series one or two, then again this can differ due to where the master cylinder is situated on the handlebars. If it is a custom or cut down machine, again, chances are the length will differ. That is why it is best to custom make the hose to the exact length required. Just as important is the route at the bottom of the forks where the hose goes into the caliper. Traditionally, a cable would go around the forks in the same path as a speedo cable. This can lead to the hose getting dirty and rusty, especially if used during the winter months on treated roads. The best route is to follow the same path as a reverse pull system. The cable will be much shorter, neater and it will be out of the way from the elements.
Before measuring the cable length you must first fit the disc brake with the caliper attached into the forks and the master cylinder into position on the handlebars. Choose your route into the headset, down the forks and then the exit to where it will go to the caliper. When you have done so, take an old cable outer that is long enough and use that to feed through. You should be able to feed it in near enough the exact same position as where the hose will go. When you are happy with the way it’s been routed, cut the ends where the hose fixings will go. Pull the cable out and this will give you the exact length your hose needs to be.
Two things to remember: Firstly, the banjo will add around one inch to both ends of the hose, so allow for that in your final measurement. Secondly, if you route the hose the same way as you would if following the reverse cable system, you can fine-tune the length slightly. The curve from the top of the fork tube to where it enters the caliper can be made more acute or shallow to suit. Remember to get your measurement as exact as possible and try not to rely too much on the curve for adjustment in the length. Make sure the curve is long enough to allow the front wheel to be removed from the links in the event of a wheel change.
CORRECT BANJO
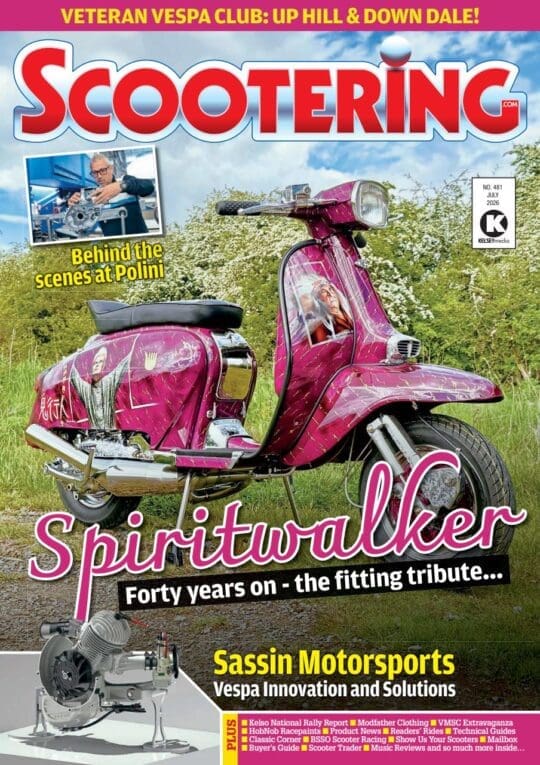
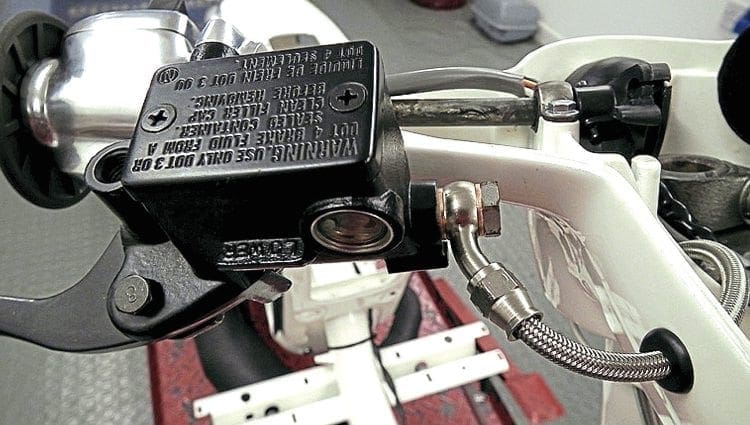
Having got your hose length correct, the next procedure is to select the correct banjo fixings. There are many available and they come in all different shapes and sizes. These vary in the angle of curvature and go from 15° in various increments all the way up to 90°. The angle you require at the headset end will be determined by where the exit is on your master cylinder. Because there are so many master cylinders available, the position will vary greatly, so selecting the correct banjo is important to get the entry in the headset correct.
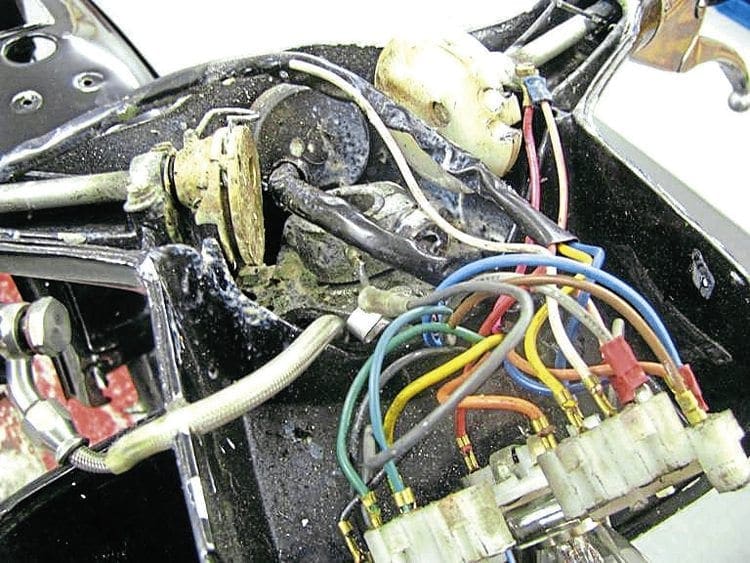
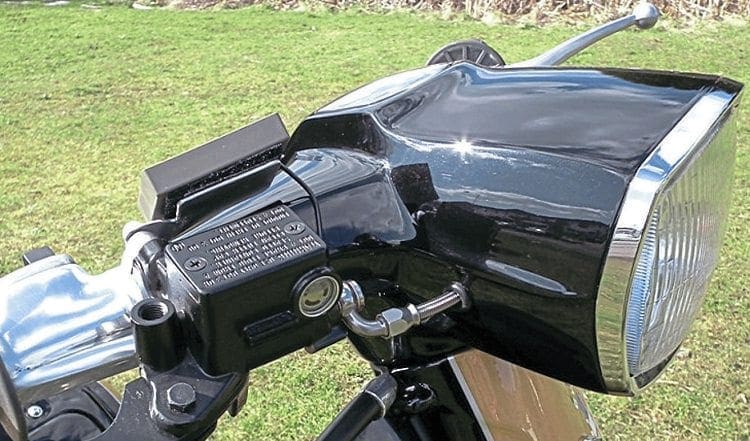
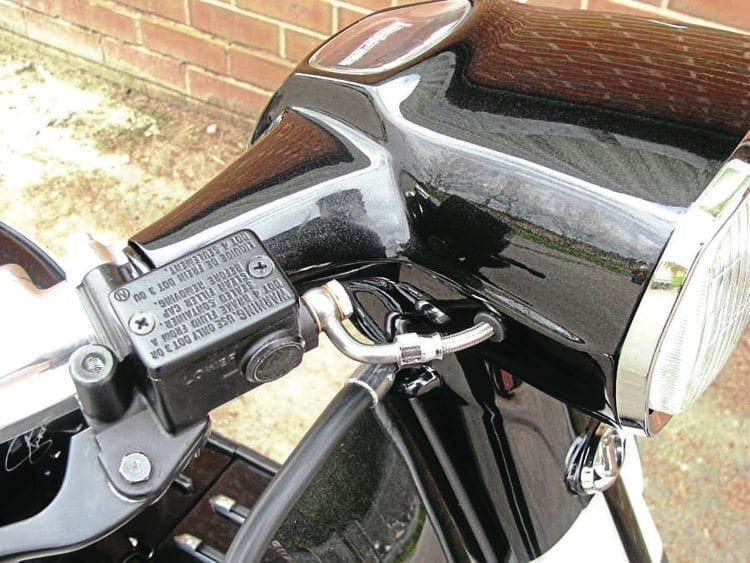
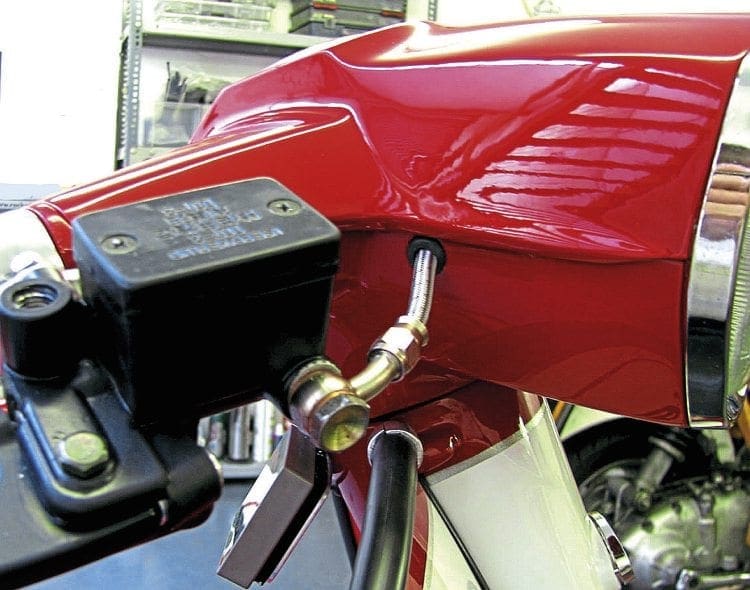
The best place to enter the headset bottom is around the middle of the front square section and around 2cm down from the lip. This area is free from the headlamp and the majority of the wiring loom. It will also give the hose a nice flowing curve as it has to go down the fork stem. If you use the correct angled banjo there will only be a small part of the hose showing and it will look neat. To get the banjo through the hole in the headset will require a 12mm drill. Though the hole will be bigger than the hose itself, a rubber grommet will fit nicely around it to give the correct finished look afterwards.

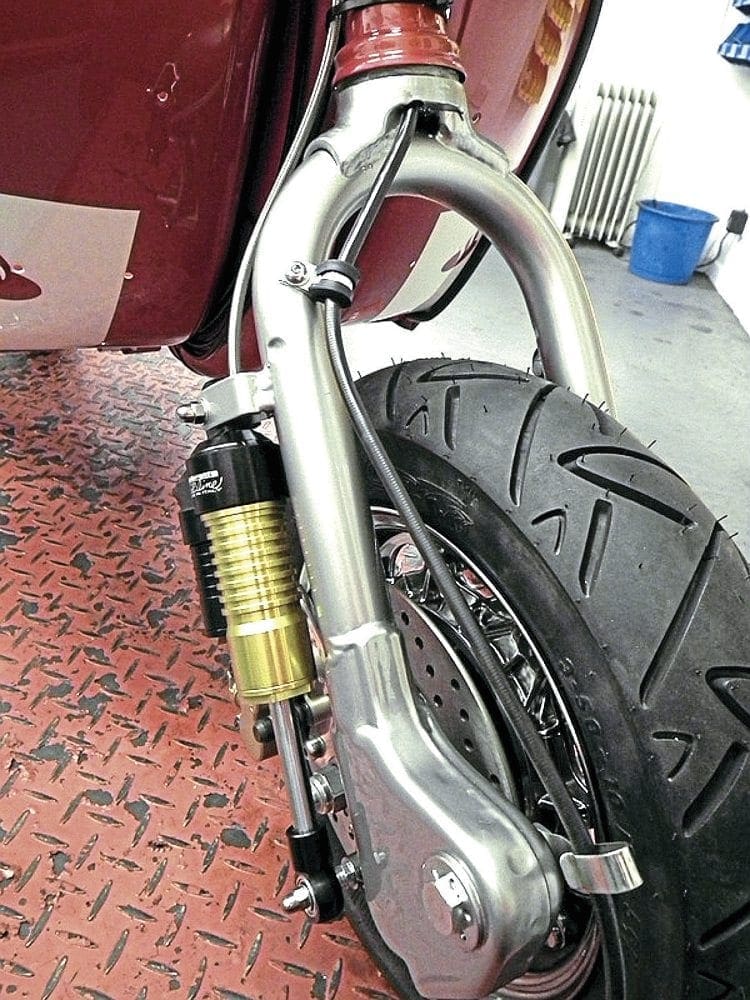
The banjo on the brake caliper itself needs to be straight and will sit perfectly where it bolts up. Occasionally there can be a tendency for the bolt that tightens up on the hose to rub against the caliper. If it does, then chances are it will stop the main banjo bolt from tightening up, causing a fluid leak. If this happens then place two copper washers between the banjo and the caliper to allow enough clearance.
By now you should know the exact length of hose required and which fixings you want on each end of it. Once you do you can get the exact custom-made hose that fits exactly. You can, of course, order the parts and make your own hose, but if you are unsure there are plenty of companies that will make one to your exact dimensions. Venhill actually has a measurement guide on its website that shows how to measure the hose length, including the banjos.
FITTING THE HOSE
Assuming you have the fully made hose, now is the time to fit it. Take care not to scratch any paint and always start from the master cylinder end.
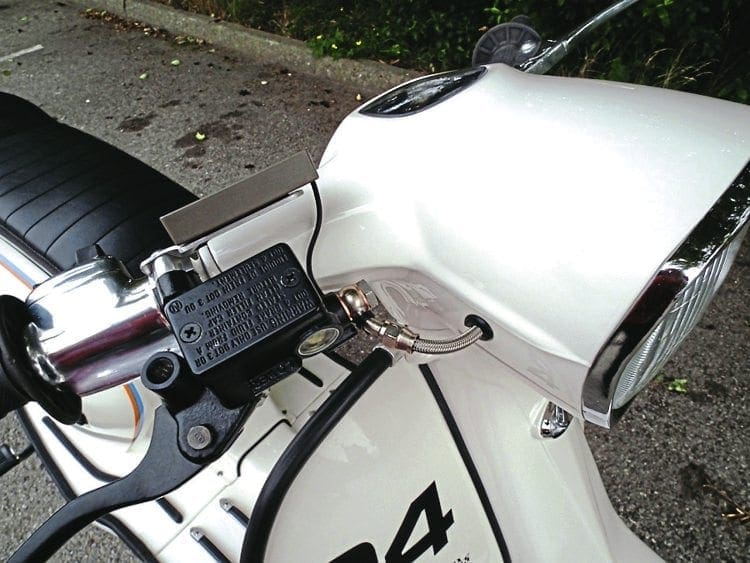
Feed the hose through the hole in the head set and offer the banjo up to the master cylinder. Most importantly, place a copper sealing washer either side of the banjo face before tightening up the banjo bolt. Don’t fully tighten up yet because if you have to reposition the copper washers will need to be replaced, as they should only be tightened once.
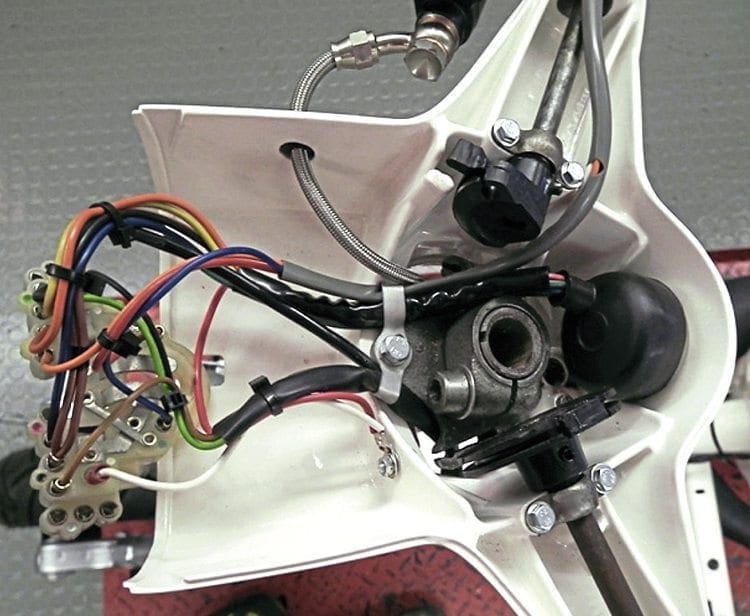
Now the hose can be fed down the right side of the headset and sown the side of the main fork stem. Here it will have to go over the bottom fork bearing protection plate, which has a rather sharp edge. It is possible to remove most of the edge where the hose will pass to prevent the plate from cutting into the hose. The easiest way to do this it to cut flat across one side, which will allow for the movement of the hose. As an added safety measure you can put a rubber sleeve over this area of the hose and secure it with a couple of small cable ties.
As the hose will be taking the same route as a reverse pull cable it will need to be secured. You can use the same type of wire clip a reverse cable uses, but it is possible for the hose outer to rub, so a better method is to use a rubber mounted hose clip that can be fixed on the inside of the top damper bracket bolt. The hose can pass through securely and be free from friction. Now the banjo can be bolted to the master cylinder again, remembering to put a copper washer either side of the banjo and two on the caliper side if extra clearance is needed.
In theory you should now have the complete hose in the correct position. If you are happy that it is, you can fasten both banjo bolts up as tight as possible. Take care when doing so and make sure you hold the banjo in its exact position, as it can move when tightening up. Assuming that everything is secure you can then proceed to fill the master cylinder with fluid and bleed the air out of the system up to full operating pressure. if a banjo is not secure or airtight, now is the time you will find out. If there is a fluid leak from either end then go through everything once again and retighten until the seal is secure.
OVERVIEW
There are a few things to research and remember when getting your hydraulic hose. Make sure you check out on the internet all the possible different angled banjos and bolts that are available. That way you will be able to work out the exact route and length your hose will be need to be made. By looking at them first it will give you options that you may have not have thought were possible.
Only buy the best quality hose and fixings available to make sure the brake works and does so efficiently. Always use a steel braded hose that won’t expand when you use it. Cheaper hoses can expand and won’t apply as much pressure to the pads. Only use a copper washer once unless it is an emergency. Though it is possible to use them again they are compressed when originally tightened so they may leak. This is purely a safety aspect to stop brake failures. Copper washers are only a few pence so always buy more than you need, as one or two are bound to get lost on the garage floor when fitting.
If you’re going on a long journey always keep a few in your tool box just in case of an emergency.
Finally, make sure when ordering the banjo bolts that they are the correct thread size and pitch. There are different sizes and if you are unsure, get them measured correctly. Remember, if you have purchased some sort of exotic master cylinder, it may be a different thread to the one used on the caliper — don’t take it for granted that they are the same. Only use the correct hex head spanner when tightening them up to prevent rounding off, as it will need to be as tight as possible. This is important because at the master cylinder end it is not always possible to have enough room to use a socket fitted to a ratchet. If you are using Allen screw bolt heads make sure the Allen key is in perfect condition. Though you may be able to tighten it up okay, remember that it will need to be undone at some point in time and if it is rounded off will be very difficult to undo.
Last but not least, take your time when measuring the hose length to get it exactly right. If you do, then fitting and securing will be much easier and give you the best result.
Words & Photographs: Stu Owen