Out of sight, out of mind? If it lets go, it’ll wrap around your sprocket and launch itself through your engine casing! Time to look at the transmission chain…
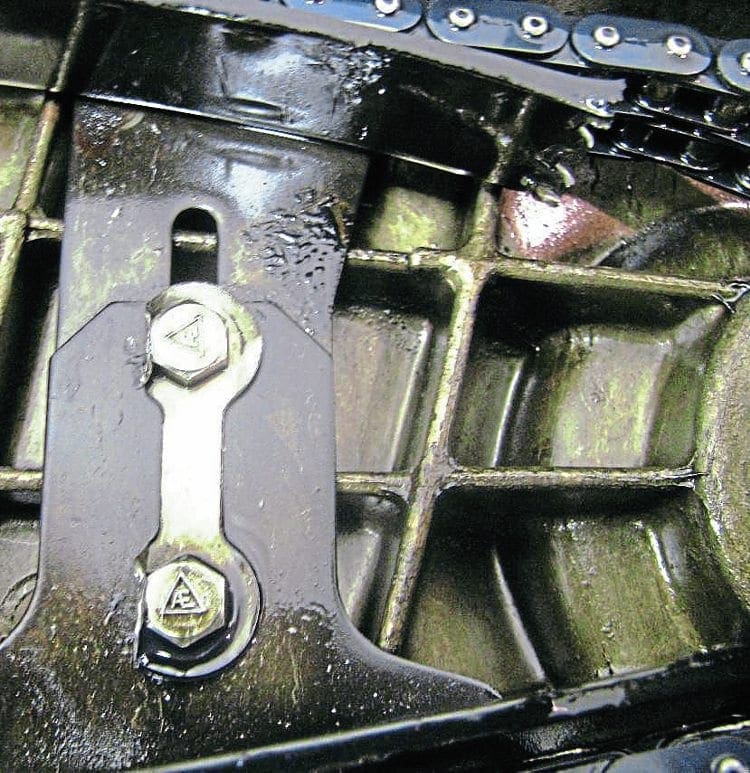
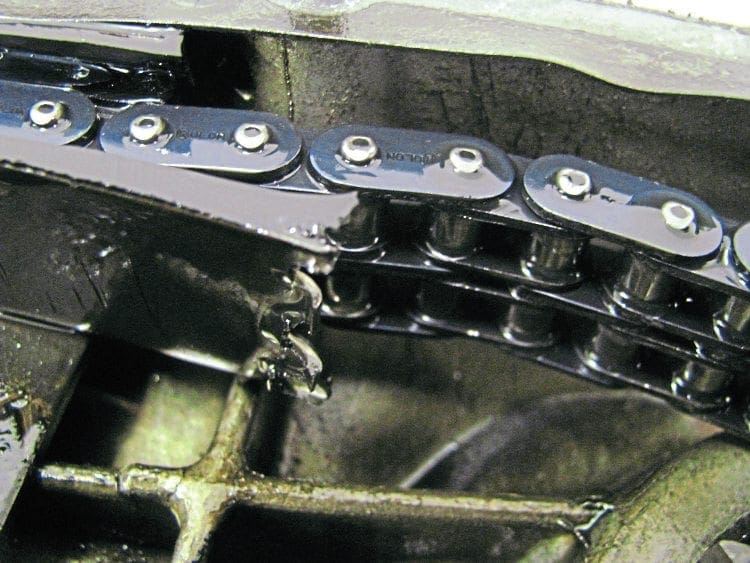
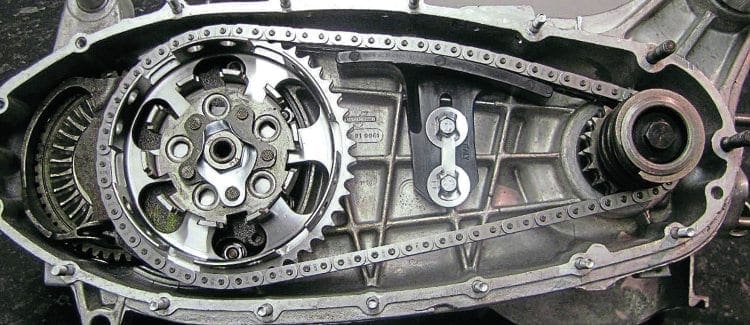
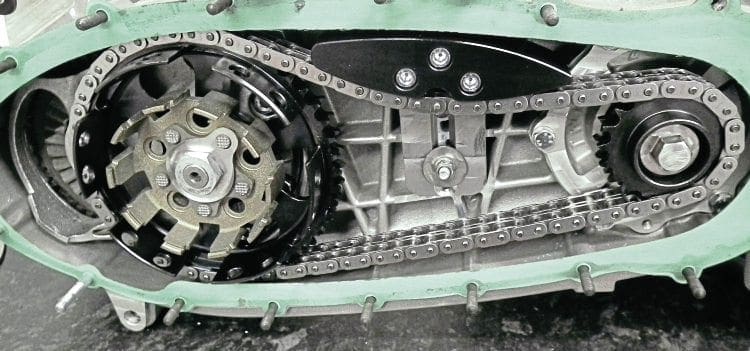
The transmission chain links the front sprocket and cush-drive to the rear crown wheel on a Lambretta engine. Unlike most transmission chains on two-stroke engines which are single, the Lambretta transmission chain is a duplex type. It can give many thousands of trouble free miles if looked after and serviced correctly, but left unattended it will give you problems.
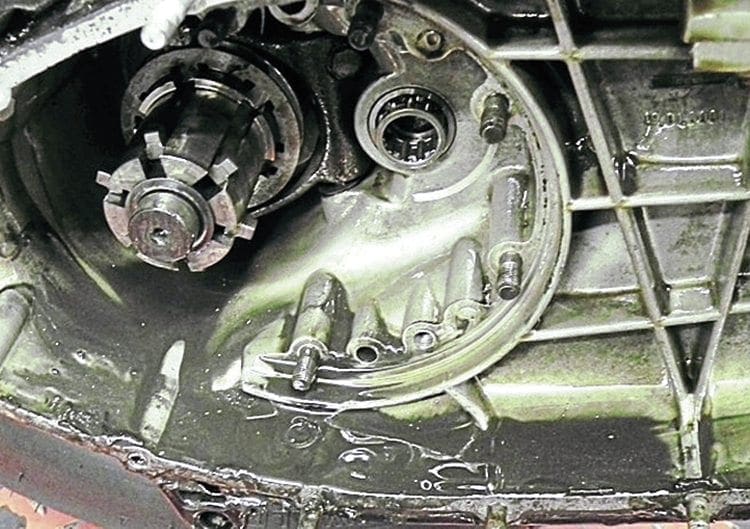
Unlike conventional motorcycles where the chain is exposed, on the Lambretta it is hidden. Unfortunately this is the main reason for the chain not getting regular servicing. The problems are twofold, firstly you cannot see if its running slack, secondly getting to it is time consuming and messy as it runs in oil.
Enjoy more Scootering Magazine reading every month.
Click here to subscribe & save.
So why do you need to check it in the first place? The chain’s job is to transmit the power from the cylinder to the clutch and gearbox. Whether a standard or tuned engine, the chain is constantly under load and over time it stretches, even a new chain will stretch and need readjusting.
So the only real way to check is by draining the oil and removing the side case to inspect thoroughly. When fitting from new it is best to inspect it after 500 miles’ use, as stretching can occur as all the links bed in. After that period it is essential to check after every 1500 miles and more frequently on high-powered engines.
Testing
There are a couple of easy tests you can do if for example you are going on a long journey, without having to removing the side case. Firstly by removing the oil filler plug you will be able to see the top of the chain. You can gently push the top of it with a small electrical screwdriver to check its tension. If the screwdriver pushes a long way down you know it is too slack and needs adjusting. Secondly place a tub under the drain plug and remove it to take a small sample of gear oil. Check the oil for swarf. While there are always tiny amounts, anything excessive will mean there could be a problem. The oil should be clear or still dark green in appearance. If it is starting to go dark grey and rather sludgy this is a definite sign that the chain is slack as it will have rubbed on the bottom of the casing.
The grey-looking appearance is caused by aluminium being scraped off and mixed with the oil. A good tip here is to have a spare drain plug; as you take the one out of the casing replace it with the spare. You can then check the magnet on the plug without losing any more oil. Again any excess amount of filings will tell you there is a problem. Also check there are no roller shells which will always stick to the magnet if they break off. If a roller shell is present the chain will need replacing immediately.
Servicing
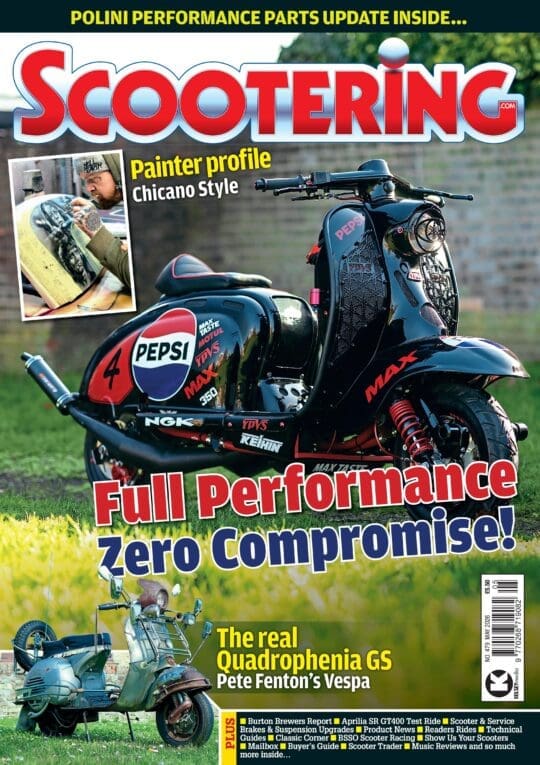
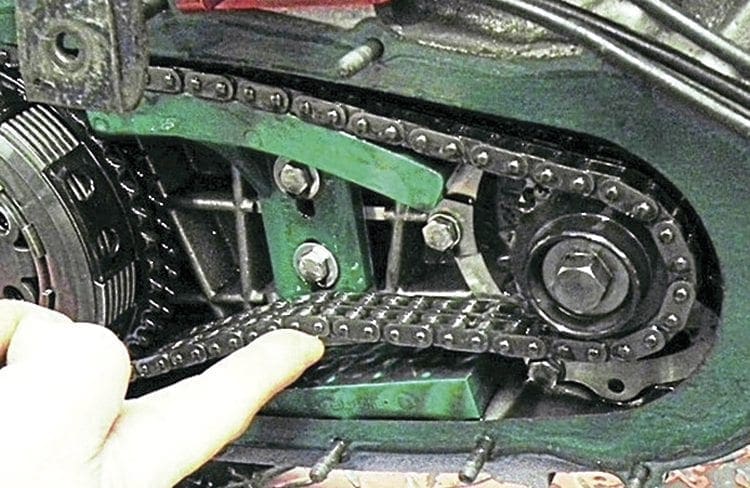
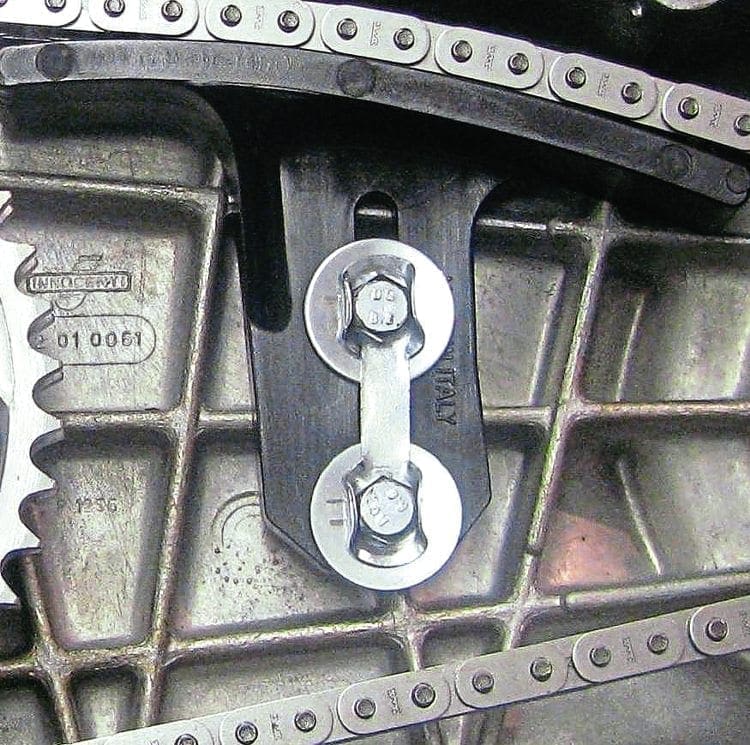
With the side case removed the first thing is to do is give the chain a thorough check. Pushing the chain off the top of the tensioner the gap should be just over 1cm. If it is any more then it will need readjusting. Loosen off the bolts and push the tensioner up to the chain then pinch the bolts back up. While you don’t want to remove all the slack allow for about a 0.5cm gap. While there is a fair amount of travel on the tensioner after several adjustments over time it will have reached as far as it can go. This is telling you the chain needs replacing. Never adjust the tensioner to its full limit as if the chain stretches then it can rub on the top of the casing.
Always check the tensioner running surface for groves or scores. Once this starts to happen and certainly if large tracks appear then it is time to replace. If running standard factory tensioners then use both top and bottom ones. If using the more heavy duty aftermarket type tensioner only the top one is needed.
If the chain is to be replaced after fitting always turn the crown wheel to make sure it is running smoothly which it should. There may be the odd occasion where one of the 7mm gearbox studs has slightly raised due to over-tightening. This can sometimes catch and you would feel this as the chain is turned. If this is the case it will need replacing or the top grinding off it. Once the tensioner is in the correct position tighten it up fully and always remember to bend the tab washers over each bolt. If using a tensioner that uses studs with an M6 nyloc nut always replace the nyloc nut with a new one.
Replacements
Always use a good quality make of chain and don’t buy one because it’s cheap. A cheap chain may look okay but will stretch at a rapid rate once fitted. Split link chains are not advisable but if you do use one make sure the link clip is facing towards you. If fitted the other way round there can be the tendency for the exposed clip to rub on the casing and break off.
Tensioners come in all shapes and sizes so it can be a bit daunting when buying one. Factory ones are fine for standard engines but the much heavier duty nylon ones are best for tuned engines. The current trend is to use the push down tensioner, these have the advantage of allowing various sprocket sizes to be fitted without having to use half link chains. As with all aftermarket tensioners some are good and some are bad. Do your research on the internet first and read reviews of which are the best quality and design. Again don’t buy one because it’s cheap buy the best you can get.
Checklist
Before putting the side case back on remember to check these important procedures:
- Make sure that the tensioner bolts are fully tightened up.
- Make sure the tab washers are fully bent over the bolt heads.
- If using a split link chain make sure the link pin is facing out towards you.
Stu
This article was taken from the June 2016 edition of Scootering, back issues available here: www.classicmagazines.co.uk/issue/SCO/year/2016