When fitting cylinder studs to your crankcase little thought may go into the process, yet there are a number of dangerous pitfalls along the way, which can easily catch out even the most experienced and careful of engine builders.
In the beginning
Let’s start by taking a look at the original stud design, crankcase stud tapping, and cylinder stud-hole combination… the original setup is a good one, it had to be. When an engine manufacturer plans to produce thousands of units around the world, the last thing they want is a product recall at huge cost, especially when low-cost items like stud, nut and washer combinations are to blame. The potential labour charges to repair/replace would be high, and damage to company image/reputation would be severe, so the minor cost of sourcing fully quality controlled fixings with appropriate metallurgy, heat treatment, materials, testing, etc. is minor in comparison.
Enjoy more Scootering Magazine reading every month.
Click here to subscribe & save.
Tell me about it, stud
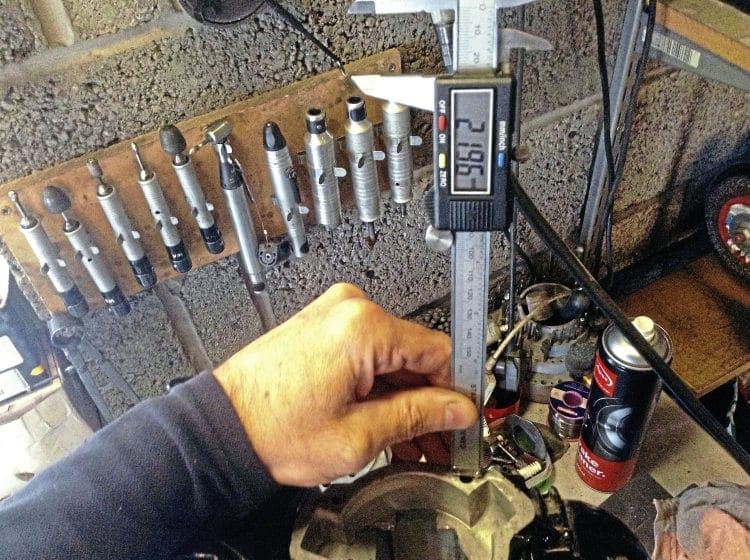
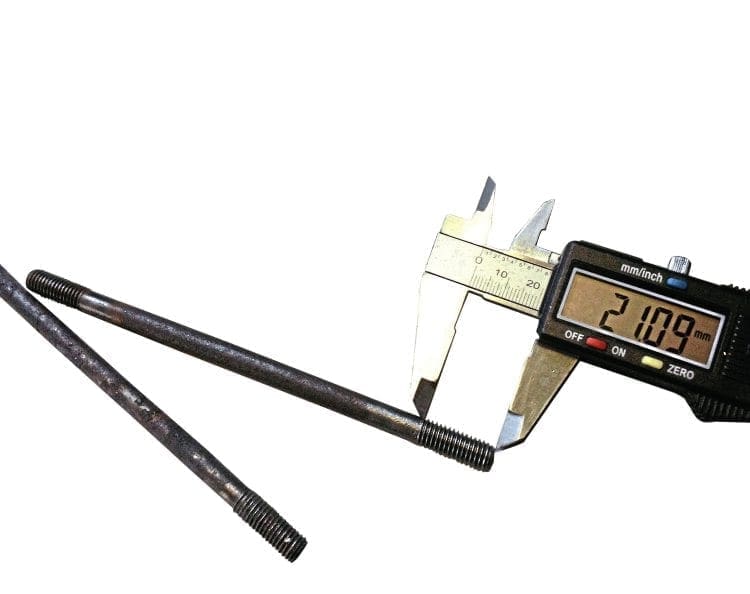
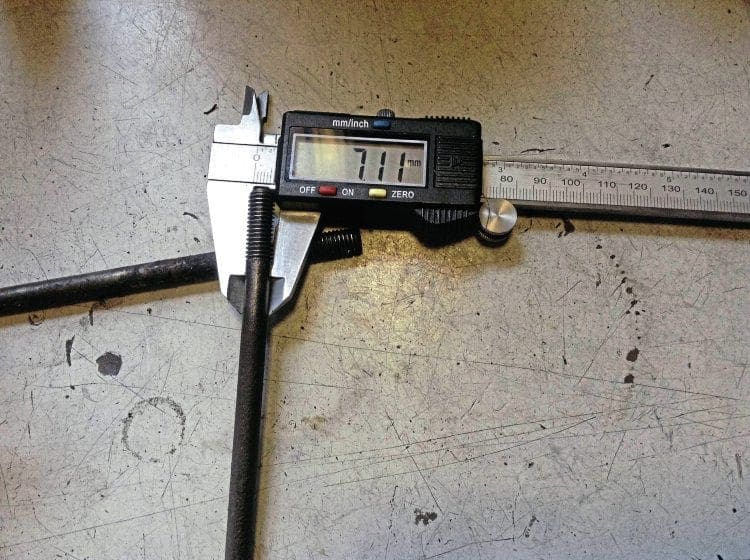
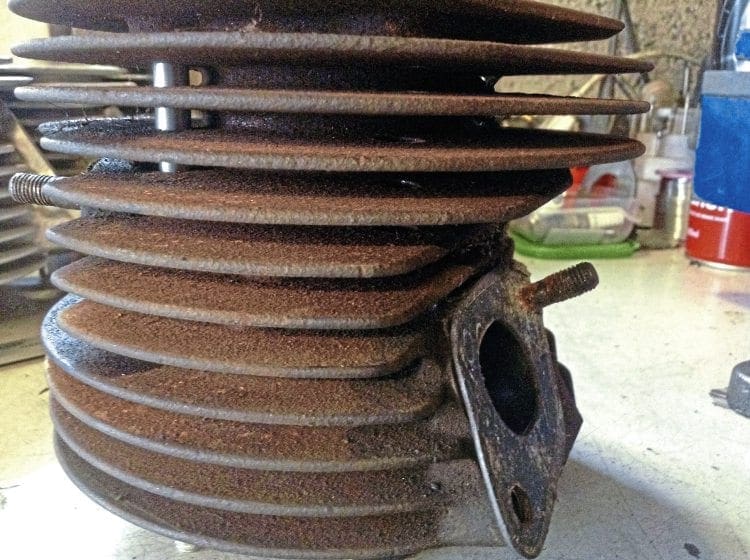
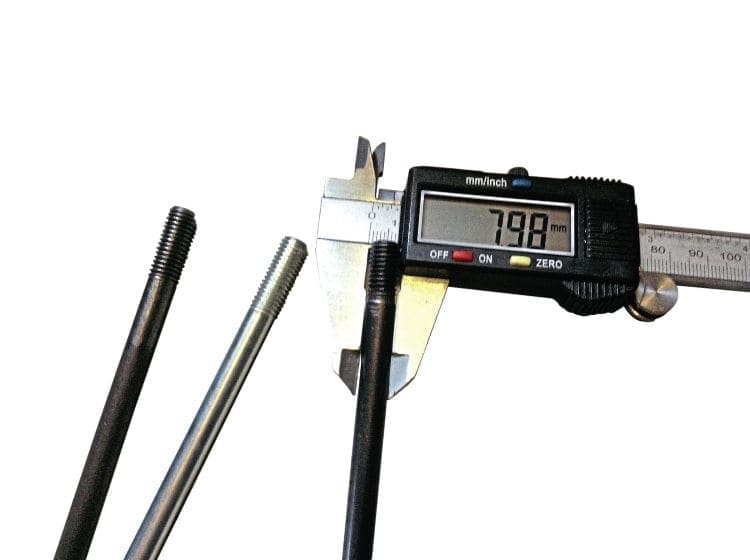
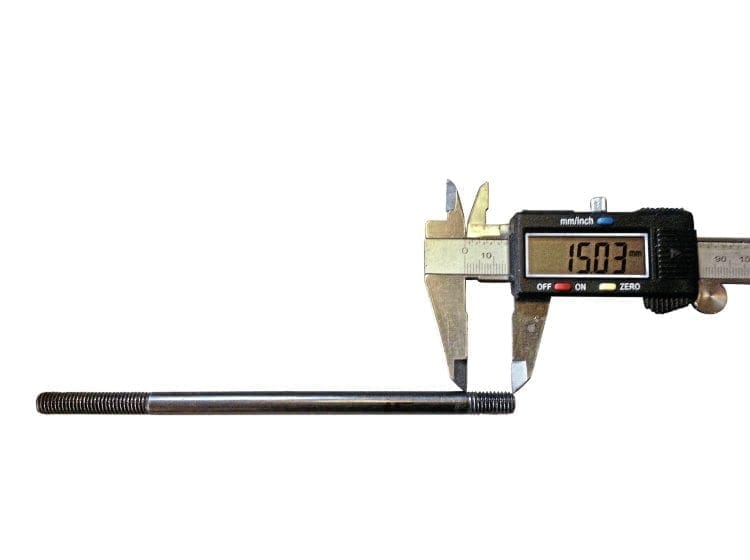
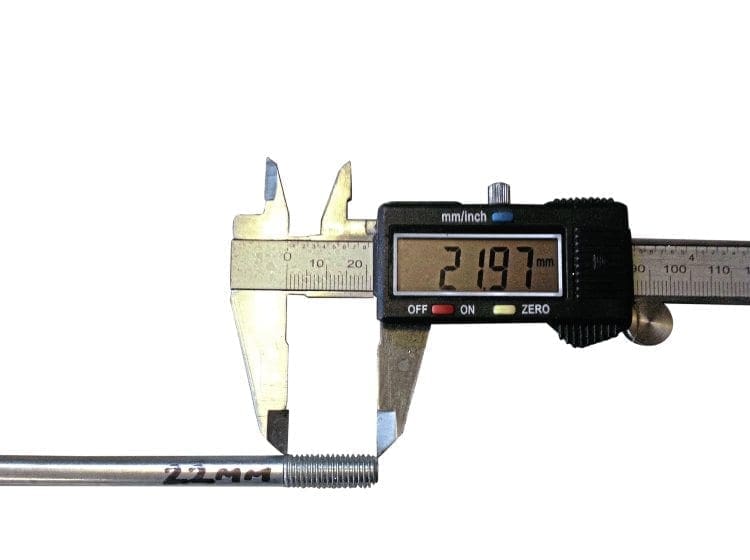
Standard stud dimensions are 8mm thread at each end which are 21mm in length. The central section of the stud is that running parallel to the bore is a slimmer 7.11mm. Original crankcase stud hole/tapping is 21.96mm deep on the ones which I checked +/- 0.5mm, so with the slight taper-end of the cutting tap and the lead-in portion of the stud, it leaves the stud sitting pretty flush with the crankcase. It’s fitting is confirmed with the stud bottoming out to a reassuring dead stop. It cannot be wound in any further, so you can get a meaningful tightening torque figure on it. The reduced centre section means that if the stud were to run through a little deeper it would cause no ill effect to the case.
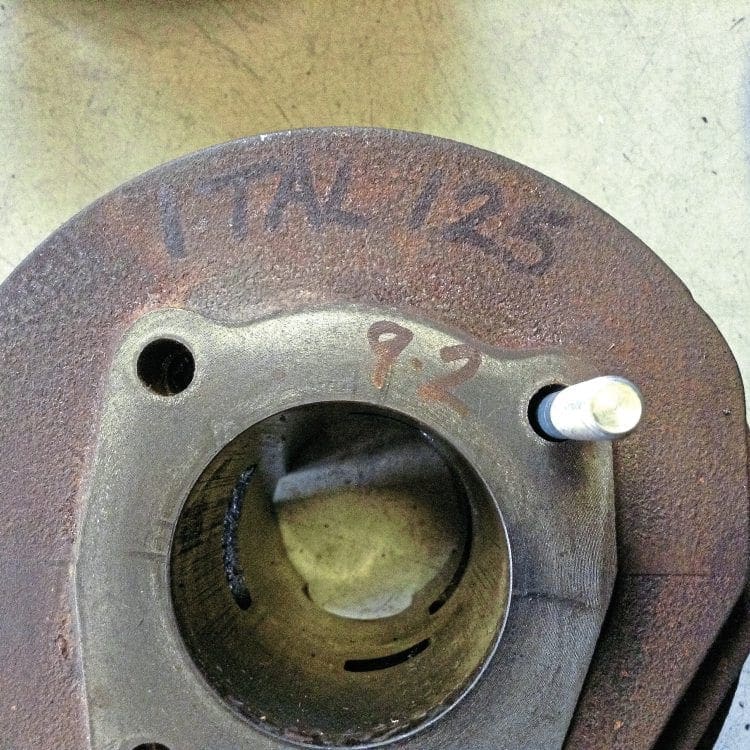
The hole story
The original cylinder stud hole, on the 125cc Italian cast iron cylinders which I measured, was 9.2mm in diameter, the Indian GP 150 showed 9.3mm, and the Indian 175cc cylinder I had available was also 9.2mm. So this results in a 7.11mm stud being used with a 9.2mm hole, giving a total of 2.1mm clearance, or just over a mm all-round the stud, that can be seen as quite sloppy when assembled with no resistance when sliding down the cylinder.
Why is this important?
As part of high mass-production, the tolerances from studs to cylinder holes to crankcase drillings, as a set, will be applied to avoid fitment issues. Over years of production tooling/jigs/castings etc. will inevitably slip a little, to a point that they are too far out of tolerance, and must eventually be replaced. But a more important reason is thermal expansion. As a piston heats up it will expand and grow in its dimensions. This is catered for in the piston’s design/shape as it gets up to working temperature. The bore itself will expand also to maintain a running clearance, which, on cast cylinders and alloy pistons, is at a different rate to that of modern alloy cylinders, but both still require adequate space to expand.
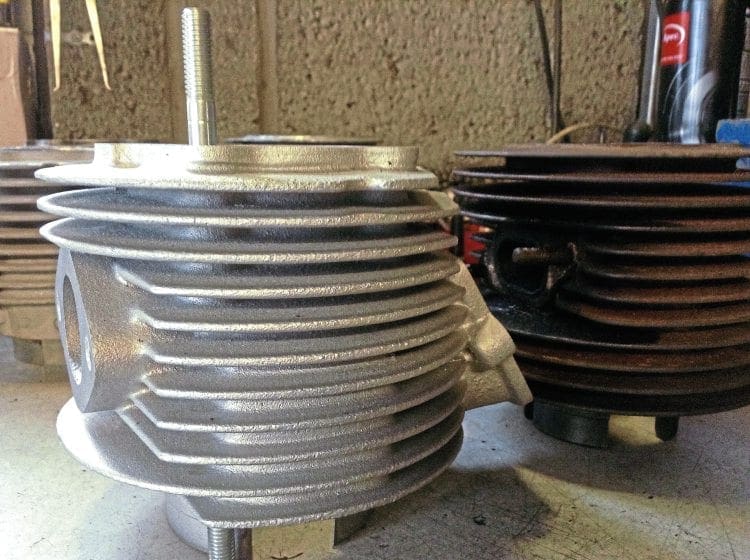
The 1mm clearance around the stud allows for the cylinder to grow/expand, without pinching the piston. In addition to this the original cylinder design was cast, so as to run the studs in open space through the centre sections of the cylinder, with just solid sections of casting at both the base and head area. Modern cylinders are now fully cast in this centre area and drilled through the solid casting. So let’s look at a few aftermarket combinations.
Aftermarket cylinder types and clearance hole sizes
A hunt around the workshop soon uncovered many different aftermarket cylinders to make checks on, and the clearance hole sizes showed a fair bit of variation:
TS1-225 = 9.0mm
TS1-200 = 9.2mm
Monza 225 = 8.7mm
Rapido 225 = 9.6mm
RB250 = 8.9mm
BGM225 = 9.0mm
Mugello 200 = 8.7mm
Avanti 225 = 9.1mm
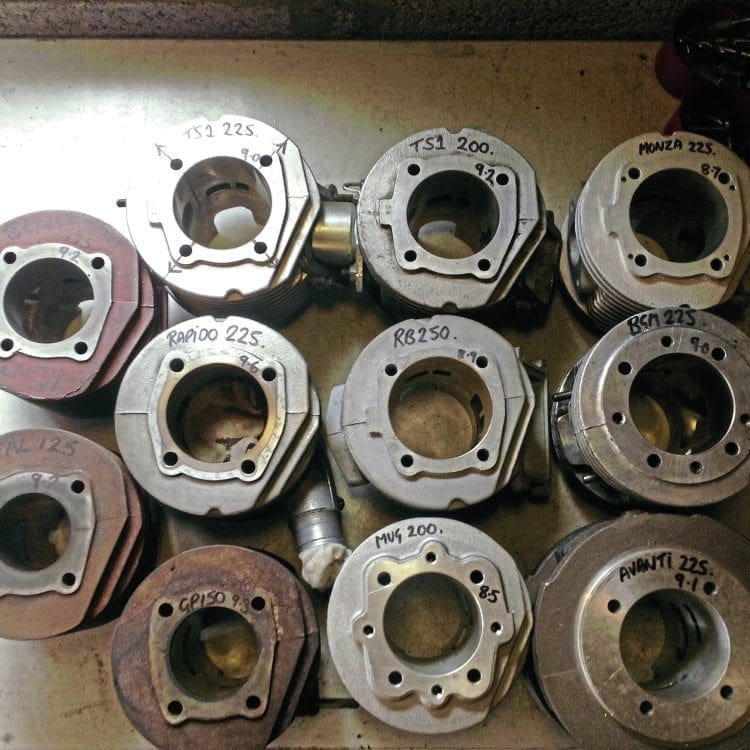
So from these results, a standard 7.11mm stud in a Rapido 9.6mm cylinder hole gives 2.5mm, being the largest clearance here. The smallest came from a standard 7.11mm stud and 8.7mm hole in a Mugello cylinder, still leaving 1.6mm clearance… so only a 0.5mm loss of clearance on the smallest option when compared to standard cylinders. Importantly, in all the above combinations I’ve not once experienced any issues.
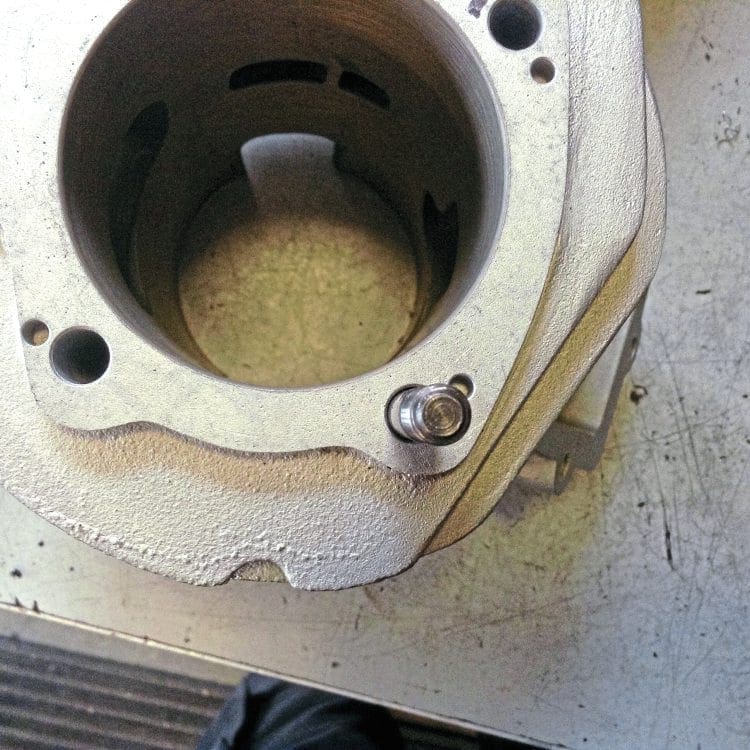
Dangerous cocktails: fat studs — small bores
With no genuine Lambretta studs readily available to buy off the shelves now, customers often turn to the aftermarket replacements. It is important to maintain those features we see in an original stud as explained before, but there are replacement studs on the market which have various issues. These problems have caused some costly cylinder and casing failures, so check them carefully before fitting. Better by design? We all would like to think so, but what happens when the design moves away from its original dimension and little thought goes into the knock-on effects of such a change? Consider using your original studs before taking them out; a new kit may have some new studs provided with it, but you’re not forced to use them… inspect your original ones first.
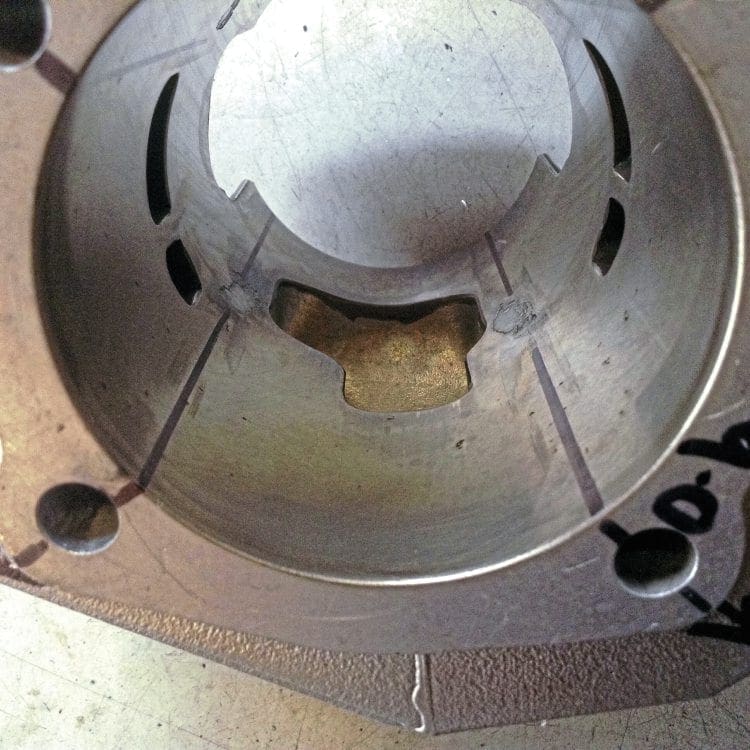
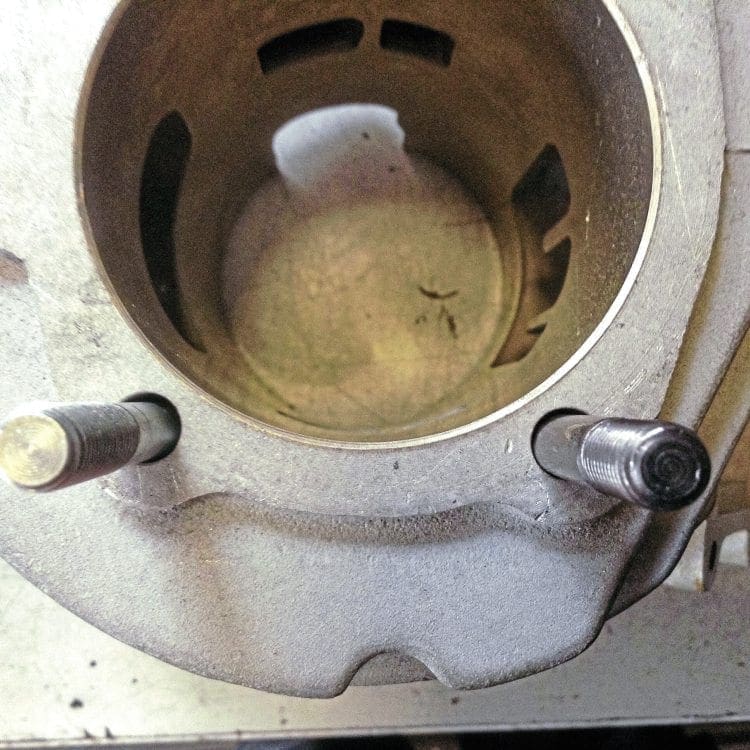
Some very cheap ‘non-branded’ ones I’ve seen can stretch and pull threads, even at standard tightening torque figures. One particular stud I saw had various issues, the first being its size. At around 8mm through the centre it is almost 1mm fatter than the original, so clearance space for expansion is reduced considerably. On an average 9mm cylinder hole it’s down to just 1mm total and 0.7mm on the smallest holed cylinders. You can clearly see this in the pictures, and that is insufficient when it comes to fitting tolerances. This combo will scrape the studs as you slide the cylinder down, and with use (time and time again) I’ve seen the results of this combination manifesting itself as a four-point seize directly opposite the stud location lines (as drawn onto the bore in the image shown). One chap had it happen three times before visiting me for dyno/advice, where I diagnosed the fault, and with no other changes than just the studs… it was cured.
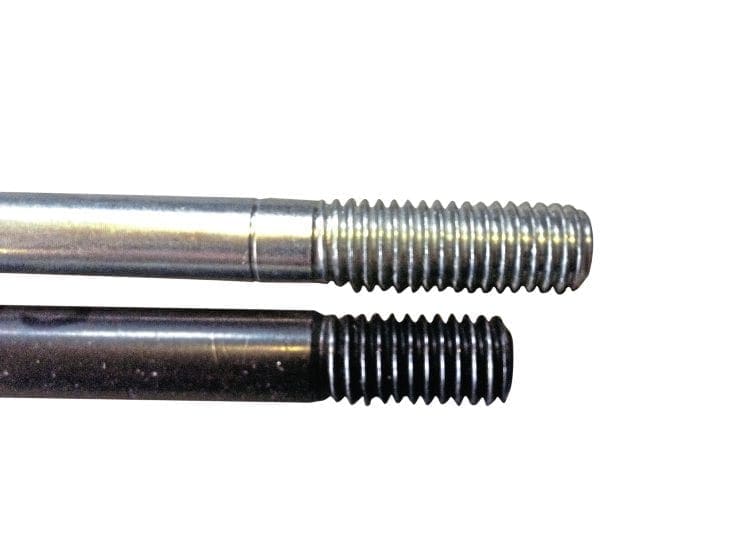
The next issue with this particular type of ‘fat’ aftermarket stud, is its reduced threaded length at the casing end: at only 15mm long it falls 6mm short of the original Lambretta stud, so has less thread available to hold onto within the casing. What’s worse though is, upon installing this stud, due to its shorter length it won’t ‘bottom out’ inside the casing like the original does, but instead it bottoms out on the outer gasket face, via the thicker 8mm shaft section of the stud.
This thicker section has a gradual taper transition cut (as picture) so as the stud is torqued up it gradually flares open the hole in the casing yet appears to feel like it has more to go, the result of continuing at this point is a split open casing that requires welding up to repair it.
The good guys
So is there a stud that we can put trust in? A stud that’s sized well with proper dimensions and still available? Luckily, yes! A favourite of mine and many others is the Vespa PX200 cylinder stud still sold as a genuine Piaggio part from most good dealers, supplied in branded packaging from a trusted source, and at a good price. There’s a lot to like about these. The threaded ends are just 1mm longer than original and its overall length a few mm longer so a favourite for use on slightly longer rod/stroke set ups like 60mm stroke cranks or 110mm rods.
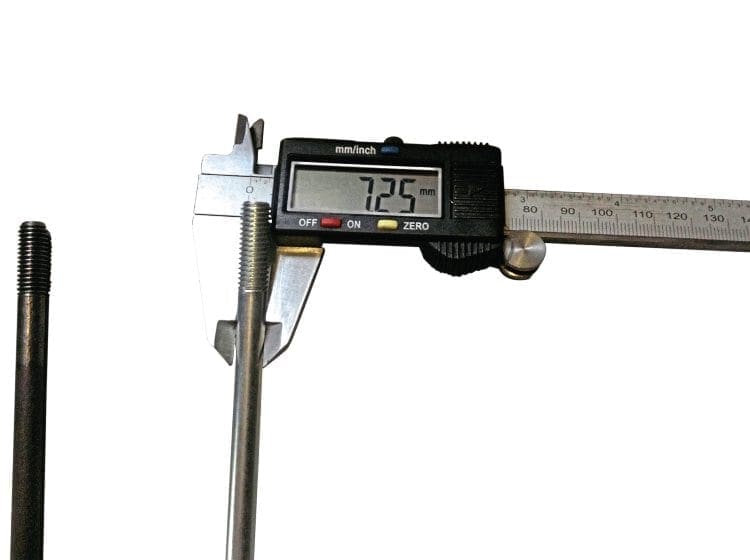
The centre section is reduced like the original Lambretta item, and just a fraction oversize at 7.25mm. Another interesting point to this stud is its slightly oversized thread at one end, and standard at the other end (marked by a small ring on the stud or you can check by popping a nut on each end to see which end is tighter).The bigger ‘tight end’ goes into the crankcase very securely, so makes a great job of tightening up old cases with baggy threads. It can be a bit ‘tough going’ into a new casing, so back off if it feels too tight as sometimes it requires a thread clean prior to fitting.
Warning signs
Tightness: If upon fitting a cylinder to your ‘thick’ aftermarket studs, you experience any tightening of the cylinder onto the studs as it is lowered down, then take this as a warning. The studs should be checked that they are straight and parallel to each other, if okay then the holes may be causing the issue which could be opened out to 9mm if too tight. The same applies to alloy base gasket/packing plates, if the holes are too tight it can push the cylinder tight onto the studs too.
Cowling ‘head bolt’ problems: This bolt, if too long in length, can unknowingly cause a problem when fitting the cowling by locking up the stud and head nut and cowling bolt. It then begins turning the stud into the casing. Don’t be tempted to put threadlock on the cowling bolt as when set, it will try to wind the stud/head nut out as one, instead of coming undone.
Additional head nuts/studs: Some cylinders have additional head fixings, so be careful on these to not over-tighten. They will often need lower tightening torque figures than M8 head nuts. If they are M7/M6, or tightened directly into alloy threads, instead of a nut on a steel stud, then the manufacturer’s instructions should be followed.
Head nuts: Using four of the longer head cowling nuts can work well as there is more thread to pull on than a standard nut, along with four sizeable washers that fit well into the head rebate, but not too small that they could sink down into the stud hole and progressively lose torque over time. Some people use spring or nordlock washers, but these can be small and collapse into the stud hole too, so seat upon a lower ‘big washer’ if you decide to use them. Don’t use threadlock on nut to stud as future re-torque will turn them together as a pair and then exert the higher torque figure through the stud into the alloy casing and risk failure.
Long game: On occasion, longer studs will be required, so is there an alternative? It’s often enough to run with the studs you have and get enough thread by having the head machined in the pockets for nut and washer to expose more stud length. The head has plenty of material and can be reduced by up to half in some instances.
Up tight: Are my current studs tight enough? A good check to carry out is a ‘ringing test’. Using a screwdriver, each stud can be struck which if secure will produce a tuning fork like ring to it but a loose stud/thread will produce a dull thud. This is particularly useful when investigating a failure like a head gasket, that may be the symptom but not the cause.
Do I need to replace mine?
Do you need to, will they be okay? If they are straight, with good threads, of original sizing and pass the ring test… well, then they should be fine. If they have to come out then a double nut method is the normal starting point, and the long cowling nut and cowling bolt works well, as it’s pulling on more thread on the stud plus is long enough to put two matching spanners on to. A quick try to see if they loosen easily to start with, then sometimes a slight tightening turn can work better to get it started. If you have no joy a few strikes on the top of the cowling nut/bolt can shock the threads and loosen them, but the best method is to heat the casing up around the stud with a hot air gun or torch, it will expand the alloy faster than the steel stud and create a clearance gap to loosen it. If the head nut and stud strips a thread then it’s mole grips or a mini vice to clamp onto the stud. This will ‘bite in’ better onto the now redundant old threaded area than it does the plain section. If the engine is out then the stud can be firmly gripped in a bench vice and the engine can be rotated.
Fitting new cylinder studs
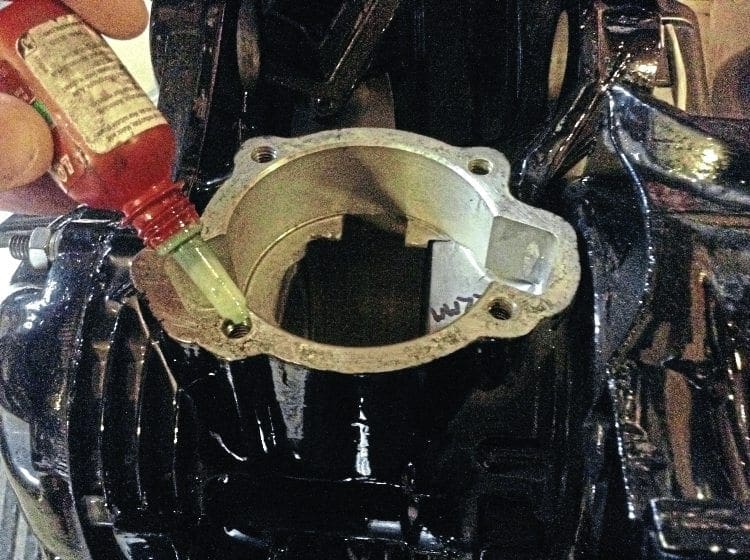
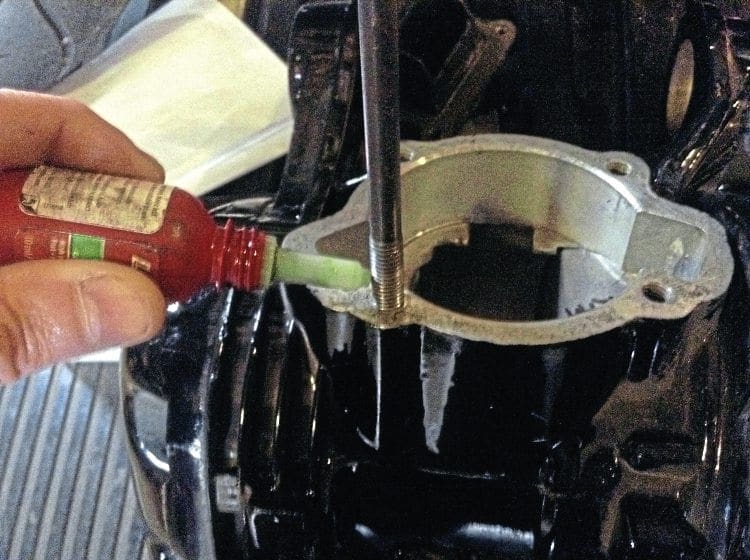
It’s worth running a tap through each threaded stud hole in the casing as part of good engine prep and for Piaggio type studs a few passes will help ease them in better. The casing will need a good clean out in the stud hole, clearing any swarf out with brake cleaner and an airline. This leaves it very clean and dry ready to fit the stud.
The head cowling bolt and long spacer head-nut become a good tool during stud installation, they can be locked off onto the cylinder stud to insert the stud into the crankcase, similar to a double-nut method. With this prepped, be careful not to put threadlock in the stud cavity in the case as it will create a hydraulic action upon being wound in that could crack the casing open. It’s safer to start the stud into the casing dry for the first few threads then apply threadlock along the threads. If medium strength is used, a strip along full length or if high strength just a few drops is required. The stud can be wound in and at this point feel for any tightening up that seems abnormal/ requires extra effort, start again if concerned as a broken case in this area is not an easy repair. Don’t use grease or oil on the stud as will promote the stud to turn in or out
The torque figure is lower for a stud into an alloy casing at about half of the head nut torque so using threadlock to hold the stud and it bottoming out becomes important. If you re-torque a head nut at a service, on occasion I’ve felt the stud and nut turn in together. This might be a loose stud or grease/oil applied to it or threadlock on a head nut at fault, but sometimes just corrosion can lock the stud and nut together. Whatever the reason, this can be dangerous on the crankcase as the torque you are now applying is not between steel nut and steel stud, it’s between the steel stud and alloy crankcase thread that can pull a thread out at high tightening torque especially on an unknown build. Torque figures commonly used are: Lambretta Cylinder head nuts: 16-20Ib-ft, Vespa Cylinder head nuts: 14-18lb-ft (depending on case/stud combo).
STUD CHOICE: ROLLED THREADS VS CUT THREADS
The highest-quality of all fasteners have rolled threads which are produced via rolling (or sliding) die equipment, which squeezes and forms a thread onto the material. The process provides a superior surface finish with improved material properties from the cold working of the material, giving much higher fatigue resistance. Thus thread strength, over standard cut threads, is increased by a minimum of 30%.
When a cross section of thread is cut for analysis, it can be seen that the grain flow of the material (like a set of horizontal parallel lines) is severed on standard cut threads. But on rolled threads it maintains a continuous flow of grain although now in a wave shape, which follows the thread contour. As a result rolled threads resist stripping, as shear failures occur across the grain. The surface finish of rolled threads is smooth and not torn from a cutting tip, so it has up to double the comparative fatigue resistance.
The rolling improves matters further as it leaves the base of the thread heavily compressed with 50-75% improvement in that area. Tests have shown rolled threads with proper heat treatment have increased fatigue strength of five to 10 times that of cut threads.
Words & Images: Darrell Taylor