The Lambretta speedometer drive system is straightforward in its construction but can be frustrating when it doesn’t work correctly.

The most often ridiculed part of the Lambretta, even among enthusiasts, is the speedometer. Often it doesn’t work at all or, if it does, the needle swipes to and fro like a windscreen wiper.
Though the speedometer unit can sometimes be to blame, more often the fault will lie with the cable drive. The system is straightforward, with a handful of components, but when problems occur they can be awkward to solve.
Enjoy more Scootering Magazine reading every month.
Click here to subscribe & save.
The best way to look at fault finding is to break it down by the two major components and ensure they both work correctly.
1. The drive
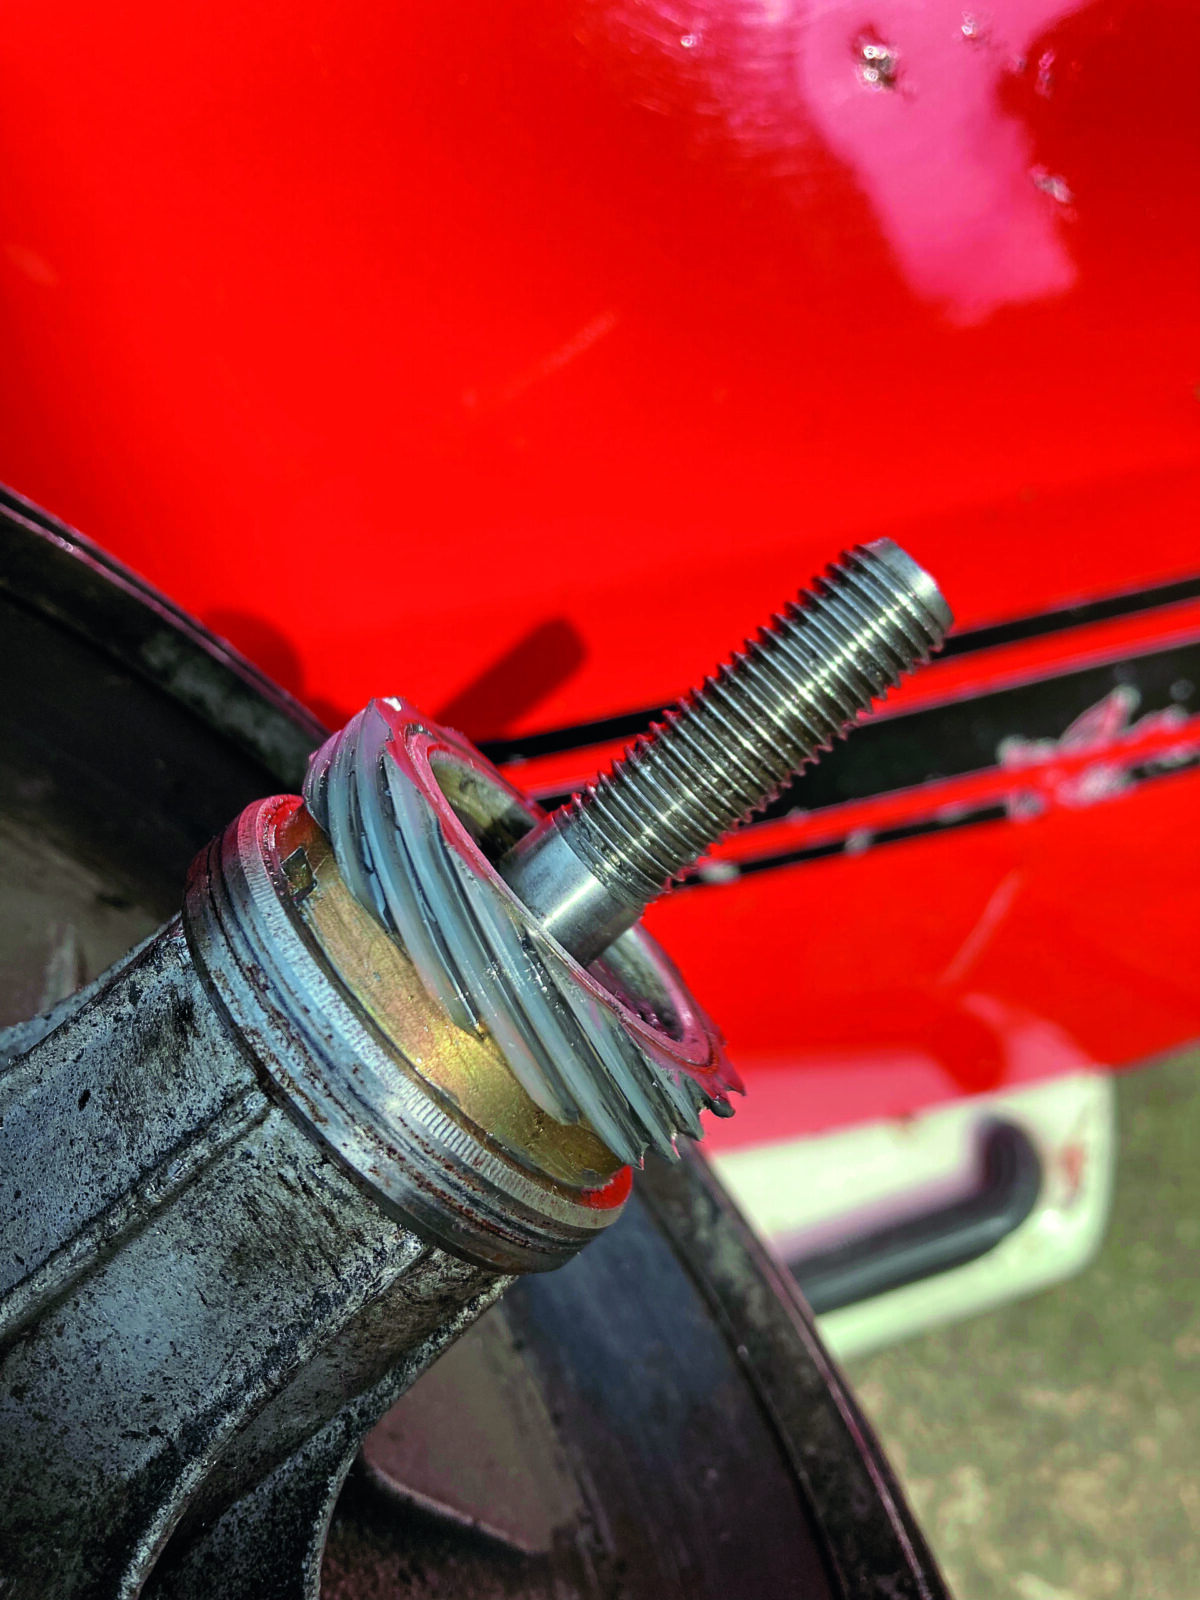
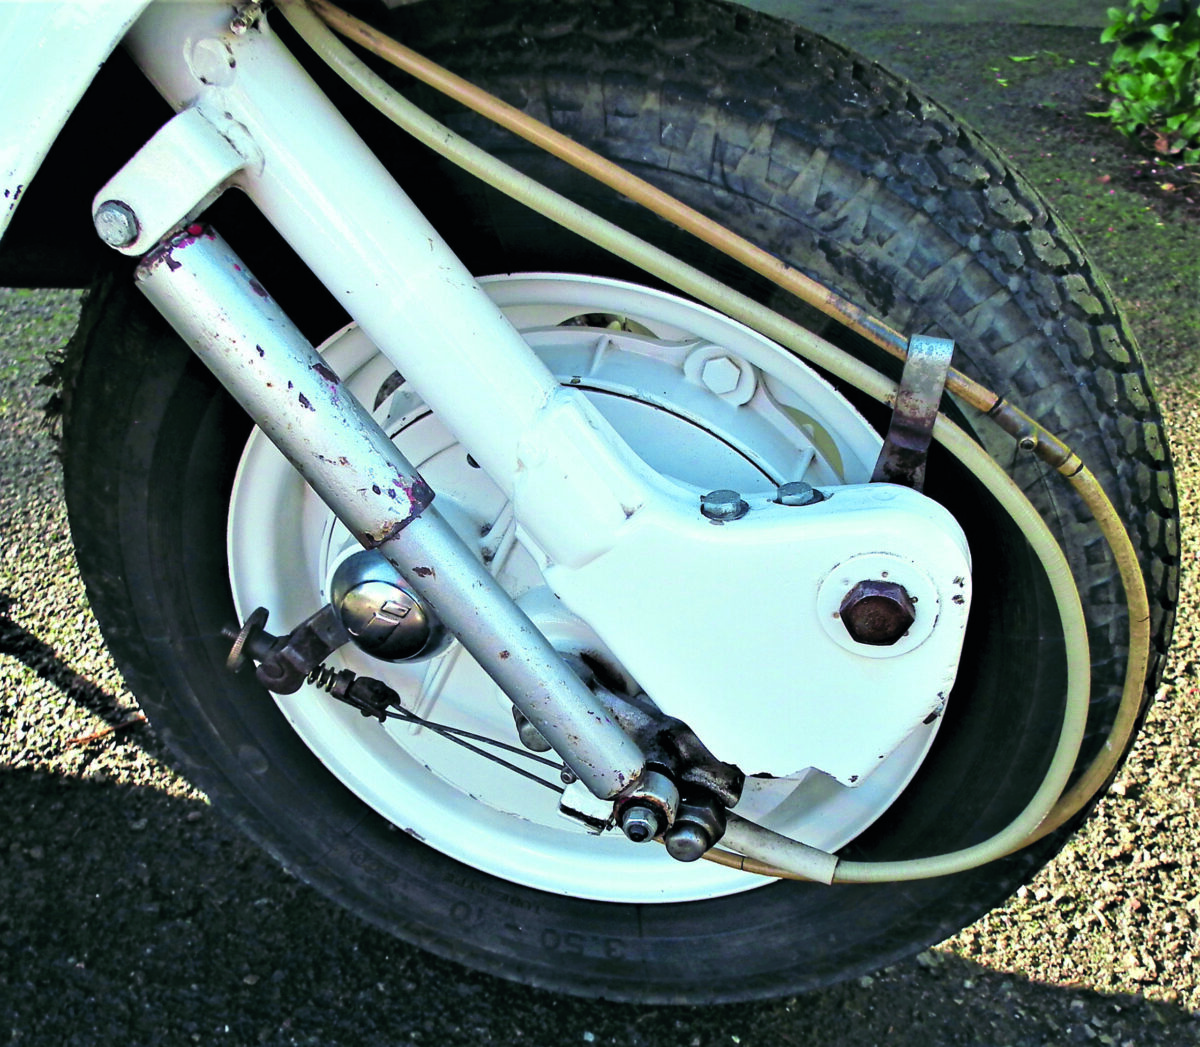
The problem with the speedometer drive is that to gain access it’s necessary to take the front hub apart. One way of testing its operation without disassembling the hub is to undo the cable from the drive housing on the hub and insert an electrician’s screwdriver into the end of the worm drive.
If the drive’s working, when the wheel is spun it will turn the screwdriver around… but if it doesn’t spin, something’s broken.
One thing to note is sometimes the drive can be damaged but still have just enough friction to spin the screwdriver. However, with the cable fitted, and the system under load, it isn’t strong enough to turn. To check for this, hold the end of the screwdriver, applying a small amount of force while turning the wheel. This will replicate the system under load.
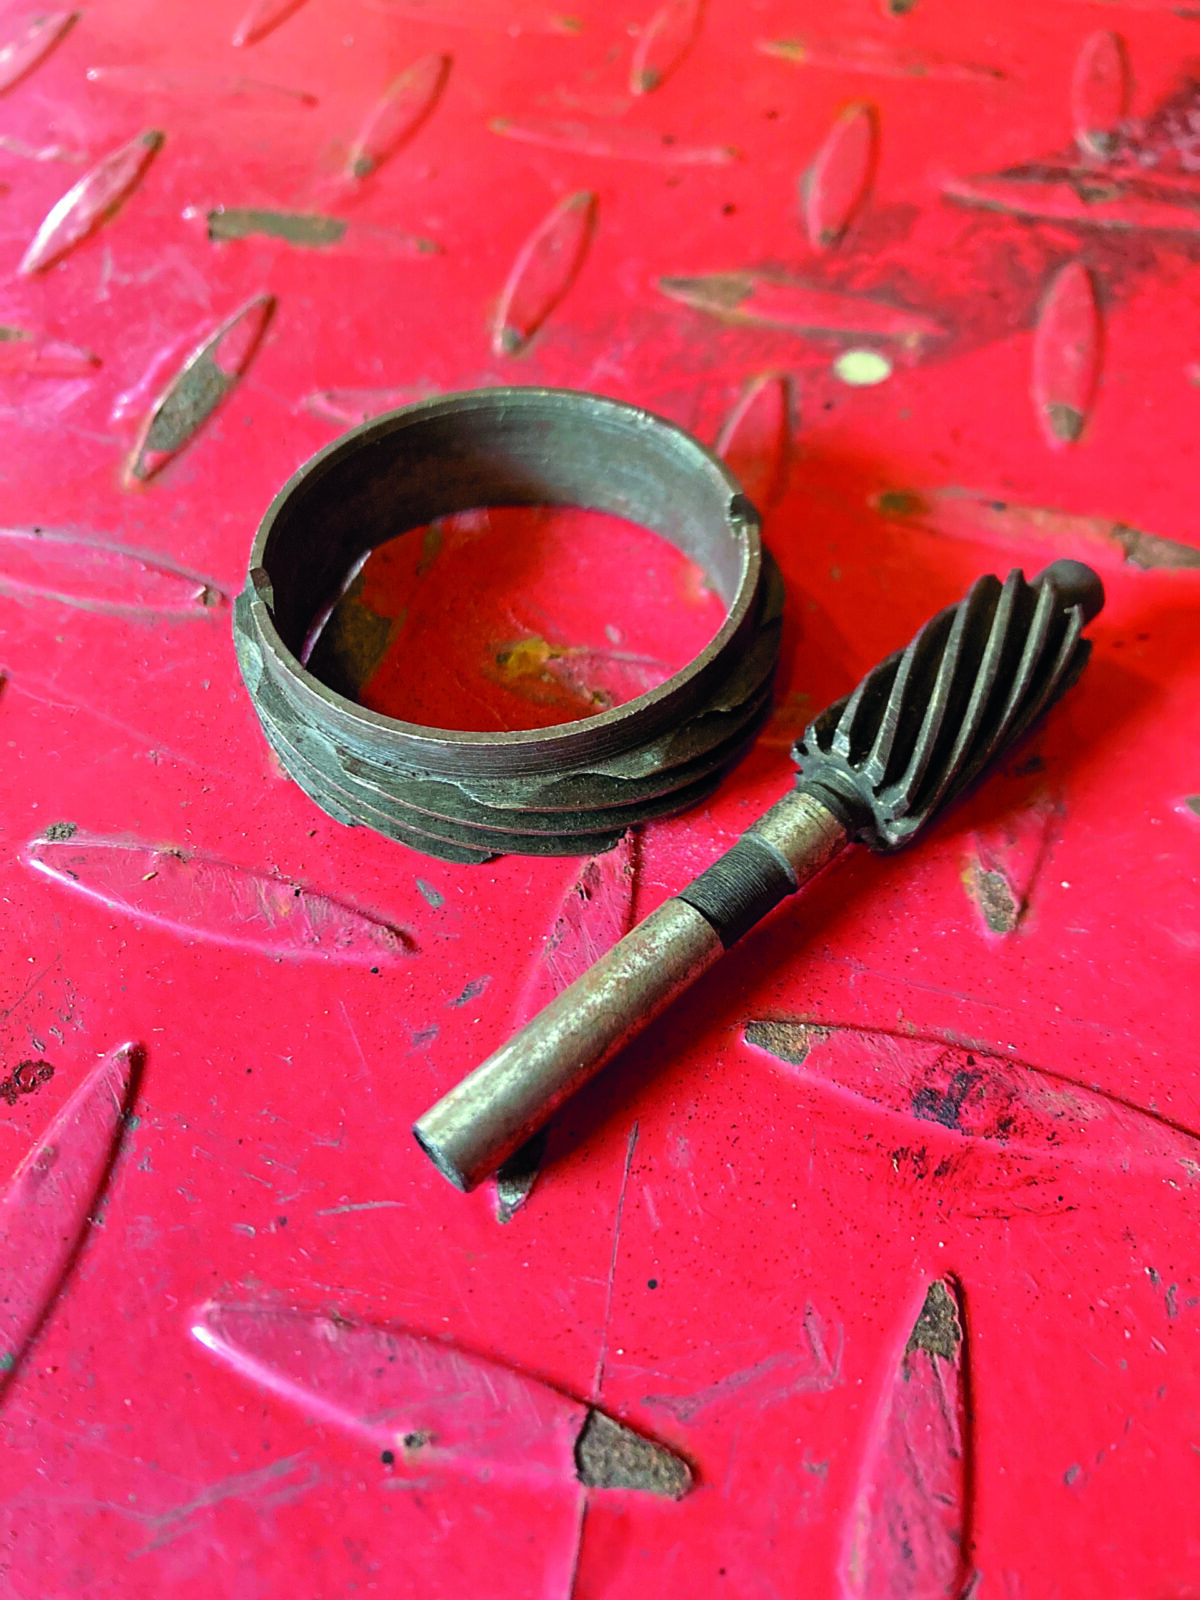
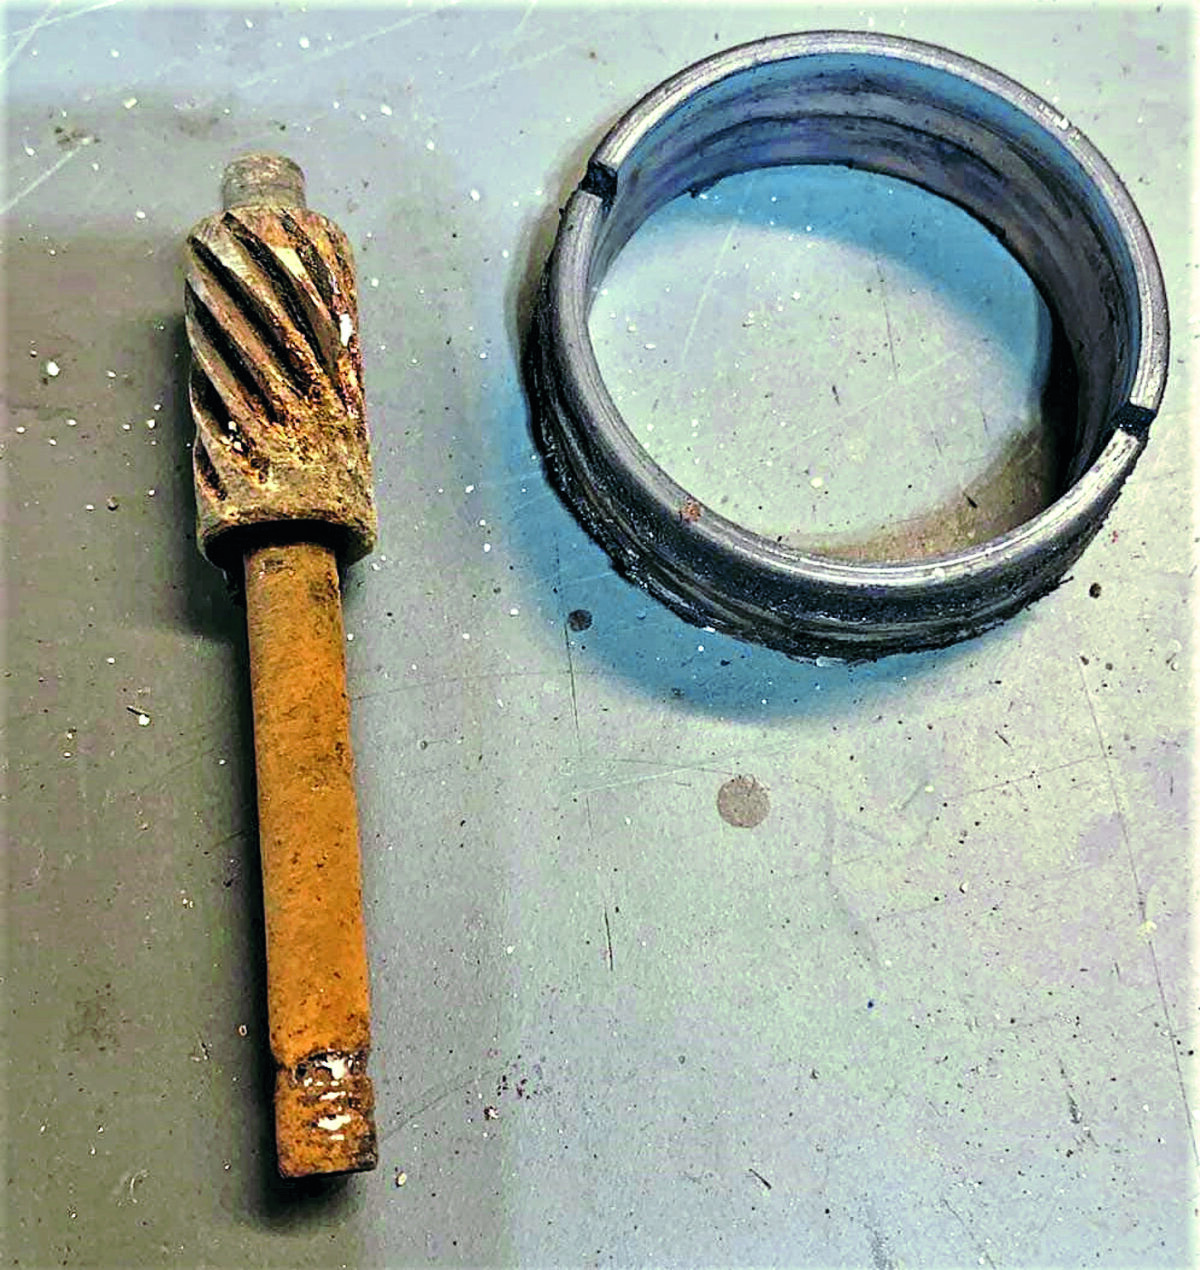
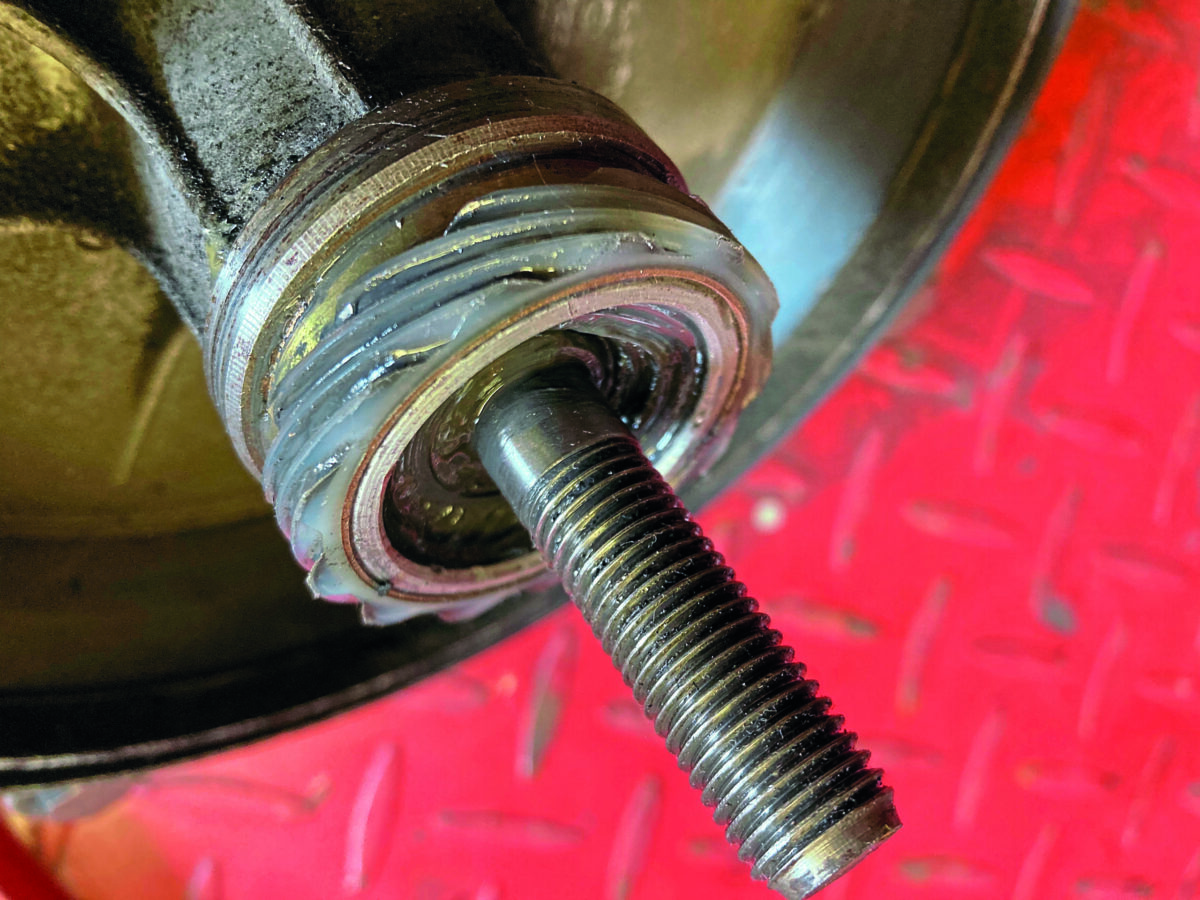
If this reveals there’s a problem, the hub will need to be split to access and inspect the drive. The fixed drive is on the left of the hub, which houses the wheel bearings, and the worm drive is on the right, which houses the shoes. The fixed drive has a series of helical grooves which should be in perfect condition. If they aren’t, the worm drive has chewed them up, and it will need replacing.
The fixed drive is held in place by an interference fit to aluminium sleeve that’s cast over the centre of the hub. Removal isn’t easy as no extraction tool is available, but the easiest way is to cut it with a junior hack saw. Don’t cut straight across, instead cut at the same angle as grooves on the drive, this way damage to the hub is less likely. Because the drive is a sacrificial part it will cut quickly and, once the cut is made simply peel off the drive. Don’t worry if you slightly scratch the hub surface.
When fitting a new drive, ensure you have it the correct way up, the exposed sleeve goes on first, and the nylon drive is facing you. Then, gently tap it on with a rubber mallet so the top of the drive sits flush with the top of the bearing housing; when it is, you have it in the correct position.
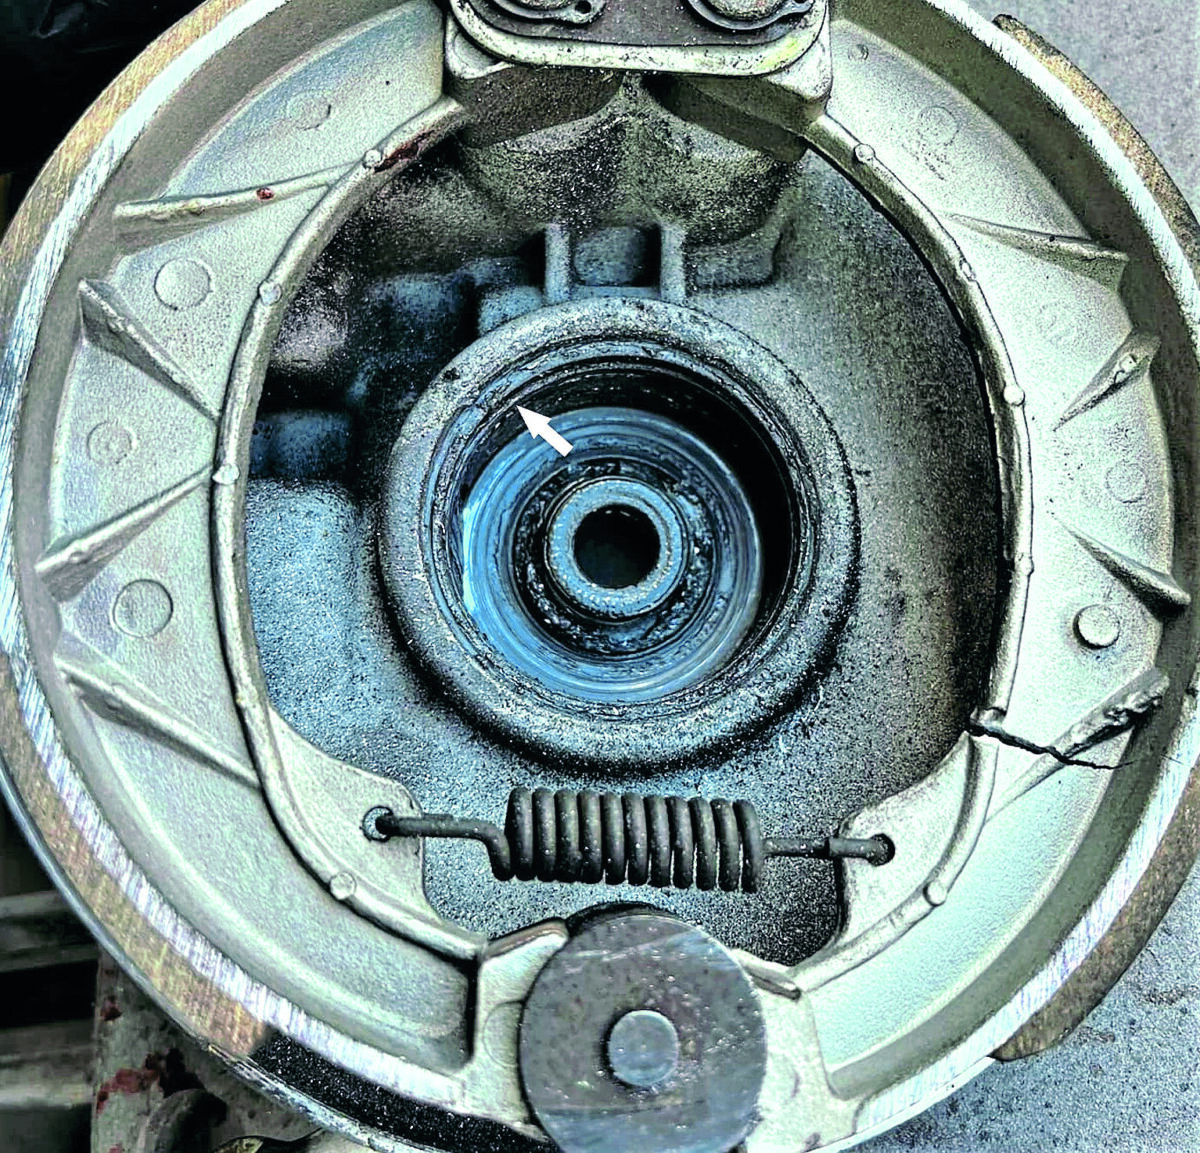
The worm drive sits in a recess on the hub’s inner and is held in place by a metal housing that screws into the hub. If the drive has sheared replace it, but this doesn’t mean you have solved the problem. The drive must be free from obstruction and able to rotate without resistance. If the cause of resistance isn’t eliminated it will shear again. Two things can cause resistance; a build-up of dirt in the housing on the hub, or water ingress which can cause corrosion.

Make sure the housing on the hub is free from any dirt or debris, and if it’s recently been painted, that there’s no residual overspray. Make sure that the drive sits in its brass housing and turns freely, as it’s not unusual for aftermarket parts to be too tight. Make sure there is no resistance between the two components before putting everything in place, and most important, heavily grease the drive so that it will be constantly lubricated.
This leads us to the final part of the internal drive, the oil seal. This thin seal sits in a recess on the brake shoe side and should be replaced whenever maintenance is conducted on the hub. They’re inexpensive and if it does fail, grease will quickly disperse from the drive as it spins, which can cause it to fail. More worryingly, grease can spread over the brake shoes meaning the brake won’t work. Remember, when servicing the drive, always fit a new seal and keep the grease where it should be!
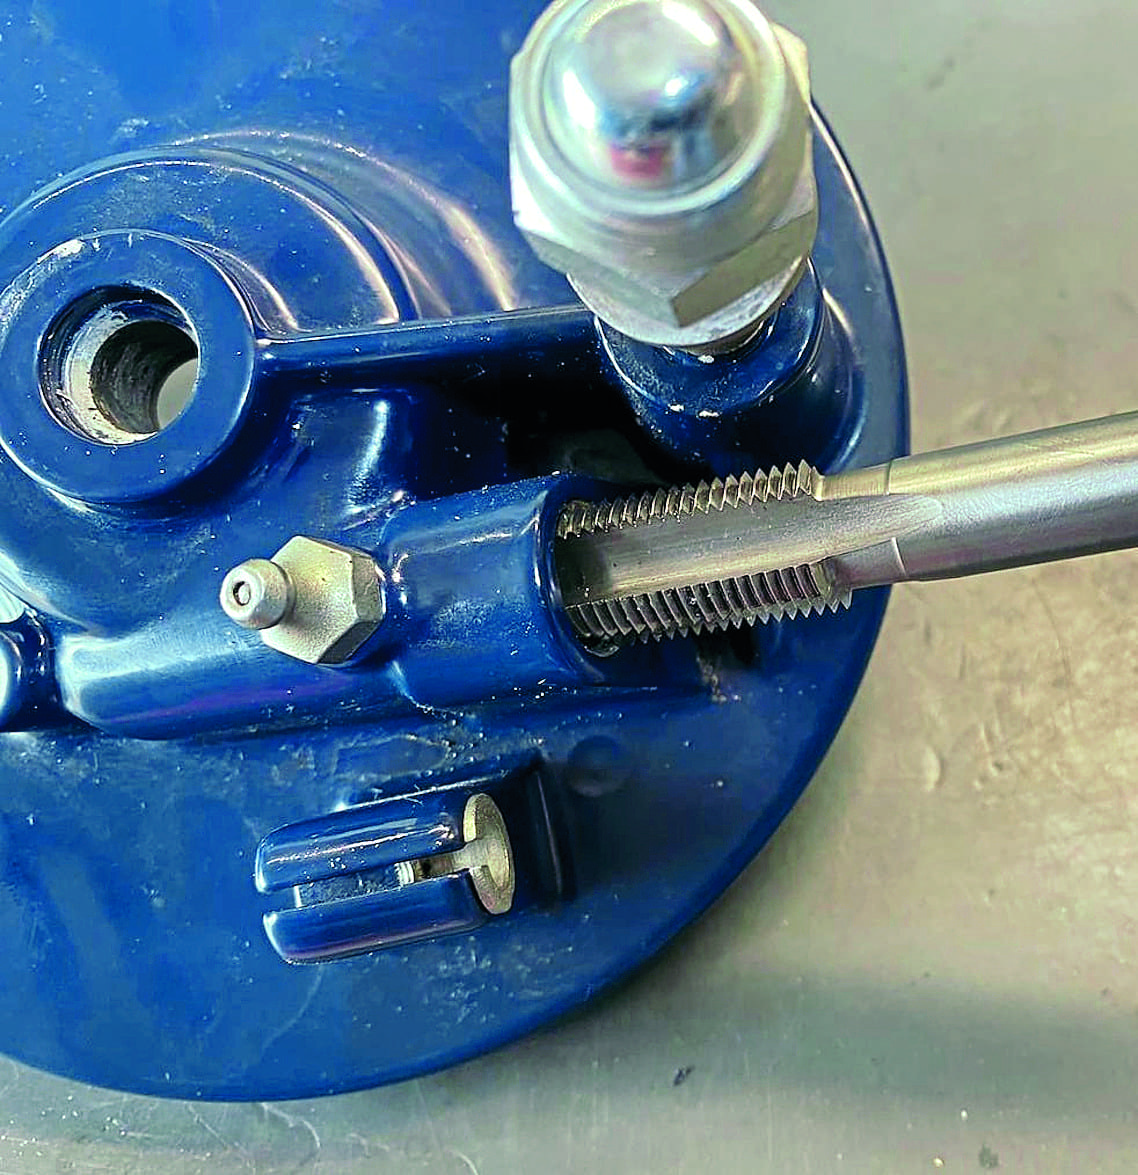
When fitting the brass housing of the drive into the hub, make sure it screws in easily; if the hub’s been sprayed, there can be paint in the thread. Make sure it is cleaned out, if you have the correct thread tap, use that, if not a small wire brush will do the same job.
2. Speedometer cable
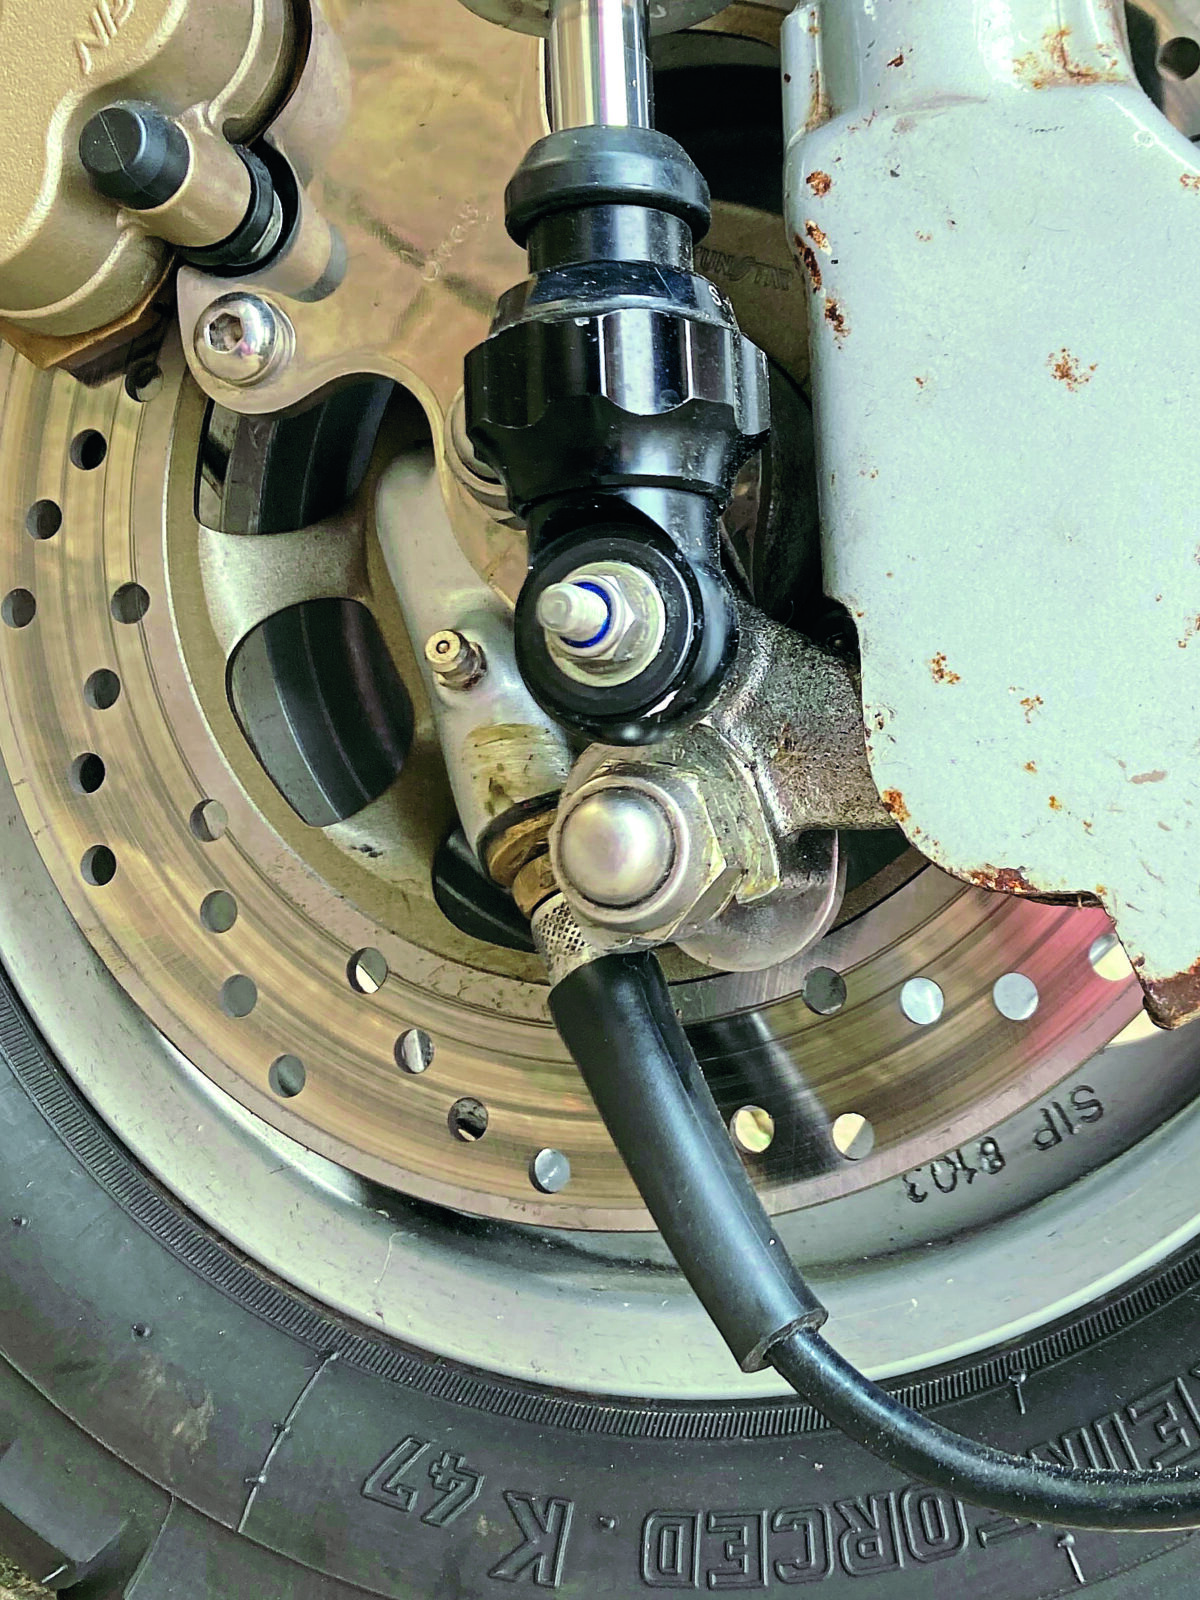
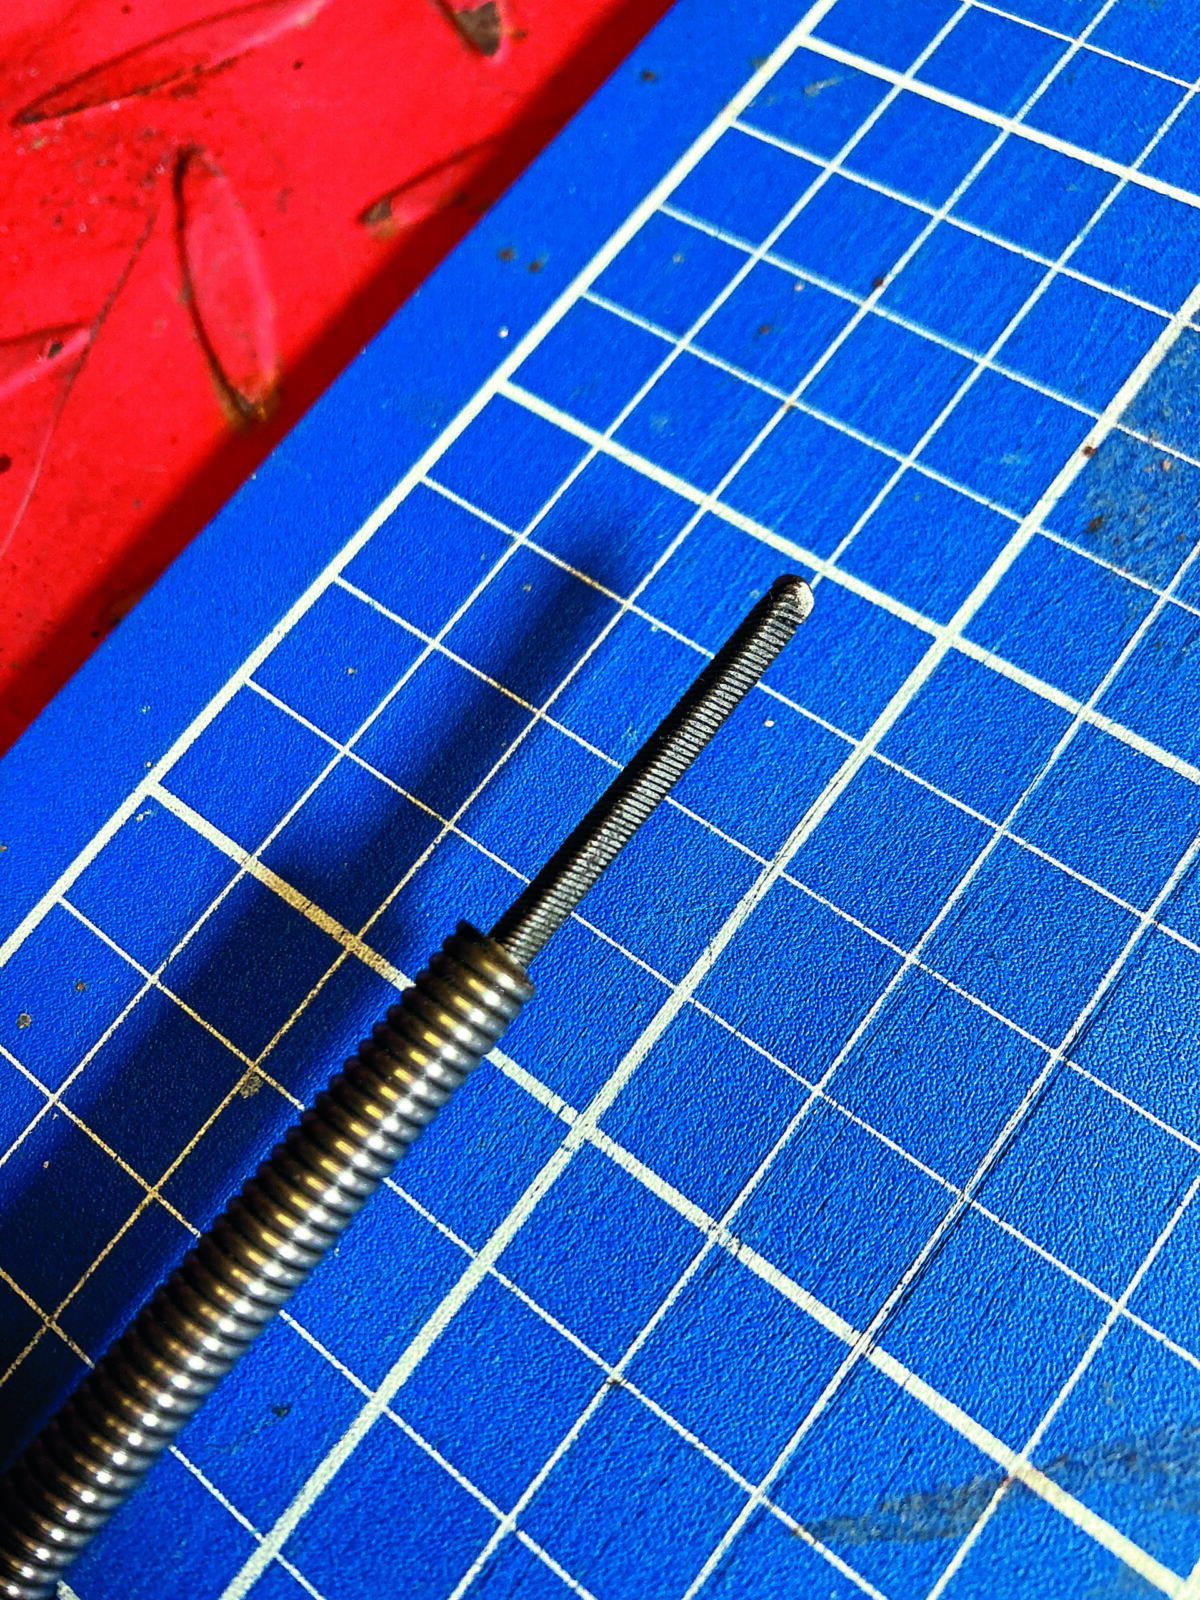
The cable consists of an inner and an outer; it’s vital that the inner can turn freely. If there’s any resistance, either from a lack of lubrication or poor routing, the resistance will instantly be transmitted to the drive, which will cause it to shear. Over time the outer plastic shroud can crack and peel away. If it has, water will get in and cause rust and corrosion, which is one of the easiest ways to get resistance in the cable. For that reason, if the outer shroud is damaged it should always be replaced.
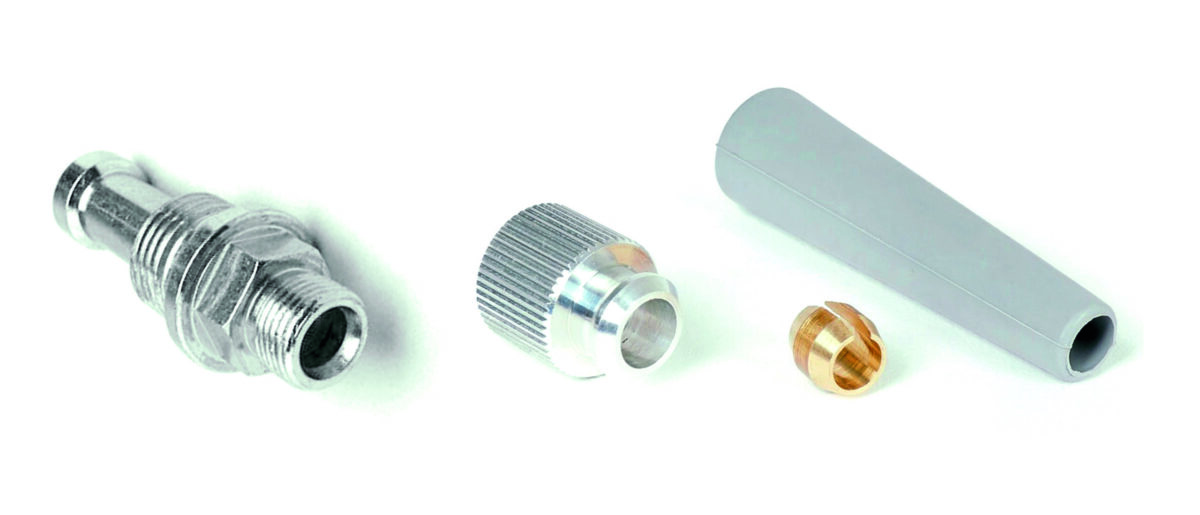
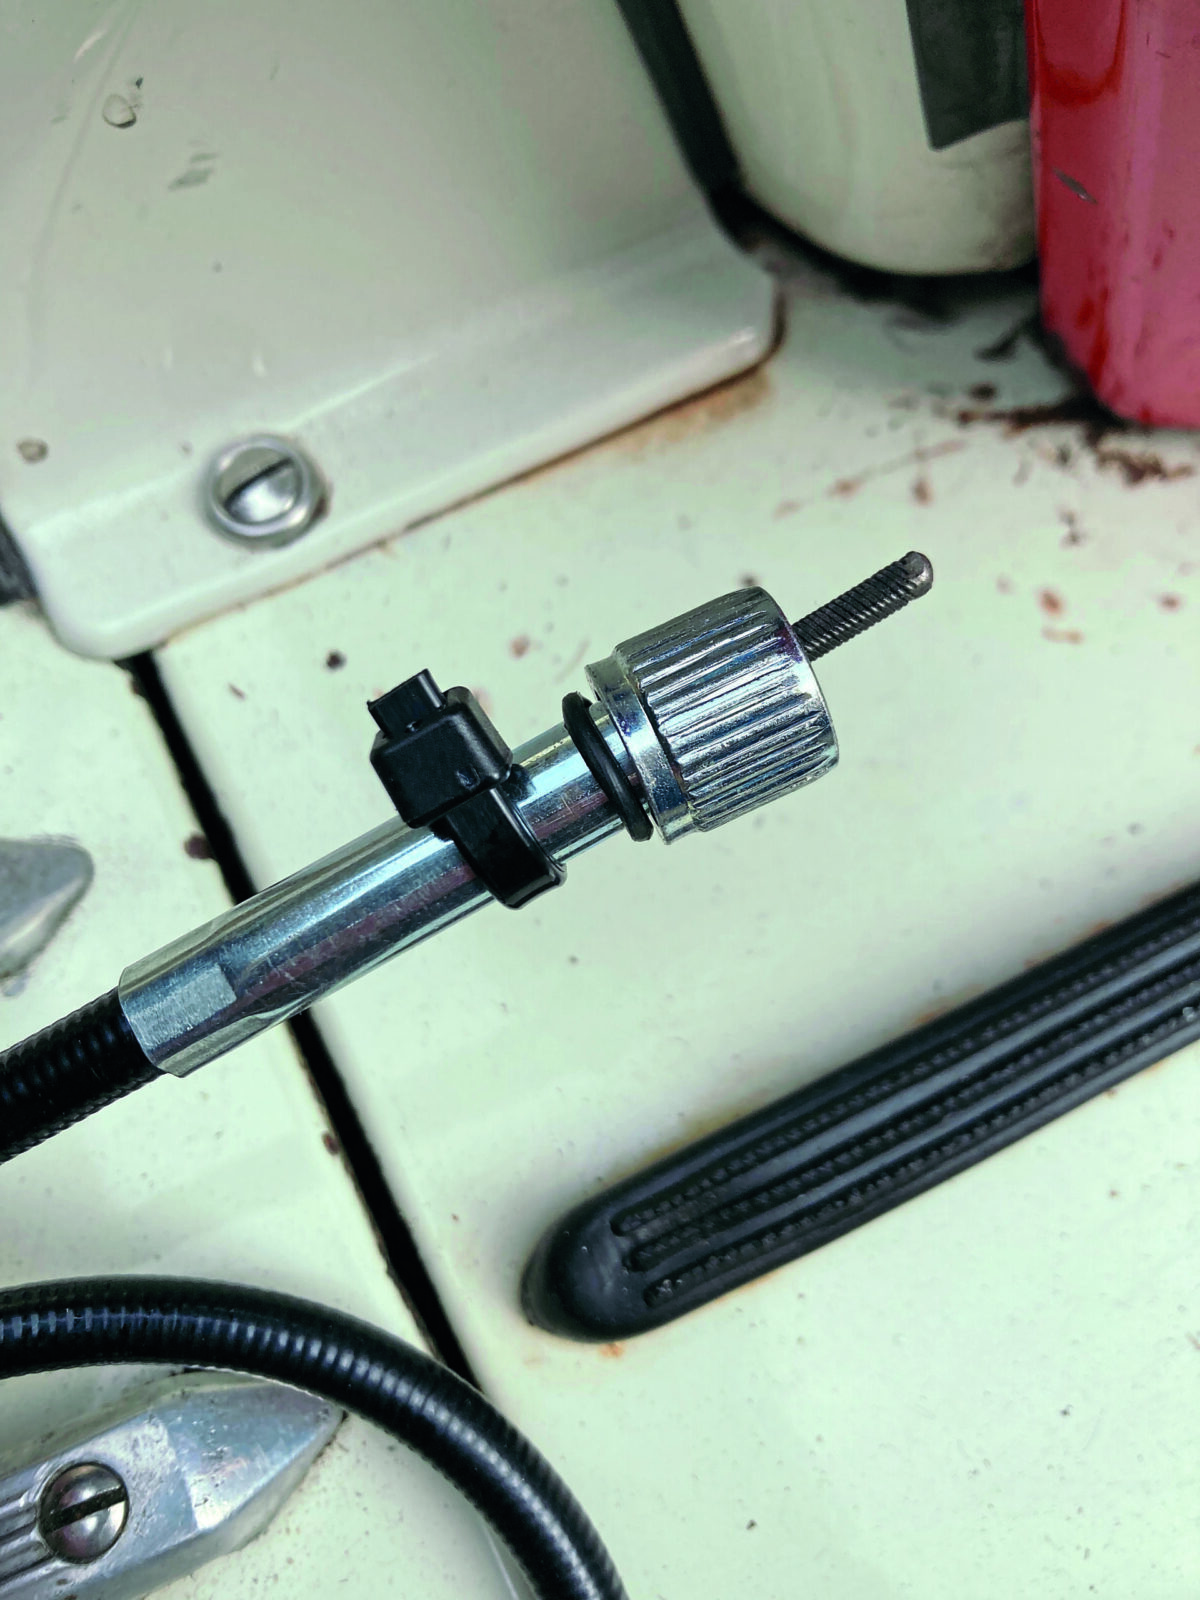
When the outer cable is fitted, the inner can be inserted and should protrude around 1.5 to 2cm from the end of the outer. If it doesn’t (depending on the manufacturer), it won’t enter far enough into the drive and, therefore, will not turn. If it is short, a small amount can be cut from the outer. Don’t take off more than is required, otherwise the outer cable will have a more acute angle. The angle of the cable needs to be as shallow as possible because the more acute it is, the more resistance will occur. Next, make sure the outer cable has its brass olive in place. This needs to be situated just over the end of the outer cable so that when the knurled nut is wound onto the drive housing it locks it in position. If it doesn’t grip properly, once the wheel turns, it will pop out.
Also, ensure the plastic shroud is fitted and secured over the end of the knurled nut. Its job is to stop water getting in and if it’s not fitted, water can enter and begin to fur the components. Again, potentially causing resistance.
Cable fitting
Cable fitting is a simple procedure, but there are a few things to be aware of and possible problems.
The first difficulty is feeding the outer through the cable stem and through the hole at the bottom. Experienced owners know that feeding the cable down the stem and getting it to go through the hole is almost impossible. Instead, the inner should be inserted ‘wrong way up’ through the hole at the bottom of the stem and threaded up the column until it’s exposed at the top. The outer can now be slid down the tube using the inner as a guide. With a little wriggling the outer will emerge through the hole, the inner can then be removed, cleaned and inserted through the outer as for normal operation.
However, before doing anything with the outer, care must be taken with the knurled nut at the top that tightens the cable to the speedometer. The cable is fitted with a small rubber ‘O’ ring that, theoretically, prevents it from moving and dropping down the fork tube. This routinely fails to work leading to a cap that’s lost at the bottom of the fork tube and is almost impossible to retrieve without removing the forks and turning them upside down. The best thing to do is replace the ‘O’ ring with a very small cable tie which will secure the nut and not allow it to move. Once the outer is in position, fully grease the inner, feed it into the outer, and ensure it spins freely. Next, connect to the drive on the hub and turn the wheel; if the cable turns, you know it works correctly. It is now ready to connect to the speedometer… and the job can be signed off as finished.
Words: Stuart Owen
Additional images: Scooter Centre, Dr Robert’s Lambretta clinic, Stan