How to straighten a Lambretta frame
There comes a time where if possible a Lambretta frame needs to be placed on a jig to see if it is perfectly in line. It may be that the frame in question has been involved in an impact or you may just want to check it as you are about to invest in doing a restoration…
Whatever the reason it’s worthwhile getting it done so you can be happy in the knowledge all the bodywork will fit properly and the machine will handle correctly when it is back on the road. There are only a few jigs available to use in the country but Scootering went to see a purpose-built one to find out how they check if a frame is out of line and if it is, how to repair it.
Building the jig
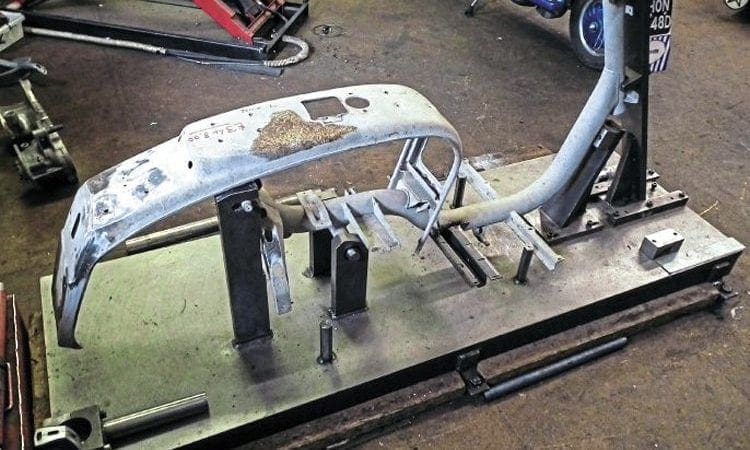
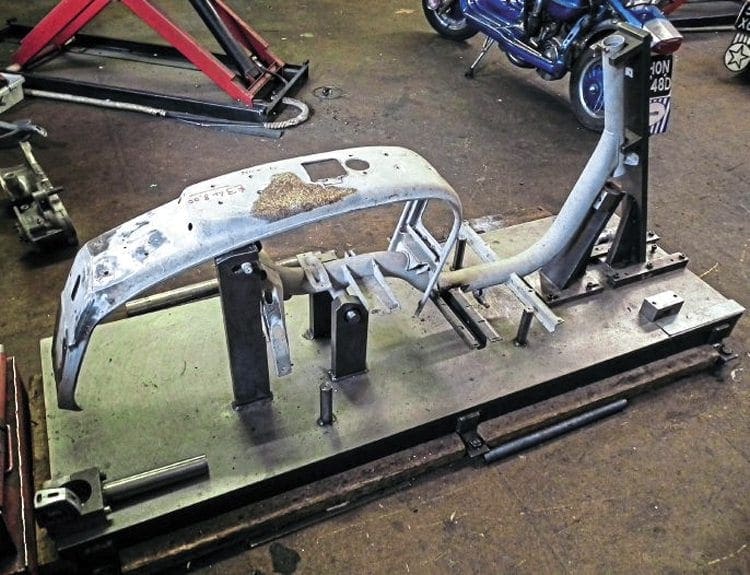
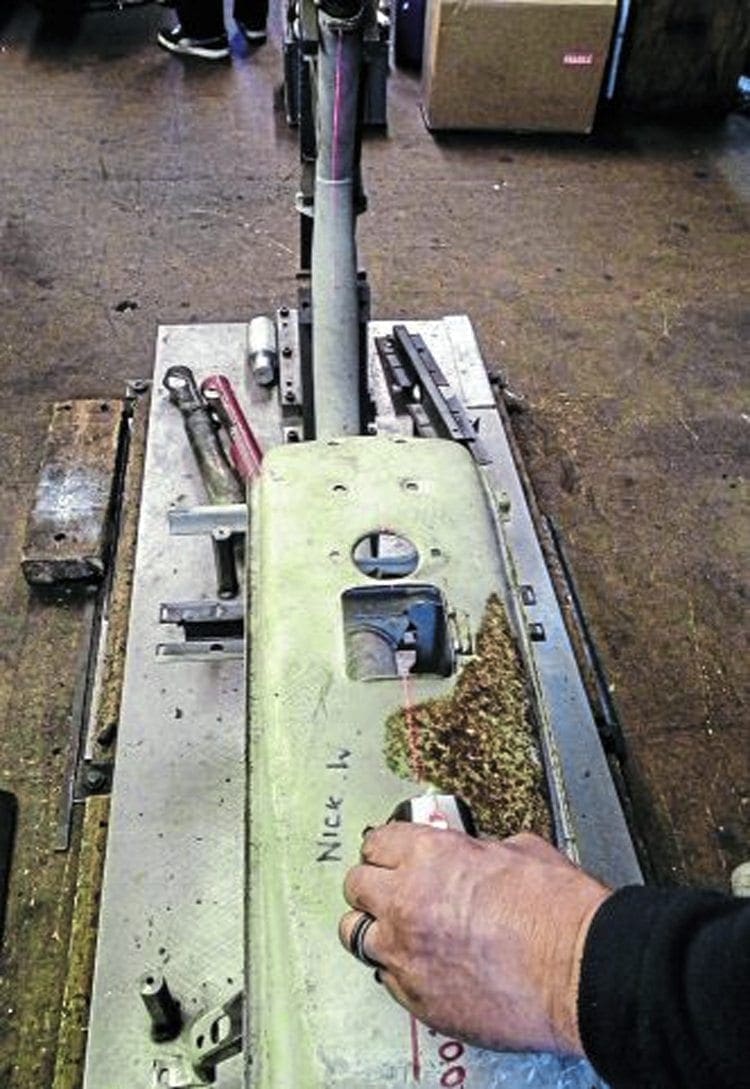
Before anything can happen a jig needs to be built. That’s easy to say but where do you start from in the first place? John Sillitoe, renowned Lambretta restorer and co-owner of Urban Scooters in Birmingham, came up with the solution. He started off by making a base out of flat surface ground steel. Then he had various supports and aligning struts made around the dimensions of a Series 1, 2 or 3 frame. These can be fitted to the jig as required, depending on what is being repaired. Here is the dilemma though — how do you know the frame used to work around is correct in the first place? John decided to gather six frames that looked in the best possible condition and take a datum average from all of them. Once he was happy with the dimensions all the necessary templates were made that allow him to measure exactly where each component of the frame needs to be.
What to look out for and where to get started
Before placing a frame on a jig there are certain things you can do to check its alignment. Making these checks early on when buying a frame can let you know exactly what you are dealing with. The first thing is the measurement from the top of the fork stem to the top lip of the tool box door rim on the frame. This should be 46cm, but 0.5cm either way is fine. If it is any more than that then this suggests a shunt has taken place in the past. Also, by standing in front of the frame and looking how the fork stem and front tube line up with the main shell you can get an idea of how far in or out of line everything is.
Enjoy more Scootering reading in the monthly magazine.
Click here to subscribe & save.
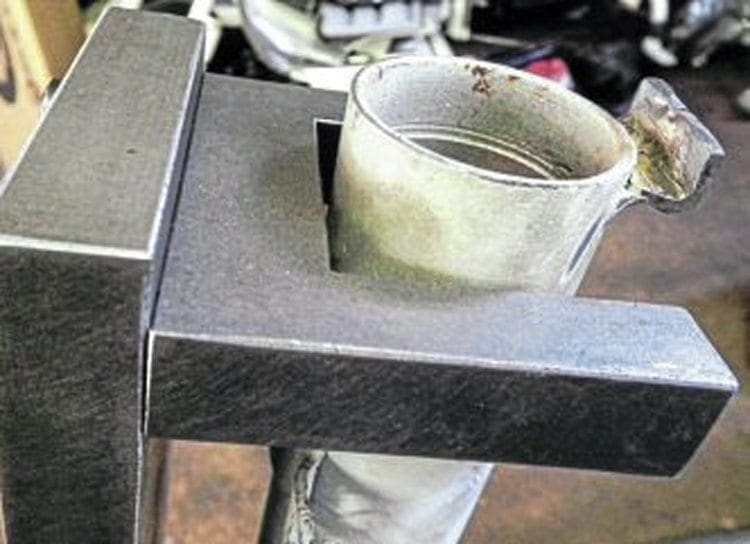
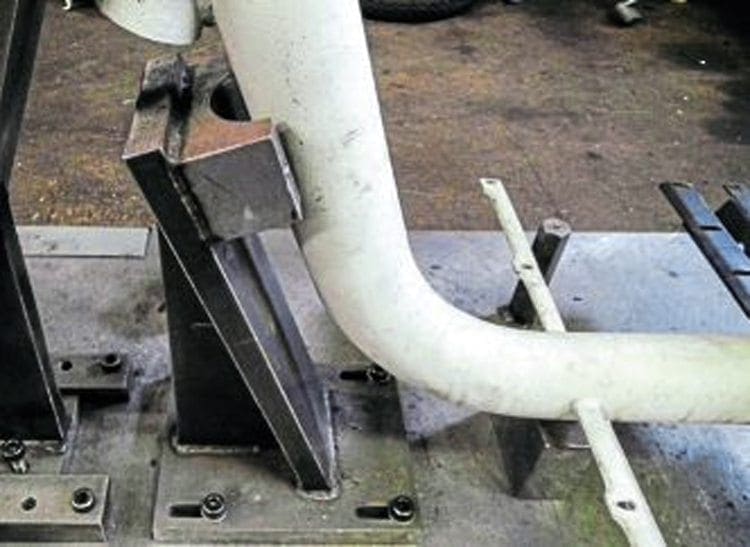
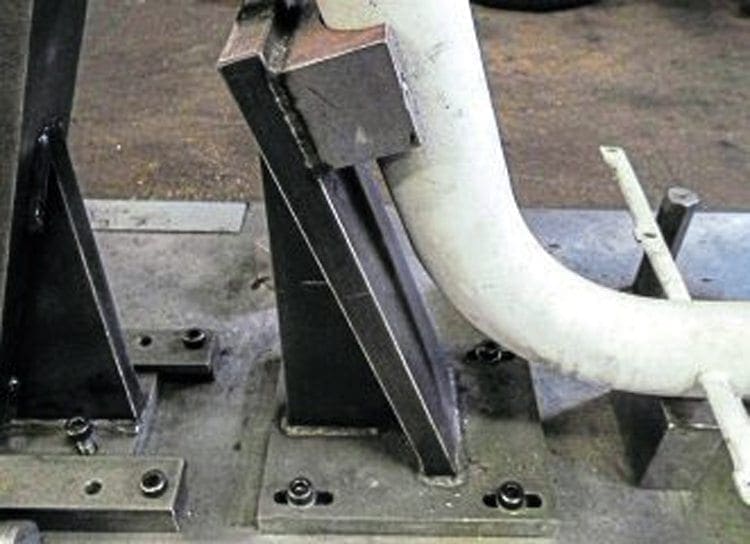
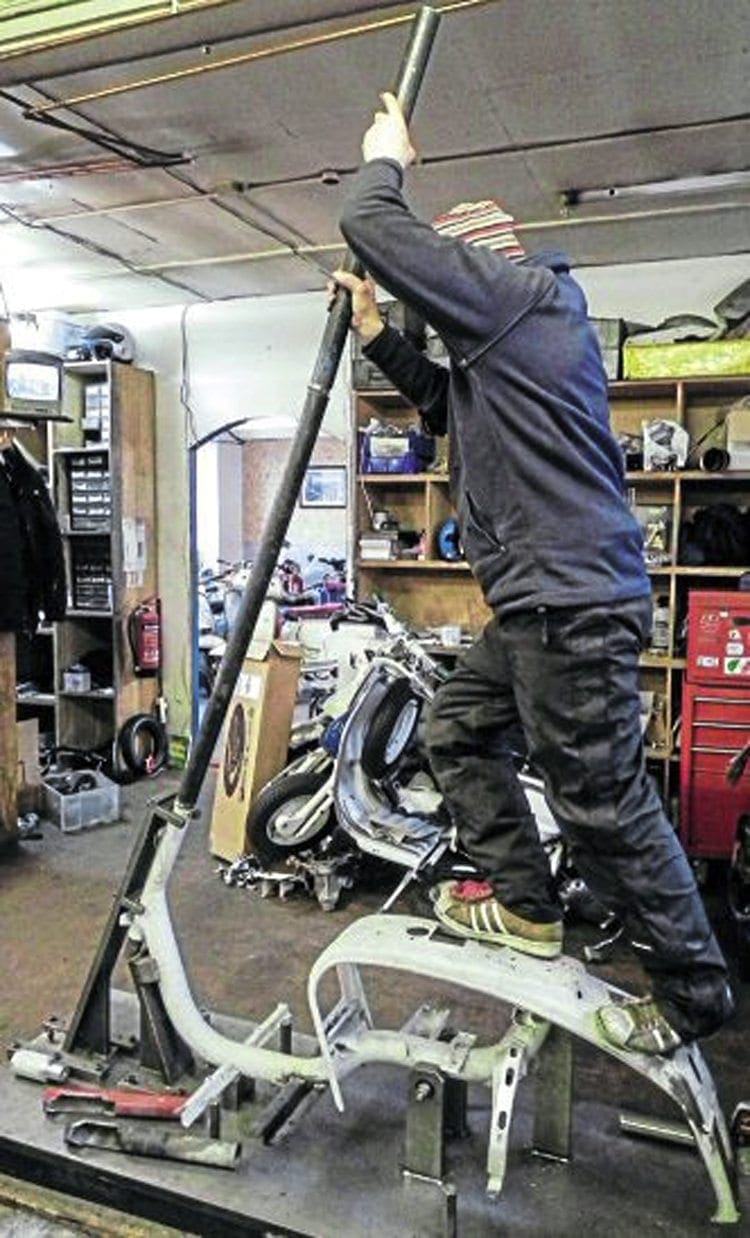
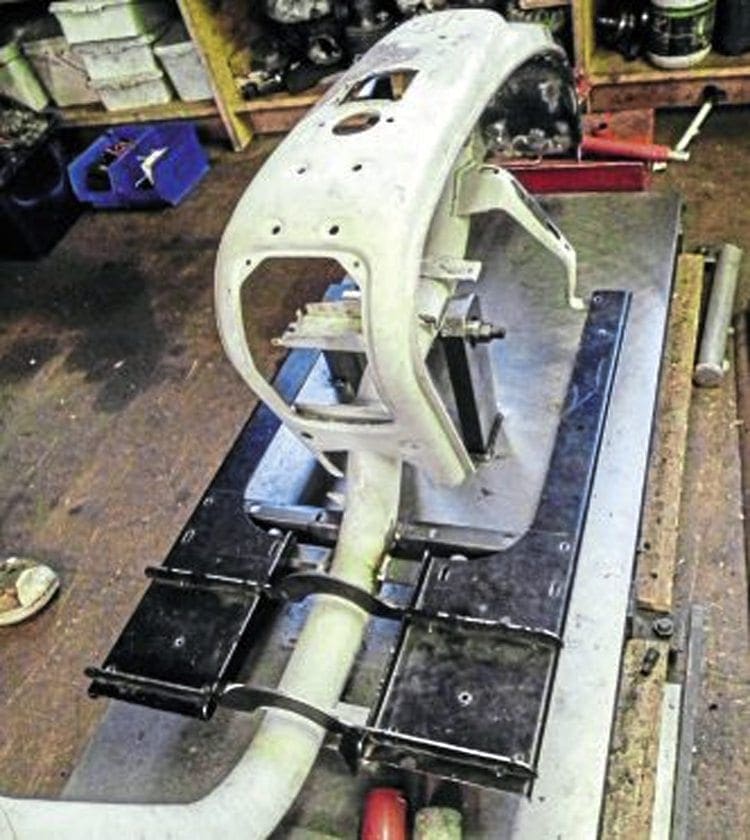
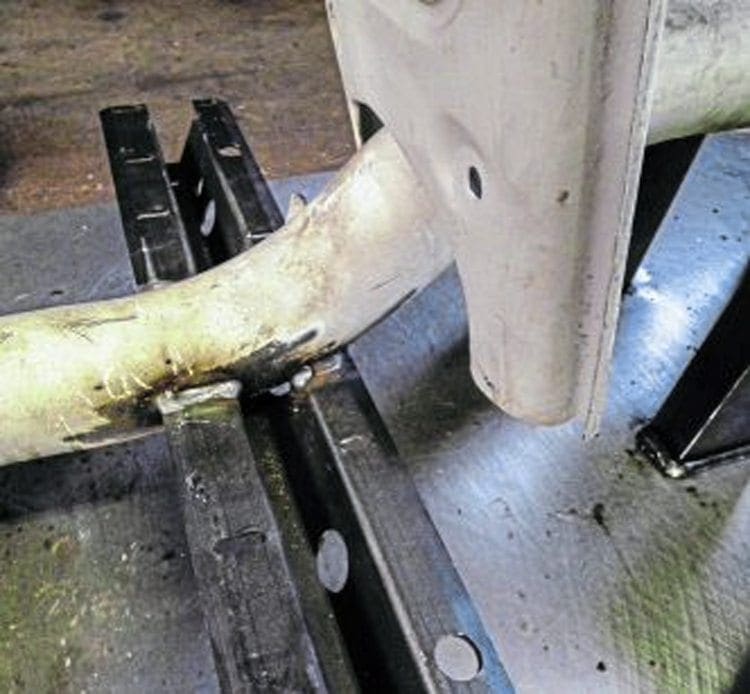
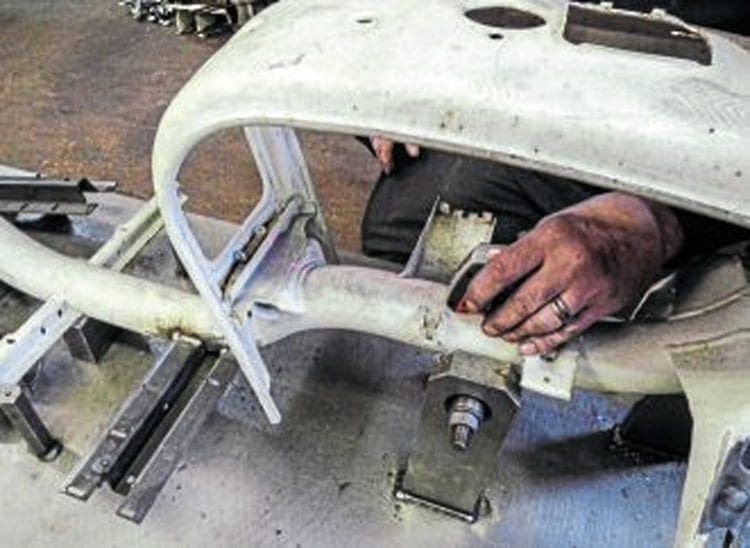
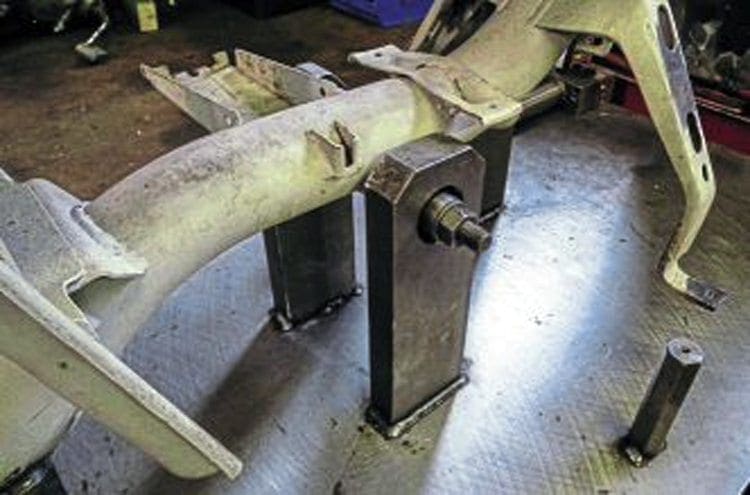
John took an Italian GP frame and showed us exactly where he would start to measure up once it was placed on the jig. The first step is to secure the frame by placing a bolt-through engine mounting tube and the two supports on the jig bed. From here it is possible to push the front frame support up against the fork stem to give an initial idea of whether the front end is out of line. The front support is fastened to the bed by means of four Allen screw bolts that should be central in their respective grooves when fixed. If the frame is straight it will fit in perfectly in all three recesses on the support. If it is out the fork stem will need bending back into place. How do you do that though? Hitting it hard with a hammer will only cause more damage. John used a simple bit of physics and came up with the idea of using leverage. By fixing a set of steel poles together and inserting them into the stem, pushing forwards or backwards from the top of the pole exerts several tonnes of pressure and thus allows you to bend the stem back into its correct position. This way there is no damage incurred as you are only flexing the tube. In the case of a tube that is considerably out of line, it does require checking to ensure there are no cracks in the weld. If there has been a heavy impact at some point it is not always possible to straighten the stem out completely so John will weld another one on in its place instead. This is not as difficult as it sounds as the jig will make sure it is welded in the correct position.
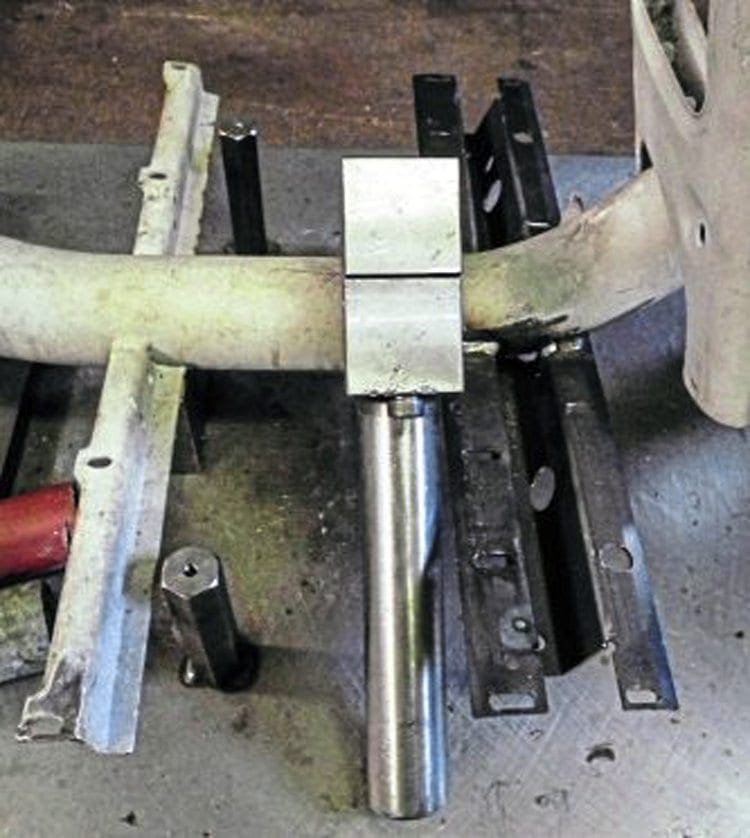
Central tube and top shell
If the central tube is slightly out then it is possible to correct it by fitting a purpose built clamp and again use the leverage method to straighten it out. The next part is the top shell which can be a nightmare if it is damaged. John noticed that while this may be the case if someone has re-welded one on in the past, even those produced in the factory were sometimes not that accurate. If it is out then detaching and welding back on is the only option. By using a laser marker it is possible to see how far a shell can be out and whether you have it perfectly in line when welding it back on.
The positioning of the engine mount tube can make all this a problem though. John has known these to be up to 0.8cm out in height — and they were made like this at the factory. This is more common on GP frames and makes you wonder how much standards had slipped at Innocenti as Lambretta production ended.
This explains why sometimes a TS1 inlet manifold can rub on certain frames and not others. It also highlights why in certain cases the head cowl can catch on the bottom of the outer shell by the choke. Again there is nothing that can be done about this and John has learned by experience how to work round these problems. It also shows that there is no exact set of dimensions that can be worked to, as every frame has the odd deviation in measurements from the next one, so no two are the same.
Frame struts
The matter concerning frame struts is not as complicated as the main tube but still requires some careful attention to make sure they are right. The most important and the one that usually suffers damage is the central stand strut. Quite often these have cracked in the middle over many decades of use and are often welded back up, usually out of line. John has found the best process is to grind it off completely and replace it with one of the good quality remade ones.
Using the old weld line as a guide as long as it was the factory one, the height can be near enough judged correct. However, he has made a template to help with positioning it in the right place with the height checked by means of fitting a foot board and side panel to make sure they don’t foul when in place. One thing that can cause a problem is when doing the final weld after initially tacking it on. There can be a tendency for the strut to bow as it is welded and begin to stretch. John got around this problem by making a solid brace bolted to a stand and then the strut. This prevents the strut from bowing as it is held securely during the welding process.
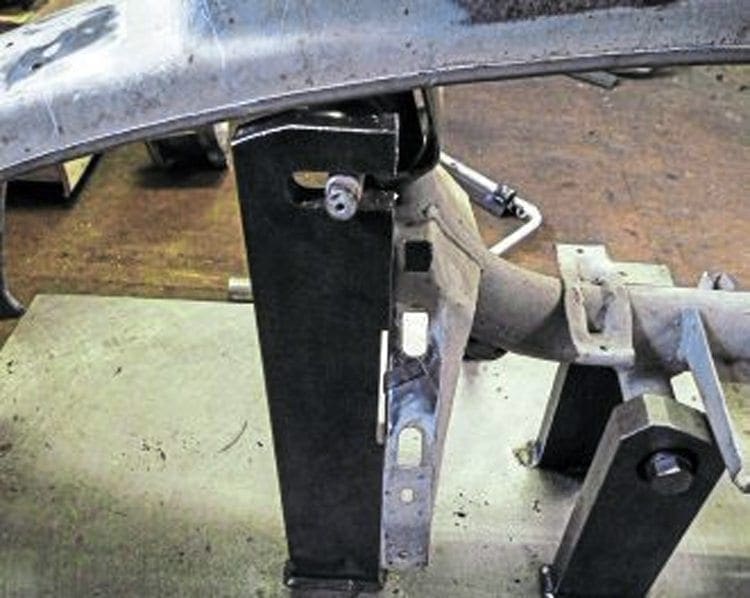
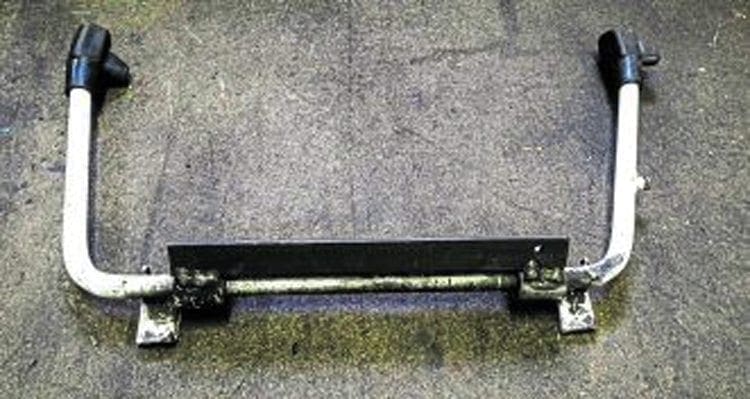
Finally in this area are the two footboard supports welded to the mid-section of the tube. These are prone to going out of line especially if the frame is bare and has been lying around for years. John prefers to leave them as they are, opting to straighten them out with heat and bend them into position using the template as a guide. However, in some circumstances, they have been cut off (the 1980s has a lot to answer for) so it is a case of finding donors to weld on.
Frame shell and fine tuning
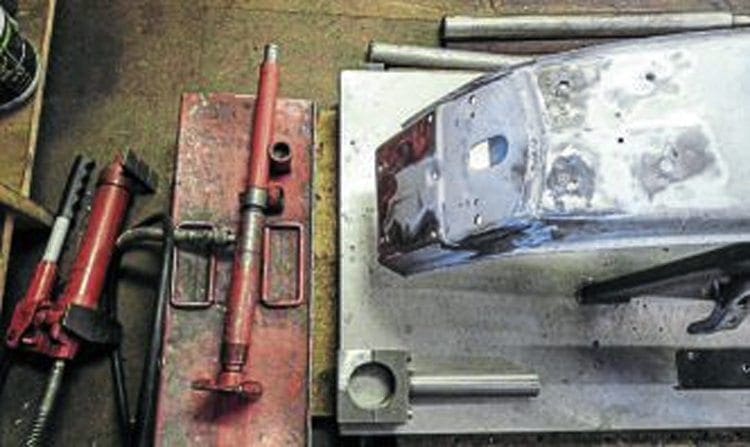
The top frame shell of the Lambretta gets its strength by means of the curved angle where the side panels fit. While this if fine any impact at the back can cause the number plate are to fold in easily. To push the frame back out John uses a hydraulic jack to get it near enough into shape.
Any fine tuning getting the creases out can then be done using a hammer and dolly combination. The jig comes into play as it holds the frame securely in position while this process is being carried out, as with any other small repairs that are required on the shell.
Costs
So what does it cost to straighten out and repair a frame? Well, it all depends on the level of damage it has suffered in the past. If it’s in good condition and you want it checked for trueness, it’s not going to take as long as one which is visibly bent. John therefore works on an hourly rate which is well worth the money. At least you know afterwards that your Lambretta frame will be in the best shape possible before you get started on the rebuild. You can contact John at Urban Scooters on 0121 773 0706 or find them on Facebook.

Words & Photographs: Stu Owen

Enjoy more Scootering reading in the monthly magazine. Click here to subscribe.
Scooter Trader