This month: Cable bust or in need of replacement? Gears not selecting properly? Cables are the most seemingly innocuous item on a scooter, but when badly fitted or maintained can be the cause of many problems.
Time to take a look at setting them up properly, once and for all.
The job of the Lambretta cable system is to link the hand/foot controls to the relative mechanical items which drive and stop the machine, and with only six cables required to do so, the simplistic design works well… if looked after! Quite often this is not the case, and as the cables are constantly in use it’s usually out on the road where one gives up and lets you down. However, with routine and regular maintenance they will give the rider thousands of trouble free miles. From time to time it may be that cable replacement is required and this can sometimes give owners problems if they are unsure of how to route cables or set them up properly.
Enjoy more Scootering reading in the monthly magazine.
Click here to subscribe & save.

In this article we will look at the four cables required to drive a Lambretta. The clutch, throttle and gear cables. The easiest way to get started is to separate them and fit in the following sequence: both gear cables followed by the clutch and finally the throttle. Trying to fit them all in one go can lead to confusion and frustration as you struggle to route them properly.
Gear cables
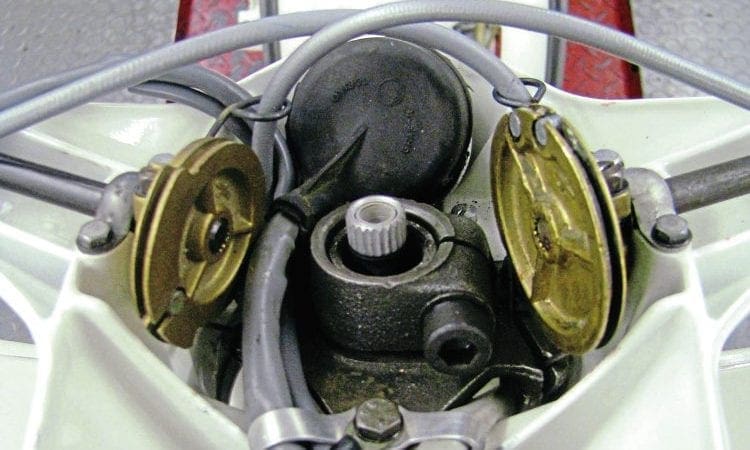
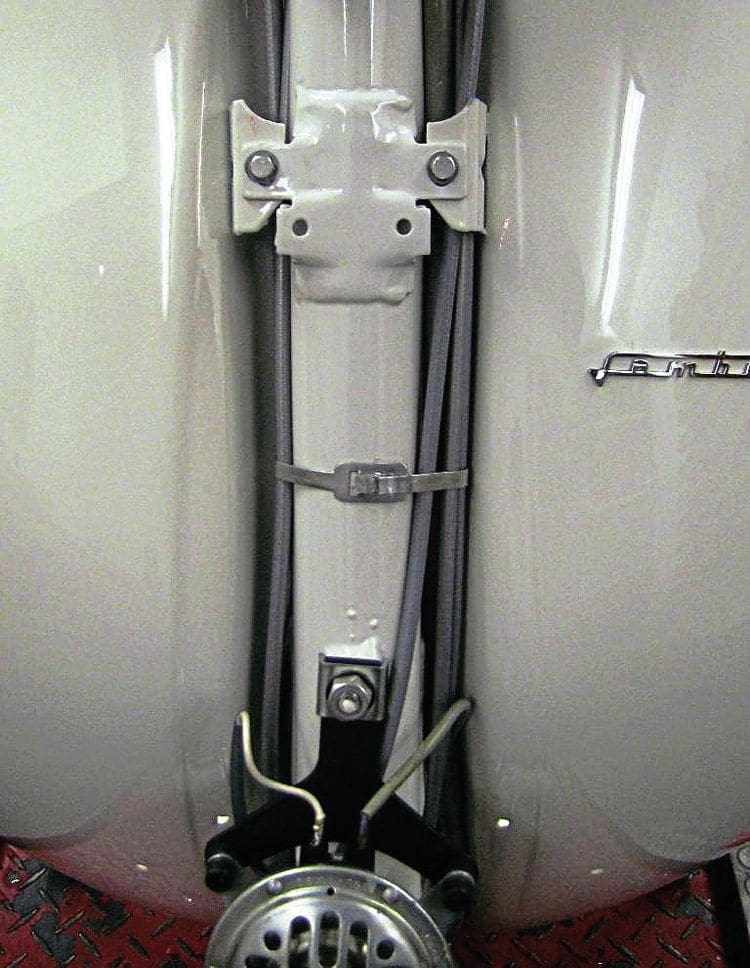
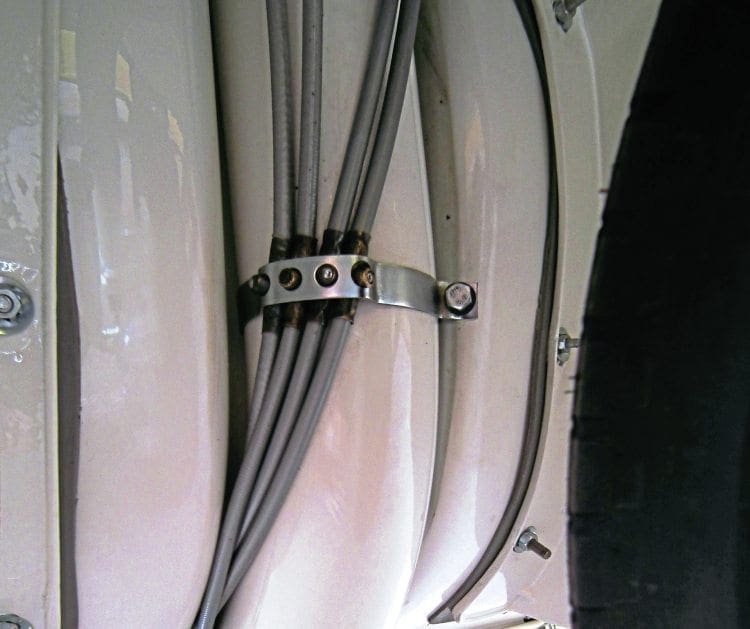
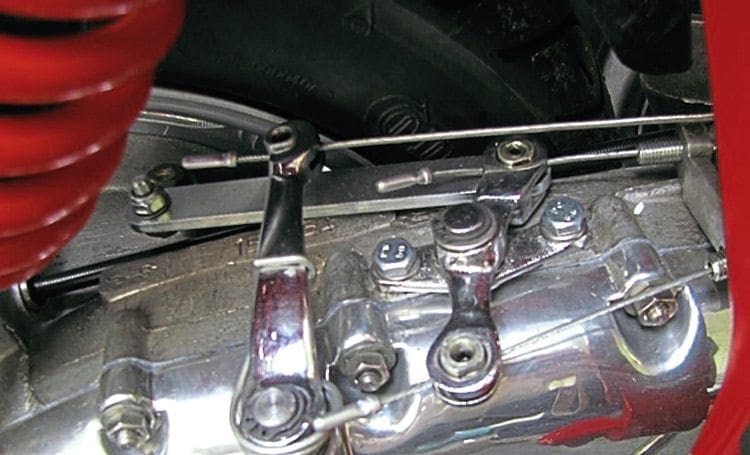
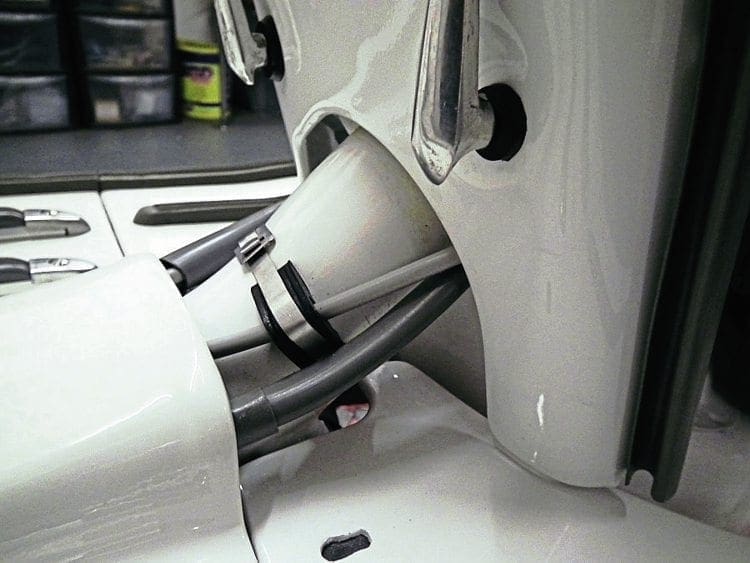
Before starting to fit the gear cables or clutch for that matter, make sure the adjuster block is in good condition. If the adjusters have become rusty or dirty clean them fully and grease the threads. At this point wind the adjusters fully back so you have full adjustment on them. Sit both outer cables in to their respective housing in the head set clamp. With the inner cables fully lubricated slot each one in to the pulley holes. If the holes on the pulley or the split pin fixing are worn, replace the pulley as this will give excessive play between the gears. Feed the outers down the left hand side of the fork stem and cross them over the main frame tube to the right hand side just below the bottom fork bearing. From there they sit just above the legshield and stand supports, looping over the rear brake housing on the frame. They then pass around the side of the head cowl feeding though a 10cm long protective shroud where they finally feed into the adjuster block.
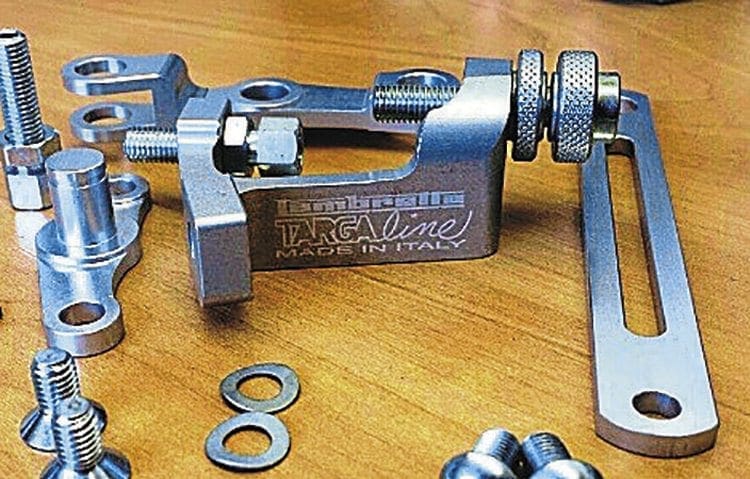
Now to make sure you have the cables the right way round. Looking down at the pulley in the headset, the cable that sits in the top hole feeds in to the inner adjuster on the block. The cable that sits in the bottom hole on the pulley feeds in to the outer adjuster on the block. Feed the inners through the cable trunnions on each side of the pivot on top of the casing but don’t tighten up. Make sure the small disc that sits underneath the grub screw in the trunnion is present. If not it can start to cut in to the cable when the grub screw is tightened, causing it to snap over a short period of use. A good tip is to make sure all the linkage is free from wear as now would be a good time to change it. This includes both pieces of the pivot and the tie bar which is the most common for wear. Also make sure the trunnions are free from grooving on their outer surface especially the one connected to the tie bar. Replace if necessary. If replacing a trunnion, make sure the Allen key size in the top is the same diameter; this goes for the clutch as well. Some use a 3mm Allen key and some a 3.5mm. It can be a nightmare if you are out on the road and discover you have the wrong fitting Allen key because you have mixed up the sizes.
Making sure that the outer ends of each cable are fully seated in their respective housings, it is time to tighten them up. With the engine in neutral, get someone to hold the gear changer in neutral on the headset. You can do this yourself but it is easier if someone else is holding it to stop it moving as you pull the inner cable taut. Start by tightening the inner trunnion on the pivot and once that’s done check to see it selects first gear. Next, tighten the outer trunnion. As it’s pulled tight, the gear changer should remain in the neutral position on the handlebars. If so, you have correctly fitted your gear cables. As a check you can push your Lambretta along with the spark plug removed to make sure you can get all the gears in their correct positions.
Clutch cable
The clutch cable sits in its housing inside the handlebar gear change loops across the headset and down the right hand side of the fork stem. From then on it follows the same path as the gear cables also through the protective shroud before getting to the adjuster block.
If there is excessive pin wear either on the changer or the lever itself this can be remedied by buying an oversize lever pin and re-drilling the hole. Take care if doing this and make sure you have the correct diameter drill. Where the outer cable sits inside the gear change, always check inside for debris. This can be old pieces of the plastic outer from the cable or its steel end. If there are any obstructions it is possible to cause the new cable to be fitted without it being seated properly in the housing and going slack when the cable is operated.
With the outer cable in position, slide the inner cable all the way through so it exits the adjuster on top of the engine casing. Make sure the cable is fully greased and more so where the clutch lever sits in the gear change. At this point fit the lever pin and tighten it up. Before fitting the trunnion you will want to make sure both ends of the outer are fully located in their respective housings. By holding the end of the inner in a set of mole grips and pulling the cable taut, depress the clutch lever. If one of the ends of the outer cable is not sitting fully home this will push it fully into place. Don’t worry if the end of the inner cable has been crushed a bit as this will be cut off to its correct length after fitting.
Before positioning the trunnion, turn the adjuster on the block out by about 4mm. This will allow you to slacken the cable off slightly just in case it is a bit too taut when fully tightened. With the inner cable tight, push the clutch arm on the casing forward till it stops. Take a marker pen and mark the cable where the trunnion will sit in the recess of the clutch arm. Now tighten up the trunnion where marked enough so it won’t slip on the cable. To now sit this in the recess the arm needs to be compressed. There are a few aftermarket tools for this procedure but if you don’t have one it is possible to move the clutch arm forward by using a big set of pliers or mole grips. Though this isn’t the conventional way of doing it, it does work. If using this method though, place a piece of cloth between the jaws of the pliers and the clutch arm to make sure it isn’t marked. Once compressed, you can slot the trunnion in to position on the arm with ease.
When you are happy that it is in the correct position, fully tighten the trunnion and check to see where the biting point of the clutch is. By selecting first gear then pushing forward you will be able to find the point where the clutch disengages the engine. If it needs adjusting either way this can now be done on the adjuster block. Remember you don’t want the cable to be taut like a piano wire or likewise so slack that the clutch will drag. You will find that after a few miles the new inner cables will stretch slightly and may need a slight adjustment. This also goes for the gear cables and hence the need for the adjuster block.
Clutch and gear cable finishing — points to note
Now that all three cables are correctly fitted, finish off by cutting the end of the inners to the desired length. This wants to be around 3cm where they exit the Trunnion. Cut any excess length off with good quality cable cutters. Anything blunt will cause the ends to fray as they tear.
To stop fraying afterwards, you can solder the ends of the cable but it is easier to place an aluminium cable cap on the end and crimp it over. These are readily available to purchase from any mountain bike shop and simple to use. Sometimes a method of tying the ends up in a loop is used. This can often look messy and get in the way when doing maintenance. They can also come undone and possibly rub and cut in to the outer wall of the tyre.
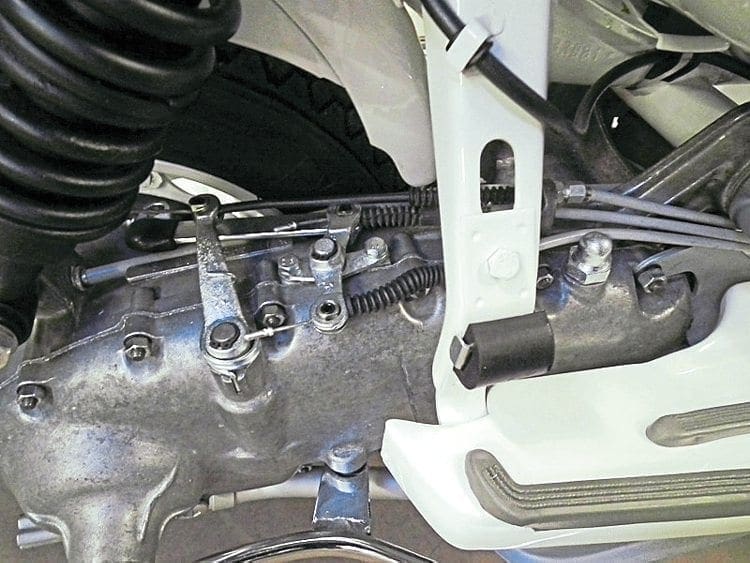
Another point to note is that the routing of all threes cables out of the shrouding comes around the head cowl at a slight curve to give them the most natural line to the adjuster block. At no point should they go over the engine as is sometimes seen.
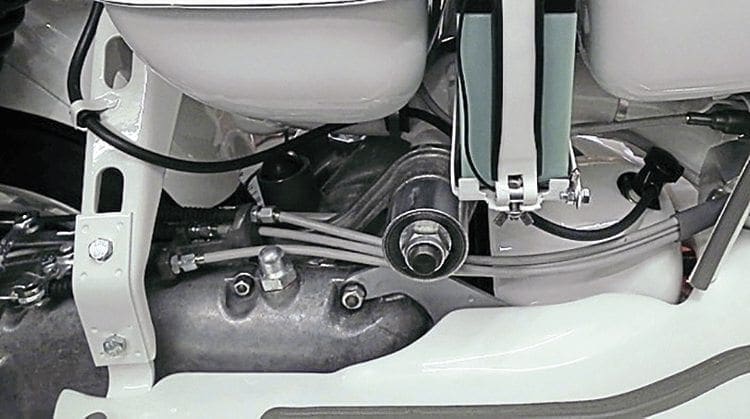
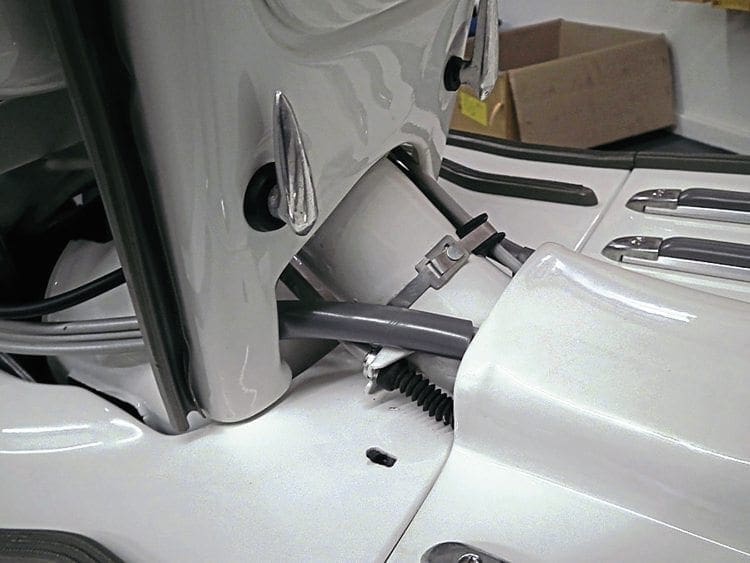
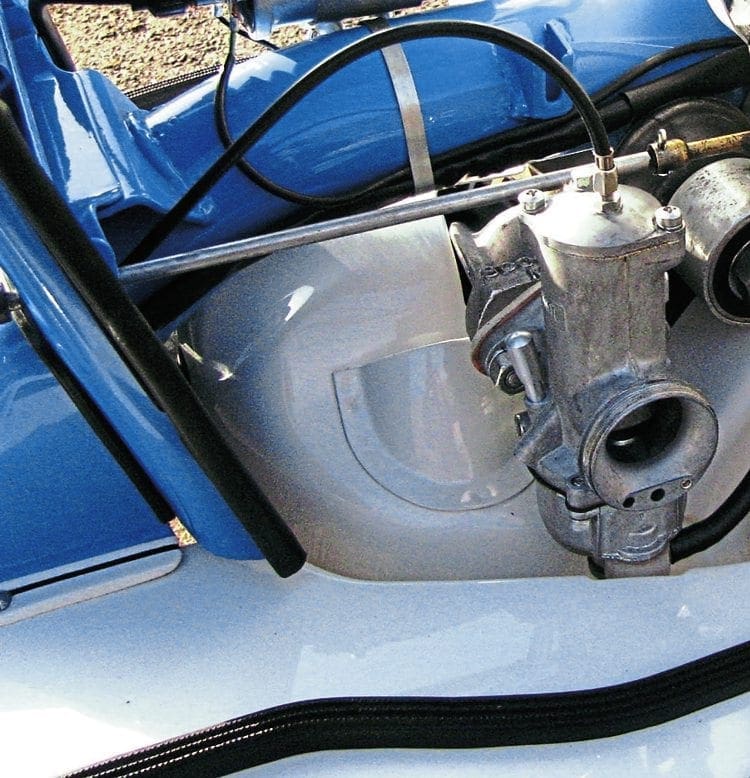
As the engine flexes with the rear shock absorber this would cause the cable to pull taught as they pivot over the engine mount. This can cause the clutch to slip as it would pull the clutch arm in by itself or put unnecessary strain on the gear linkage, causing the engine to jump out of gear. If you have an engine where the carburettor exits on the right hand side, for example a TS1, then it’s best to make the curve around the head cowl as shallow as possible. This will prevent them rubbing on the carburettor which could cause it to be pushed off or worse split the mounting rubber. To get the curve shallower may require the outers to have a slightly shorter length. This is done by cutting a centimetre off the ends and needs to be done during the initial routing of the cables.
One final note is the use of cable shrouds where the inners exit the adjuster block as fitted in the factory. From a purist point of view they look good but can become a problem as they compress especially on the inner trunnion of the gear pivot. If having to change a snapped cable on the side of the road it is also another obstacle to contend with as you have to feed the new cable though it. Fitting them is a personnel choice but as long as the exposed inner cables are greased there is no actual need for them to be fitted.
Throttle cable
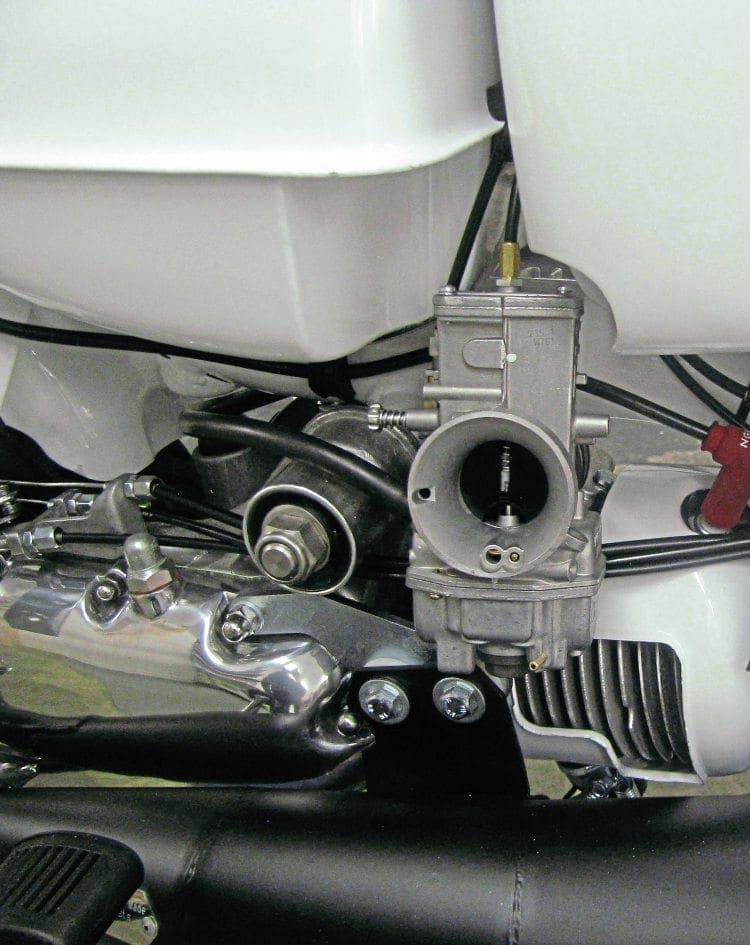
The throttle cable can be a real problem as there are so many possible lengths it can be. If you buy a cable kit it will have a standard Lambretta throttle cable. Chances are if you have a standard engine the cable will be a near enough fit. The problem is though so many owners have cylinder kits with different carburettor types and positions there is no defined length. With the trend these days to fit a long range tank it may also be the case that throttle cable routing needs to come in at a different angle.
The easiest way to get the correct length inner and outer is to make your own custom cable and it’s easier than you might think. Either from the internet or any good mountain bike shop, purchase 2.5m of outer cable and two steel ends. For the inner cable use a mountain bike gear cable, the end should fit nicely in to the throttle slide. As a note here if you are routing round a long range tank, and the outer may be longer, it may be better to purchase a tandem gear cable inner as the standard mountain bike one may be slightly short. The tandem cable will be too long but is simple to cut to the correct length afterwards.
When routing the throttle cable outer, start from the head set first where it then follows straight down the right hand side of the fork stem. It will then meet up with the clutch and gear cables and follow the same route over the front leg shield support. If the carburettor is on the traditional side it is at this point that the cable crosses over the top of the frame tube to exit above main stand strut and up to the carburettor. If the carburettor is on the right hand side then the cable will continue on the same path as the clutch and gear cables and before going up to the carburettor.
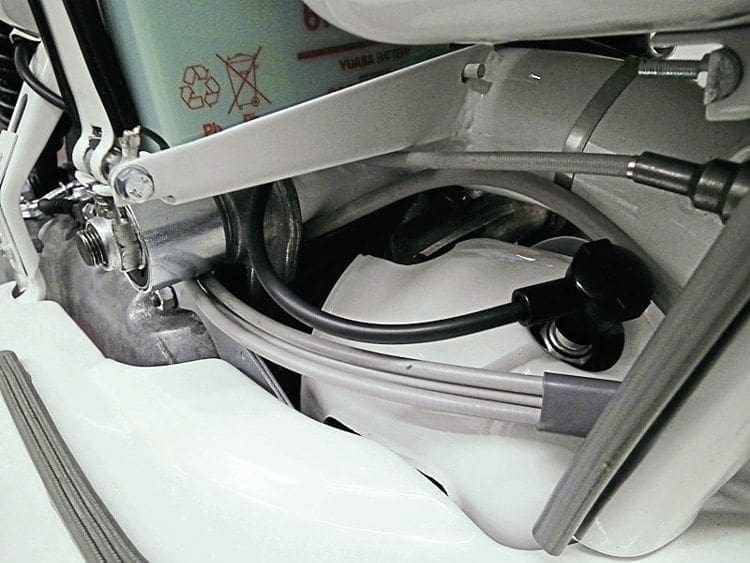
Where the cable goes up to the carburettor try to make sure it has a nice curved loop. If the loop is too short or sharp this can stop the cable running smoothly and stop it from returning on its own. Once happy with the routing of the cable, cut it down to its correct length and fit the steel ends. Now feed the inner in to the outer from the slide in the carburettor up to the headset. On the throttle pulley use a small brass trunnion with a screw adjuster and feed the inner cable through the pulley grove and trunnion. Make sure the throttle is in the fully closed position and pull the inner cable taut.Now tighten the trunnion and you will have the correct length throttle cable.

Note that when pulling the inner taught don’t overdo it as the throttle will start to open. As a check, if you turn the headset to the left hand lock look at the throttle slide. If it is too tight you will see it open on its own even if the throttle remains in the closed position. It is always best to fine tune the length of the cable with the adjuster on top of the carburettor to get the desired length rather than have it too short in the first place.
Periodically lubricate the cable at the pulley end either with a small amount of grease or a spray lubricant. If the throttle cable is going to snap then this is usually where it happens. Likewise if you see any fraying of the cable in this area replace it immediately as it could let you down at any point. From a safety point of view, if the inner is frayed badly then it can catch on the outer cable which may cause the throttle to stay open — which can be dangerous.
Words & Photographs: Stu Owen
This article was taken from the October 2016 edition of Scootering, back issues available here: www.classicmagazines.co.uk/issue/SCO/year/2016

Enjoy more Scootering reading in the monthly magazine. Click here to subscribe.
Scooter Trader