Words & Photographs: Stu Owen
Quite often when doing routine maintenance mistakes are made which can lead to unnecessary breakdowns. Here are a few simple steps to avoid them happening…
It’s time to bring your Lambretta out of winter hibernation. Even if you have left it in warm dry conditions there is every chance some minor maintenance will be required.
Enjoy more Scootering reading in the monthly magazine.
Click here to subscribe & save.
Sometimes the eagerness to get back out on the road can lead to getting sidetracked while carrying out those procedures, leading to a breakdown later on. Here are a few simple steps and reminders to make sure that this doesn’t happen.

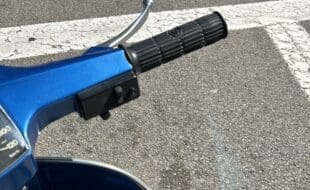
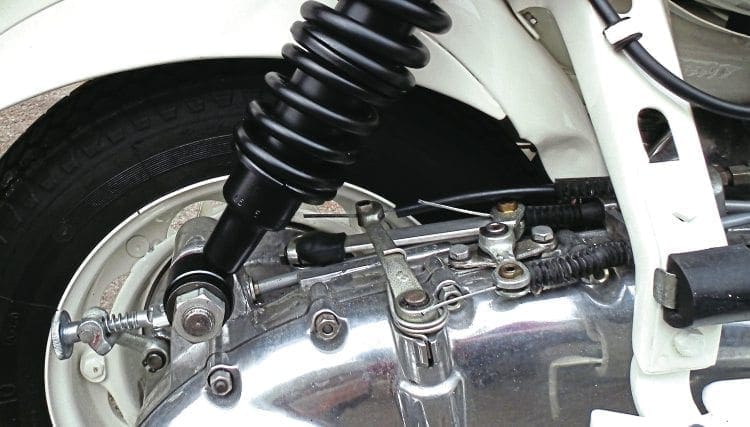
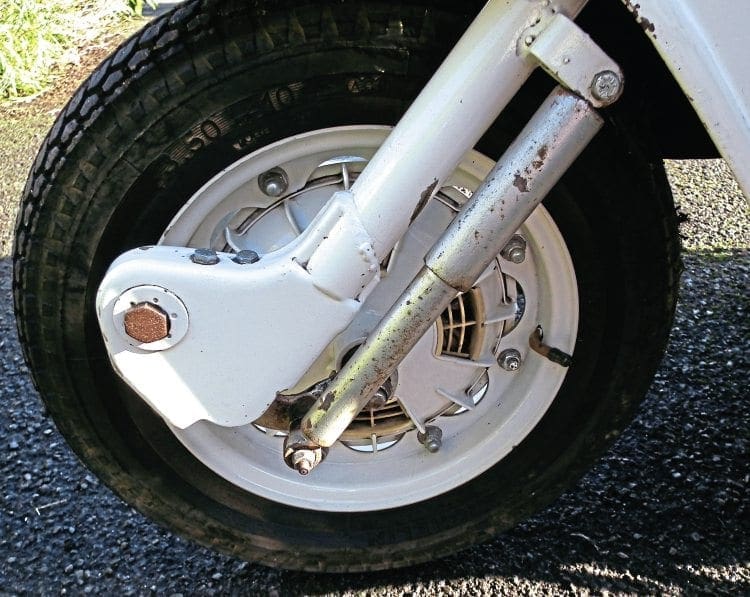
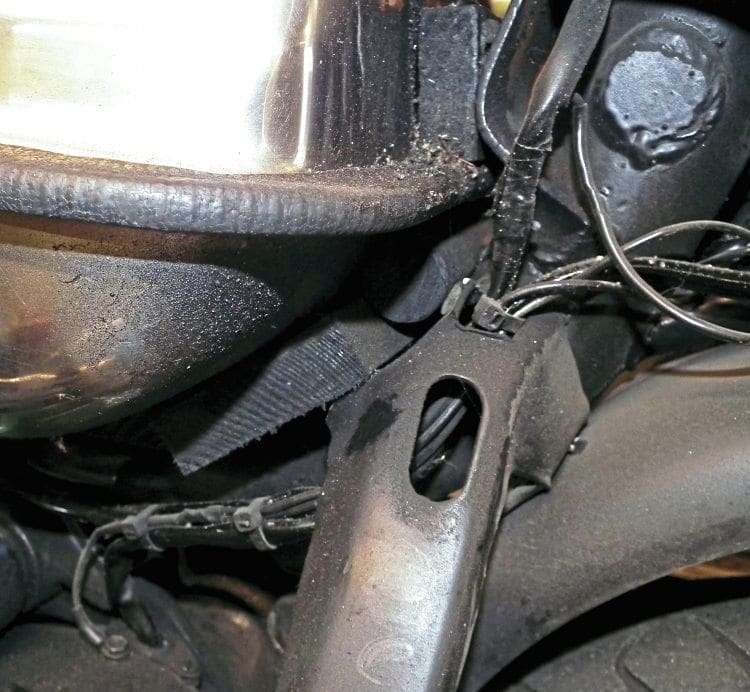
Front brake and speedometer cable
Quite often it will be necessary to remove the front wheel. Whether it’s for a tyre change or servicing of the brake, this will involve removing both the front brake and speedometer cable.
Once the maintenance has been carried out both cables will need to be put back into their respective clips on the forks. While it is easy to remember the clip on the fork link pivot bolt, quite often the one at the top of the fork stem is forgotten — most probably because it is out of sight.
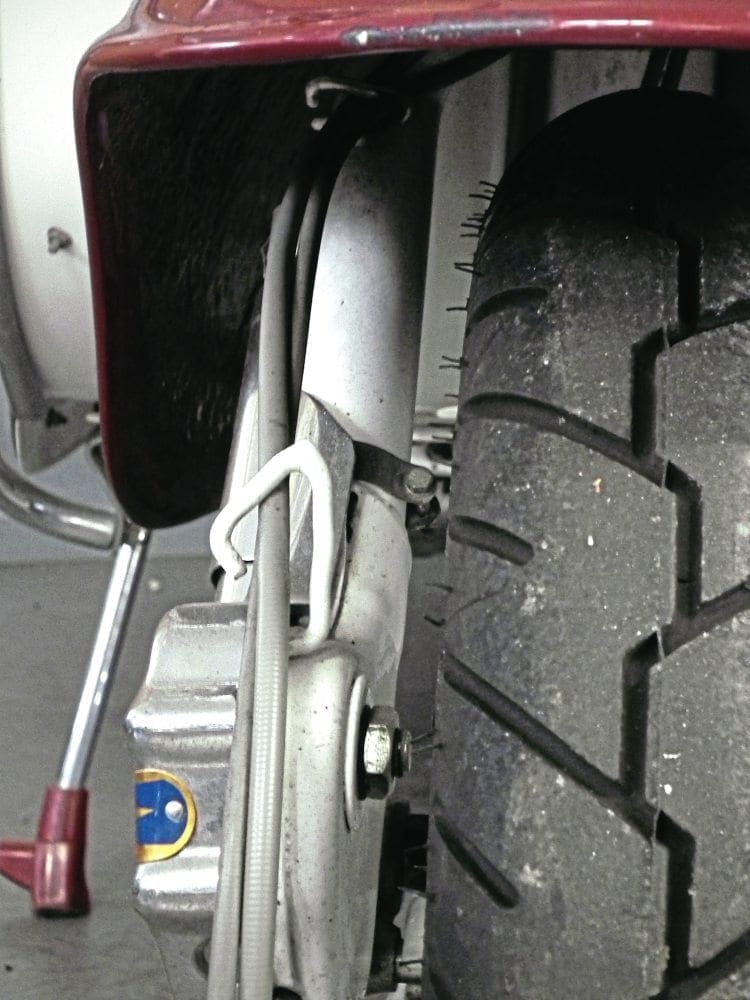
More often than not it is the brake cable that is not put back in place as this is the most likely one to be removed during servicing.
If the cables are not put back inside the wire clip then they will run very close to the front tyre. This can cause wear on the tyre surface which is dangerous. A much worse scenario is the possibility of a cable catching the tyre, resulting in it wrapping around the wheel.
If it does then the brake cable will immediately lock the front brake which can have dire consequences. So when both cables have been removed for whatever reason, always make sure they are put back correctly inside both clips.
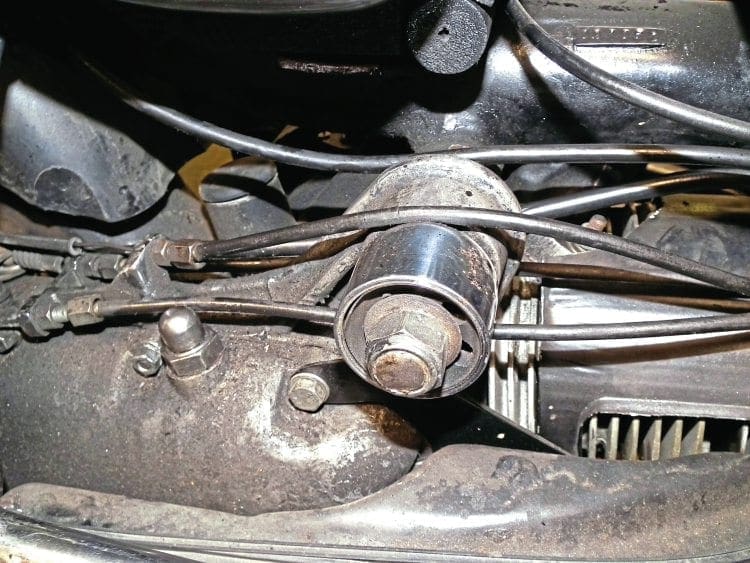
Cable routing and finishing off
The cable that takes most strain is that of the clutch; the reason being it is the most used and has to compress the tension of the clutch springs. Therefore chances are it will need replacing more often than any other.
A problem can arise with the inaccurate rerouting of the cable. The outer quite often needs removing from its trunion housing to allow the inner to be fed through the end. Sometimes more in haste than anything else the outer is not put back in its proper place underneath the engine mount but instead above it.
If this happens then chances are there will be too much tension on the cable certainly as the engine swings with shock absorber movement, allowing the clutch to depress without you knowing it. This can lead to the clutch burning out especially if you have changed the cable on a long journey and not realised what you have done.
So remember, if doing this in an emergency on the side of the road always make sure the cable is routed underneath the engine mount.
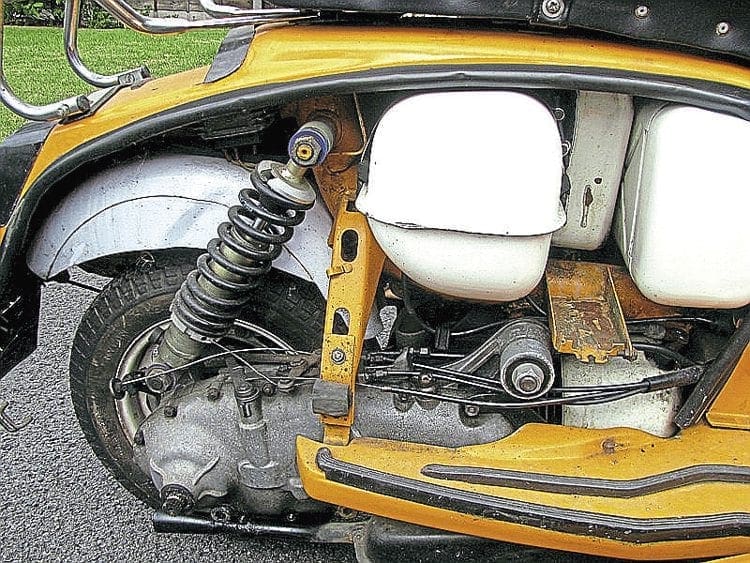
When fitting new inner cables on the clutch or the gear controls always cut the ends to a short length. If you don’t then they can easily start to rub on the tyre and if they fray cut into it. It is also possible that if the shock absorber is removed then the inner can get pinched between the casing and the absorber.
This will mean you won’t be able to select a gear or depress your clutch depending on which one is trapped. If you have changed a cable on the side of the road but don’t have a cable cutter to hand then wind the excess up in a loop to prevent these problems from occurring until you get home.
Finally on the subject of cables is lever pins. When either the clutch or the front brake cable is replaced then the lever pin will need to be removed to change them. Quite often it is easy to forget to put on the retaining bolt or do it up tightly as it is out of sight. This is more common if out on the road as you are usually in a rush to get going again.
A problem can occur where the lever pin pops out of its housing meaning you won’t be able to use the clutch or front brake. Not only is this dangerous but it will mean you can’t continue your journey because of something so small. Always remember when you have removed a lever pin to do it up tightly afterwards.
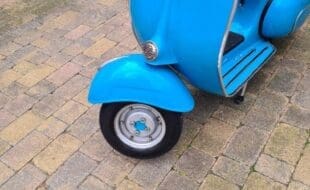
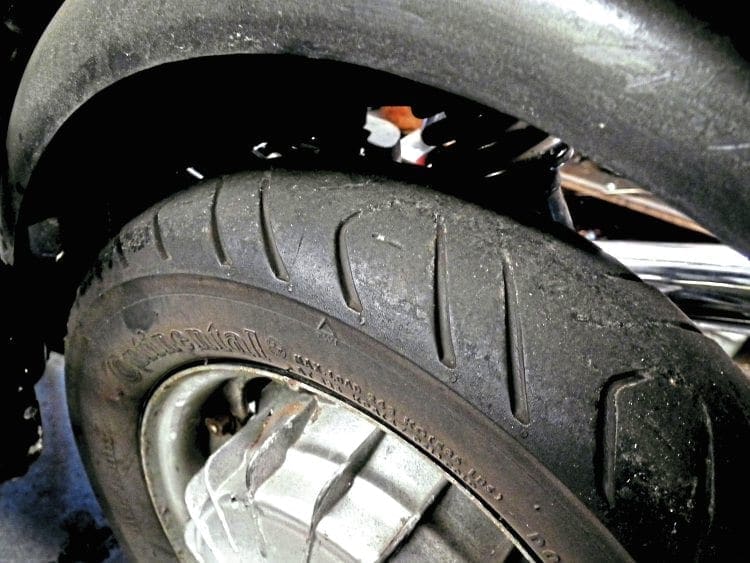
Tyres and wheel rims
When it comes to tyres then you should always check to make sure there is enough tread available on the tyre surface. Not only is it illegal but also dangerous as a stone can easily puncture the thinly worn carcass of the tyre, causing rapid deflation or even worse a blowout.
The rear tyre is always more prone to wear due to the extra load it has to take. Where it’s possible to make a mistake or misread the life left in a tyre is before a long rally or journey. Due to the extra weight or load due to a passenger and possibly luggage then the wear rate will be greatly accelerated.
If the tyre is already well-worn, change it before making a long journey or chances are by the time you are back home there won’t be any tread left.
If you do have to change a tyre then always remember to tighten up the four wheels nuts. Any distraction while doing this means you can easily forget to tighten them fully. This can easily happen if changing a spare on the side of the road.
If just one of the four wheel nuts is not fully tightened it can cause the other three to come loose over a long distance. Again, before setting off remind yourself to make sure everything is tightened up properly.
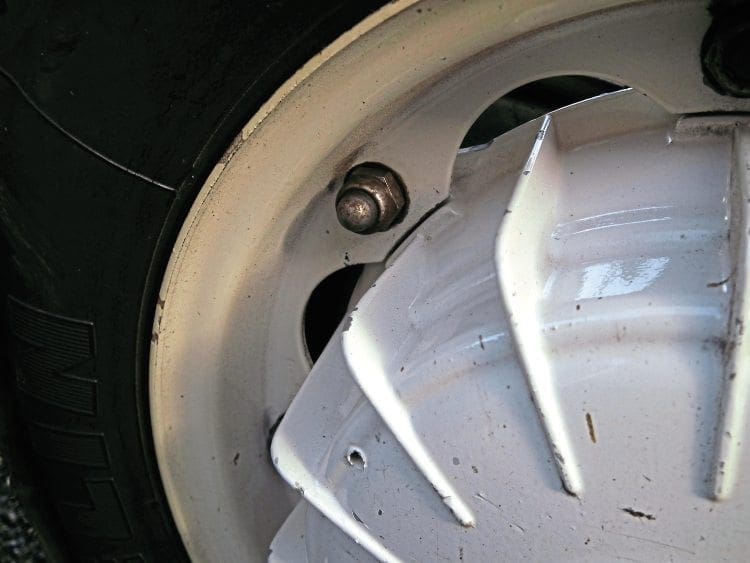
Air pressure always drops from a tyre and they will need checking and topping up at regular intervals. If doing this at a petrol station it is easy to forget to refit the dust cap afterward.
It may not seem like much at the time but once out on the open road a small stone or piece of grit can fly up and wedge against the valve, causing deflation. So always remember when you have checked or topped up the air in both tyres to refit the dust cap.
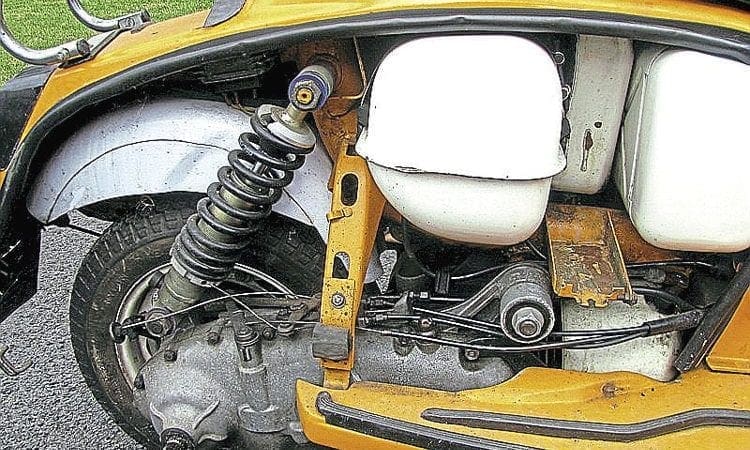
Stator wires
The wiring loom from the stator plate travels up the frame tube underneath the petrol tank and to the back of the frame where the rectifier and CDI are located. It may be that you have had to remove the stator at some point and need to re-feed the wires back underneath the petrol tank afterward.
This is not the easiest job to do so often the easy option is taken by feeding them through the top hole in the footboard strut. This hole is used to hold the petrol tank straps in place which has sharp edges. If the loom is routed through there then it is possible for it to rub against one of the edges and cut through a wire which will either leave you without a spark for the ignition or without power for the lights.

Feeding the loom under the tank is more of a problem because of the four connectors on the wires but there is a solution to help make it easier to do. Put a cable tie around the four connectors tightly and then cut the end off flush. Take another cable tie and tie it around the loop of the first one.
Don’t cut the end off this one as this is then used as a guide to feeding it through the gap under the petrol tank. Once it has come out at the top, continue to pull it and this will be followed by the loom. Once the loom is exposed at the top the rest of it can easily be pulled completely through ready to be reconnected.
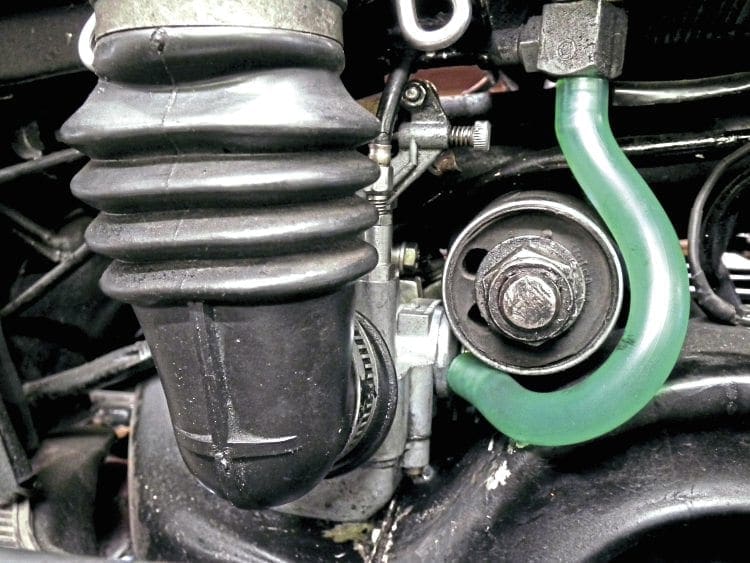
Petrol pipe
Quite often the petrol pipe between the tank and the carburettor will either need replacing or removing. If it only needs removing as you are servicing the carburettor then it is possible the end of the pipe will snap off.
If this happens don’t just refit the same pipe as more than likely it will now be too short. This means that it will have less room to go round the engine mount and may foul it. From there it can rub against the mount and will cause it to split at some point, causing a petrol leak which is not advised.
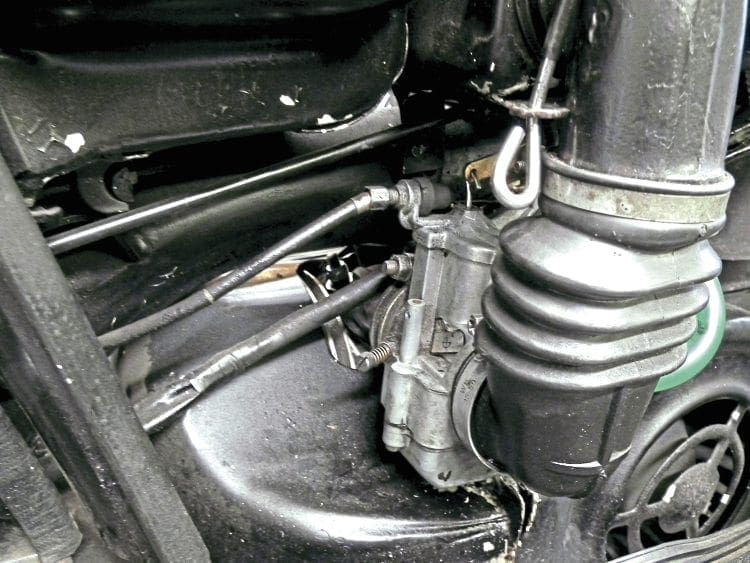
Petrol pipe is cheap to buy so if you have to remove it for whatever reasons just replace it. Always carry a spare piece of pipe in your toolbox as you never know when you might need it and it is an essential spare for long distance journeys.
If you don’t have any spare pipe and need to remove the carburettor out on the road there is another option for removing the petrol pipe. This can be done by undoing the banjo so the pipe itself doesn’t need to be pulled off.
This will mean that the carburettor clamp bolt will probably need to be undone to angle the body so you can gain access to the banjo bolt. If that is the case don’t forget to re-tighten the clamp bolt, otherwise the air can be sucked in causing the mixture to go weak which will cause a seizure or even worse hole the piston.
Checklist
When carrying out any Lambretta maintenance it is easy to get distracted. Whether it is the phone ringing or someone talking to you it’s easy to get sidetracked and forget something. Make a checklist so nothing is forgotten.
Rather than write it down, try to do it mentally in your head. That way you will be less inclined to forget anything. Also if you’re out on the open road you won’t have the option of writing it down so will have to do it by memory.
If you do make a mistake and at a later point it causes a problem like the ones mentioned, don’t get too upset about it. Learn from it and move on.

Enjoy more Scootering reading in the monthly magazine. Click here to subscribe.
Scooter Trader