Lambretta engine mounts do an important job but more often than not are left neglected and overlooked. This can lead to a number of surprising problems…
The purpose of the Lambretta engine mount is pretty simple: to stop the vibration from the engine through the frame and in turn to give a much smoother ride. Until the Series 3 Lambretta was introduced the engine mounts were flush with the casing but with more powerful engines being produced they were extended like the ones we see today. Though the narrower engine mount is still available they are seldom used unless fitted to a factory spec restoration. For the benefit of this article, we will focus on the S3 type, even though the removal and fitting process of both types is exactly the same.
Problems and diagnosis
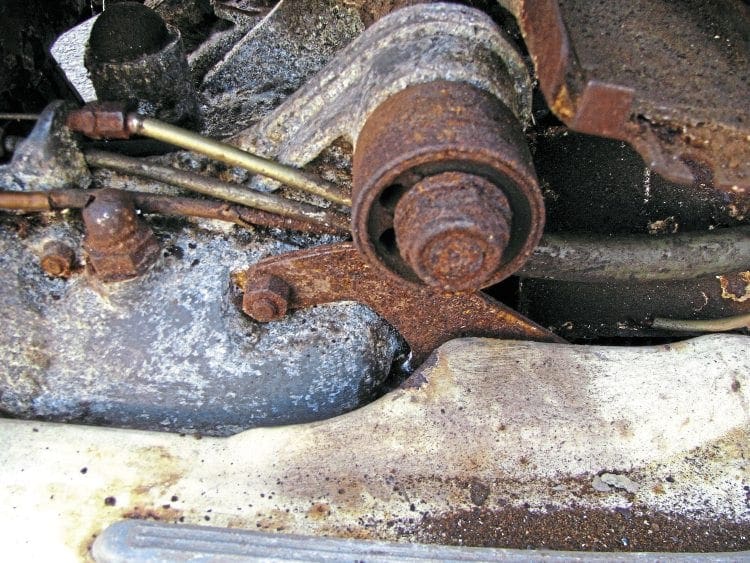
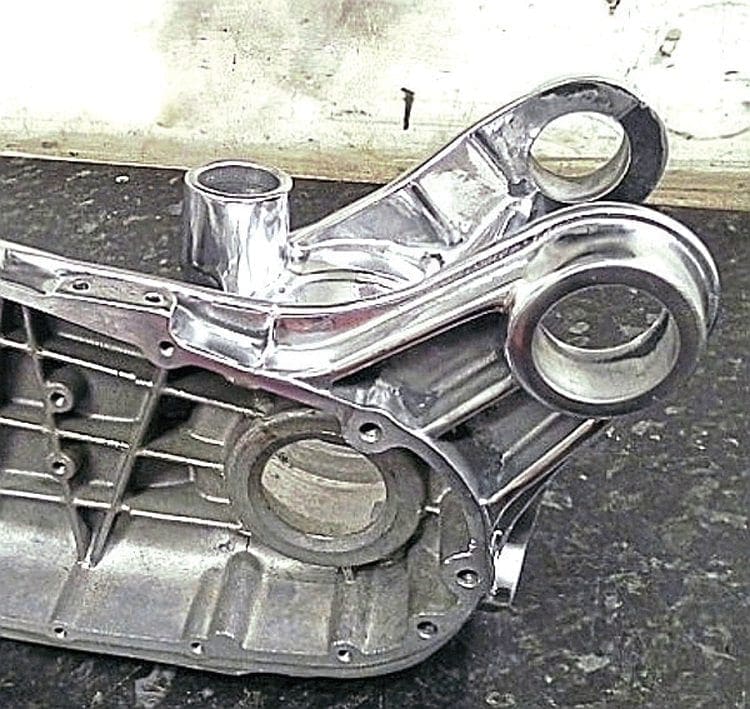
The engine mount is an integral part of the Lambretta swingarm system and allows the engine mount bolt to move freely while the mount itself stays static. Working as a pair on either side of the casing they also allow a certain amount of flexibility between the mounts and the shock absorber. Examples of this are when cornering or during hard acceleration as the engine tries to twist. Though the mounts have a hard life they should work flawlessly for several thousand miles. Problems can occur for several reasons and the most common is the fact that they have been fitted for several years so the rubber has started to perish. Another reason is the engine has been highly tuned, putting more force on them causing excessive wear.
Enjoy more Scootering reading in the monthly magazine.
Click here to subscribe & save.
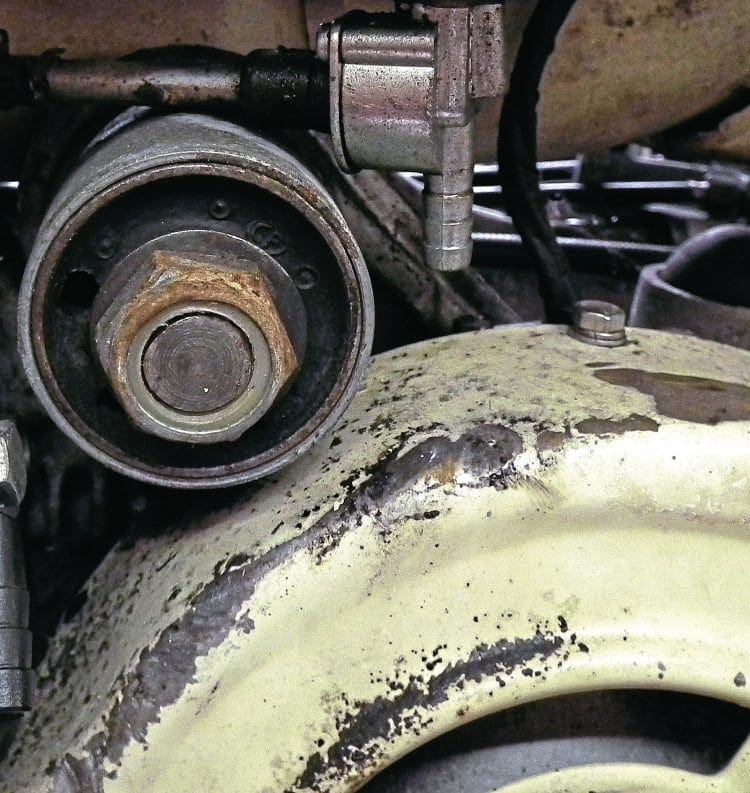
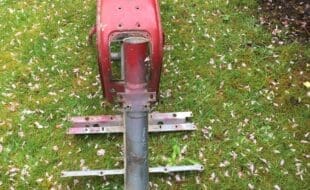
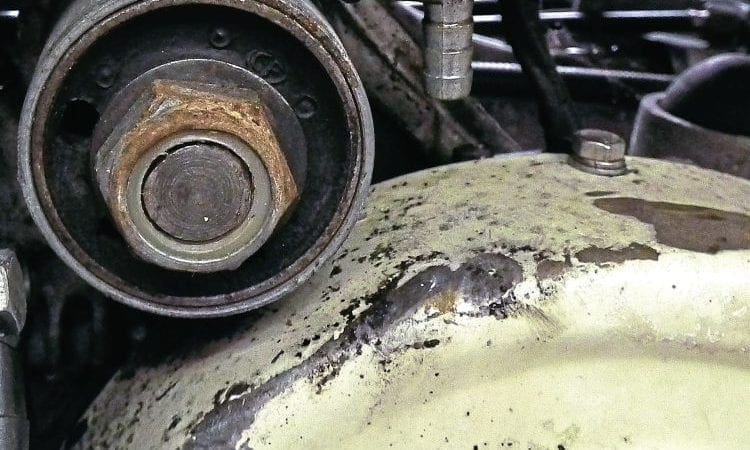
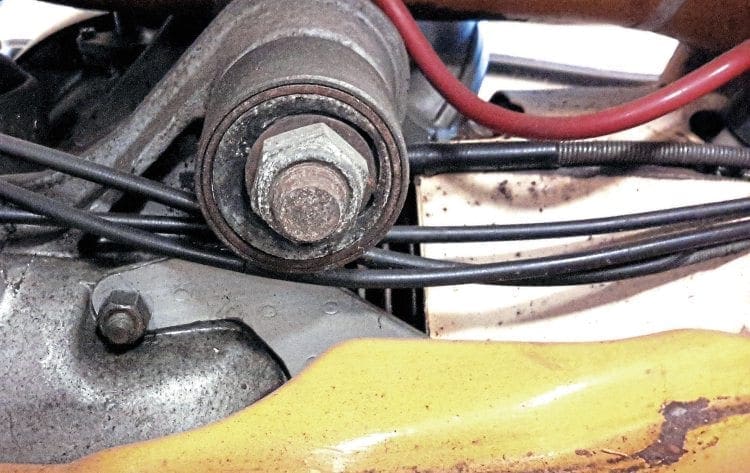
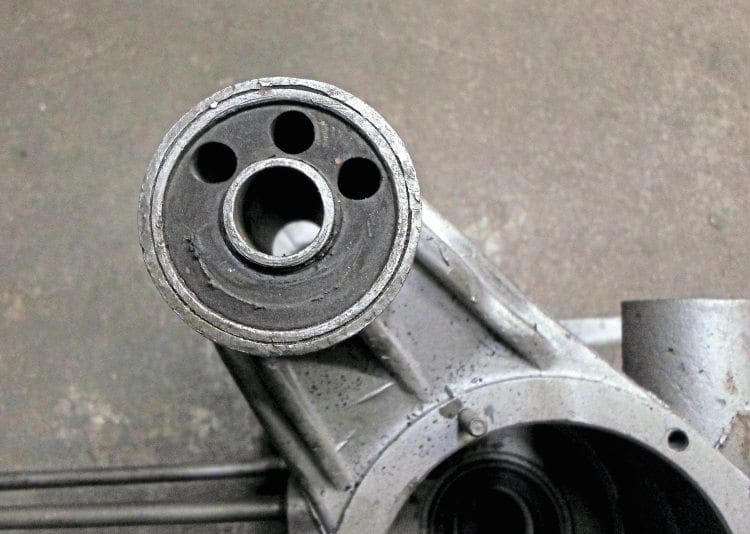
So what do you look for to check if there is a problem? The first thing you may notice is increased vibration, more so through your hands from the handlebars. Also, poor handling around corners as the engine may be leaning more to one side depending which mount is failing. It is more common for the kickstart side mount to be the one that fails first as this one has far more weight suspended on it compared to the flywheel side mount. The easiest way to check if an engine mount has failed is simply by looking at it. Always look at the kickstart mount first and look to see where the engine mounting bar nut is in relation to the mount. It should be exactly central but if there is a problem it will be closer to the top, suggesting the rubber has failed one way or another. Though the mount on the flywheel side may be okay it will still need to be checked as it is now also being forced due to the angle the engine mount bar is now at.
The other simple check is to move the engine with your hand, which will allow you to see the mounting bar move, This can be done for instance by holding the flywheel cowl on one side or the exhaust on the other and flexing it with your hand. As you do you will see the rubber stretch and then go back into position. If the rubber is perished or split you will be able to see how badly by this method.
Replacement methods
If the mount does need changing now comes the awkward part of doing so. The decision you now need to make is should you change both or just the one that has failed. This depends on how bad the one that has failed has gone. It may have started to cause a tear in the rubber of the opposite mount even though it is not noticeable yet. Because the engine needs to be removed to replace them it is best to replace both at the same time. Also, you know at the time of fitting both are in perfect working order.
It is possible to replace an engine mount by not completely removing the engine. You will still need to remove the footboards and the engine mount bar but it is possible to get an extractor in place to take the mount out. Problems can arise though, as heat is often required — certainly when putting a new one on – which isn’t advisable with the petrol tank and carburettor in close vicinity. The reality is, if you are changing the mounts then the only real way to do it is by taking the engine out altogether. If you are due to do an engine rebuild at the end of the season then you can wait till then to drop the engine out. Though the mount may have started to fail you can get by for a short while with it still like this. However, if you a planning some serious miles or it’s at the beginning of the season get it done straight away regardless.
Removing engine mounts
To remove an engine mount you will need an extractor tool. There are several available on the market to buy or maybe you can borrow one from somewhere but without one, you will not remove it. If the engine is fairly new or has had mounts fitted in the last few years then the extractor should remove it with ease. If the mount has been in for years and the engine corroded then it may require further help to remove it. The most critical thing is not to use any other force whatsoever to do so. Never use a hammer to hit it with directly or through a drive as more than likely it will snap the lug off, certainly on the flywheel side. This goes for both removal and fitting and though it may be tempting to use external force in both cases do not.
Before fitting an extractor, gently heat up the aluminium of the casing. Don’t use too much heat as you don’t want the steel of the mount heating up to much. This should help the extractor when you first start to try and remove it. When you start to turn the extractor bolt it will become tight against the mount. As you tighten it more you should hear a cracking sound as the seal between the aluminium of the casing and the steel of the mount is broken. From then on you should find the extractor moves more easily as the mount is pushed out.
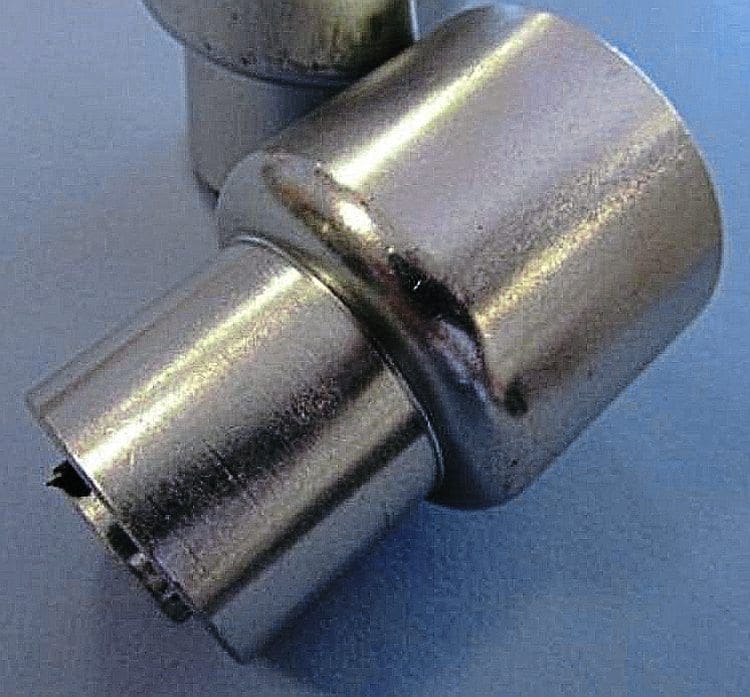
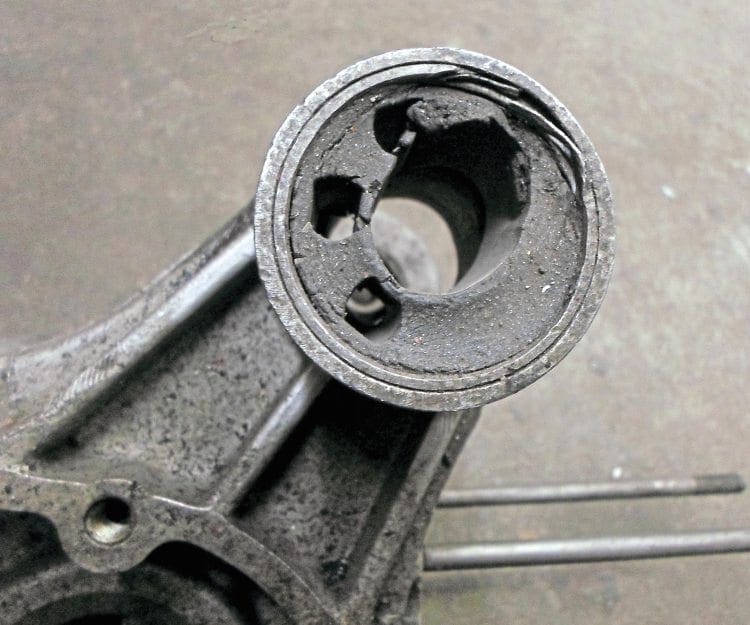
In the case of a badly seized mount certainly, in an old engine that has gone rusty, it may not be possible to break the seal. The option here is to remove the rubber from the mount by cutting it out which in turn will remove the inner sleeve that the engine mount bar sits in. This is an awkward process but by using a drill it should be possible to remove most of the rubber fairly quickly. This will then give you access to the inner side of the mount that sits in the casing. By placing a hacksaw blade through the mount you can carefully cut through the length of it. You will have to make sure you get an even cut through the entire length of the mount but once you have cut through this will in effect create a gap and so release tension between the outer surface of the mount and the casing. Take care as you cut through not to cut into the aluminium, though a couple of light scratches won’t do any real harm.
As the tension is now relaxed the extractor can do the job of removing the mount more easily. This method should only be used when an engine mount is seized solid and great care and time should be taken doing it.
Refitting the mounts
Before fitting new mounts there are several things that need to be done. Start off by cleaning the surface of the engine casing where the mounts will sit. There will always be some dirt and possible water residue that has furred up. Clean this with wire wool and get it as smooth as possible along the entire surface. Most importantly check that the edge where the mount first goes in is clean and there are no high spots or burrs in the aluminium and remove if necessary. Next is the mount itself and make sure the surface that goes into the casing is cleaned up.
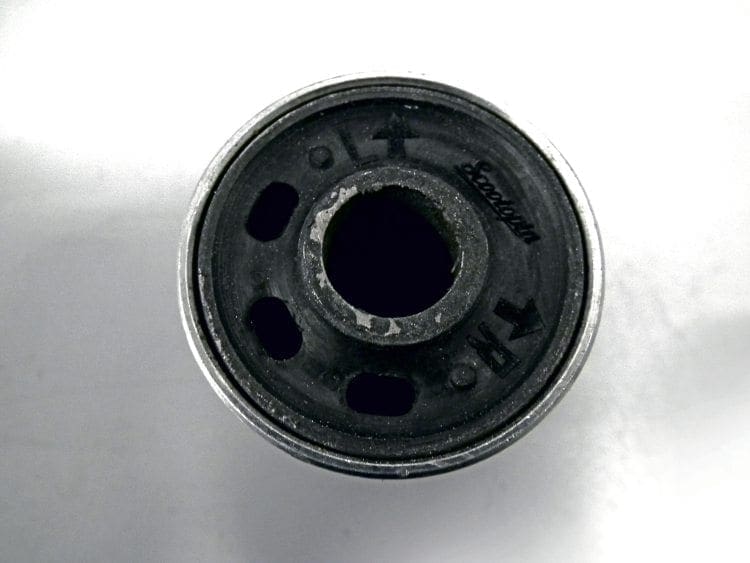
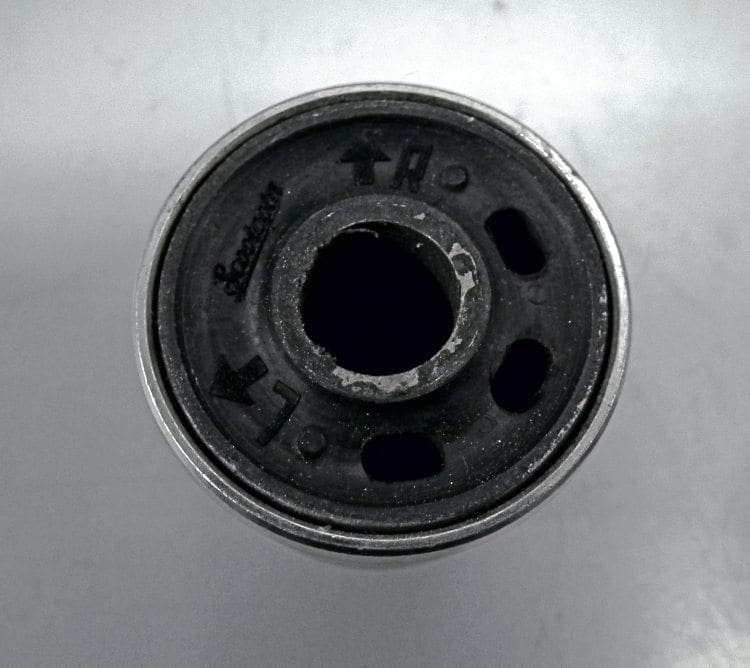
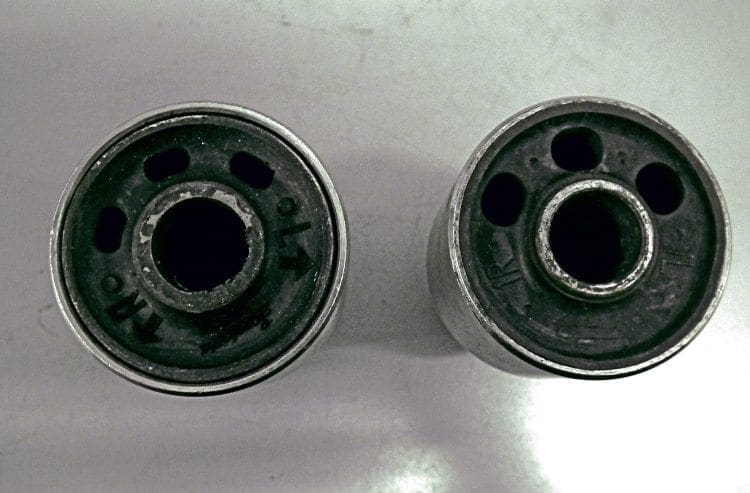
There can be a tendency from some mounts to have a rather rough surface on the steel. The easiest way to clean the surface up is by using fine sandpaper turned around several times just to take the edge off. Now, this is done make sure you have the holes in the mounts lined up correctly. Most mounts come with three holes or in some cases just two. The holes need to be in the correct position otherwise it can affect the handling as the mounts won’t work in unison during flexing if they are out of line. To make sure you have them correct imagine you are looking at a clock face. Taking that the engine is in the position it will be in the frame the holes on the flywheel side will be in the ten to six position. On the kickstart side, it will be the ten past six position. If the mounts you will be using only have two holes then ignore the bottom one so you will in effect position them 10 to the hour and 10 past respectively.
Assuming you have everything in place you can now refit by reversing the engine mount tool. However, there is an easier way of doing it, or certainly one which will help. Put the mounts in a fridge for a couple of hours before fitting to make them cold. This will contract the steel making them fractionally smaller in size. Now heat up the casing where the mount goes and in doing so as hot as possible with a blow torch. Make sure the whole circumference is heated and especially the inner edge so it expands as much as possible. With the mount to hand, you will have about a 20-second period where it should drop all the way into the casing. Make sure when you do this the holes in the mount are in the correct position as once the mount goes into the casing it will instantly cool down and go tight. You will not have a chance to align it into the correct position so have to extract them and refit all over again.
If the mount doesn’t go all the way in, which can sometimes happen, don’t worry as the mounting tool will easily push them in the remaining distance. Remember to take care if this is so as the casings will be hot and it’s best to let them cool down a bit first. Remember if the mounts almost go all the way in but are just short of doing so don’t under any circumstances attempt to tap them in with a hammer. Just be patient and use the correct tool. There are some instances where the mount will be tight fighting, even if this method is used.
It all depends on the casing if they are new or old and the mounts themselves as the tolerances can vary between the different manufacturers. Remember the only thing holding the mount in position is an interference fit with the casing so you can never take for granted that every measurement will be exact. If the fit is super tight and even the mounting tool is struggling to push them in then it maybe you will need to check the tolerances of the mount. In extreme cases, it has been known to that they will need a small fraction machined to make them fit perfectly. If this is the case then only ever do this to the mount and not the casing. If too much is removed from the mount then that can be replaced cheaply but the casing can’t.
Don’t be hasty
As already mentioned replacing engine mounts is an awkward and tricky thing to do. If they are only just starting to fail then don’t panic too much that you can’t still use your Lambretta, just be aware they will need replacing sooner or later. The diagnosis explained is quick and simple and anyone can do it in a matter of minutes. If you don’t have the correct extraction tool then don’t take the job on until you have one. Get a shop to do it for you if you don’t or are unsure about doing it yourself. If you are going to change them yourself remember the golden rule: never use unnecessary force when doing so. This cannot be emphasised enough.
Words & Photographs: Stu Owen

Enjoy more Scootering reading in the monthly magazine. Click here to subscribe.
Scooter Trader