
Having looked at the extensive process of preparation in Part 1, and following up with colour coats and lacquer in Part 2, we are spending this month back with Paul Hindle at Eyecandy to address the correct process for multiple layers of paint, striping and stencils.
What grade finish?
At the end of the preparation and primer process you are faced with the choice of what grade paper to take the primer to before moving on. This choice is dependent on what type of paint you plan to use in the colour coats. The range of grades runs from 400 through to 1200 wet and dry. The choice of which is used will affect your final finish.
Enjoy more Scootering reading in the monthly magazine.
Click here to subscribe & save.
Final finish pre-paint
When completing a project using straight colour 2k paint, a 400 grade wet and dry paper is quite sufficient. However, when any paint along the lines of candy, pearl or metallic is used, then it is advisable to work progressively up to a 1200 grit paper. The reason for this is to avoid what are known as ‘prep-scratches’ which are as the name suggests and can show through a finished paint job. Look carefully at any metallic paint job and where the level of prep-sanding has been done with an insufficient grade of paper and prep-scratches can often be seen, quite often more so where body filler has been used.

So at this stage use the correct grade of paper according to the colour-coat paint-type to be used next, and ensure your primer stage is finished to the correct level. As the name suggests, the paper used is wet and dry. Paul prefers wet sanding as it keeps the paper clean of residue and results in, as he says, “a proper job”. After the wet and dry stage is finished, Paul is meticulous in his approach to washing down all remaining residue. Any hint of contamination can ruin the final result.
Paint choice
When making a selection and purchasing the paint for your project, you will have the choice of water-based or solvent-based. Water-based paints are notorious as being more difficult to use, and only generally producing acceptable results in exceptional circumstances (read when using expensive equipment). Generally speaking most people who are not spraying on either an industrial or commercial scale will by to avoid water-based paints.
There is also a myth that water based paints are isocyanate free, but water based just means that it is emulsion based and has reduced levels of solvents. Solvent based paints such as 2k (2-pack) are reputed to be easier to use, quicker to dry and pick up a lot fewer particles. The choice seems straightforward. The only caveat to that is for intricate work, where it’s noted a lot of the airbrush artists prefer the use of water based paint for this section of the job, but airbrushing is something we will cover at a later date. When purchasing paint, you can ask for a data sheet, this will inform you of all specs regarding that particular paint, from how many coats the manufacturer recommends, to how long should be allowed for drying times, and most importantly… the pressure to spray at. Important: air pressure matters a lot. The correct pressure supplied by a decent-sized compressor will achieve consistency and quality.

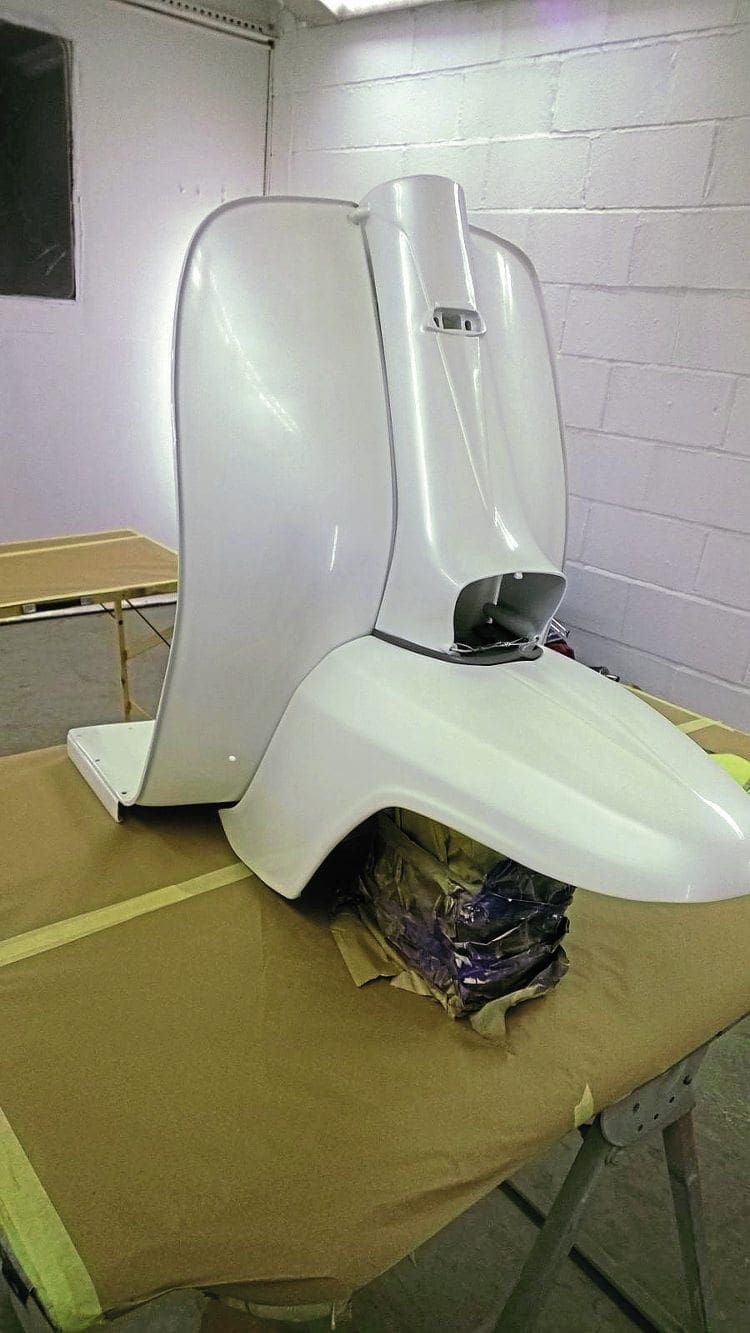
Main colour coat
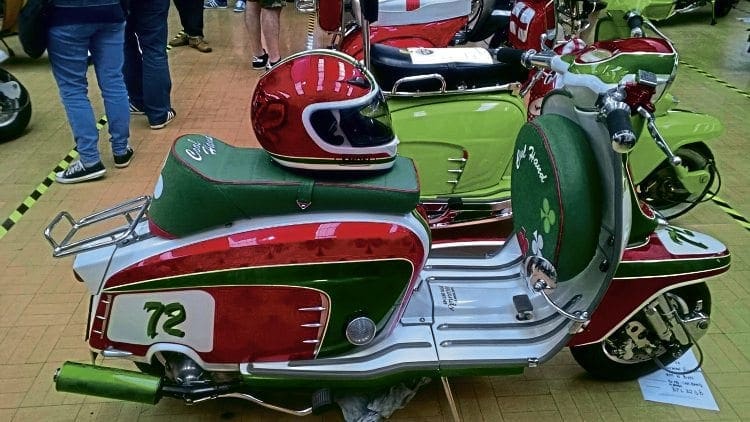
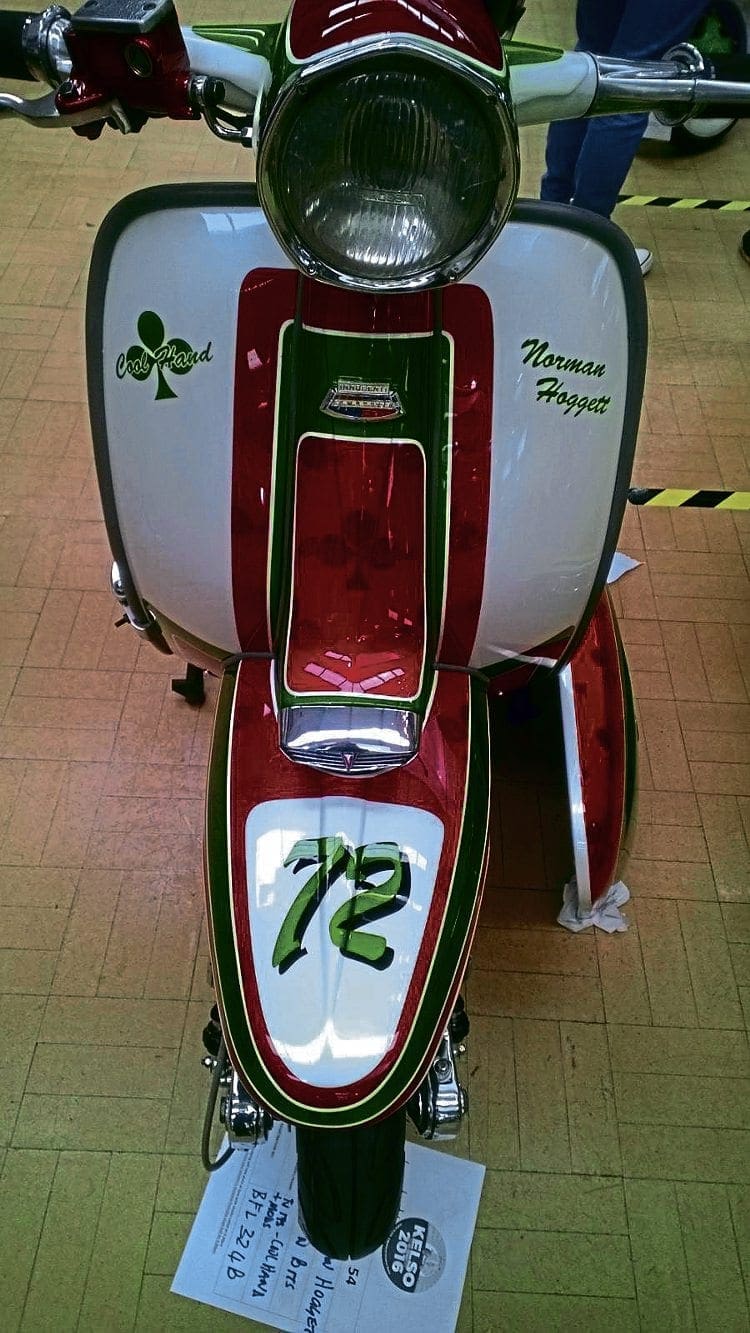
Pearl is considered a three-stage paint which consists of ground coat, pearl coat and finally lacquer, whereas a metallic paint is considered a two-stage paint which is base coat and lacquer. The main colour of the overall paint job is applied first, whatever it maybe. Apply however many coats are needed in order to achieve correct level of coverage. Three coats are quite usual, dust, full, and final but depending on the colour scheme and paint-type, more maybe required.
Allow to dry thoroughly and then once the colour base coat is done, allow to dry and then apply two even coats of 2k lacquer, and again allow to cure thoroughly. The lacquer is done before the stripes/stencil work to ‘save’ the colour coat in case of any errors during striping and stencilling prep-process.
Masking
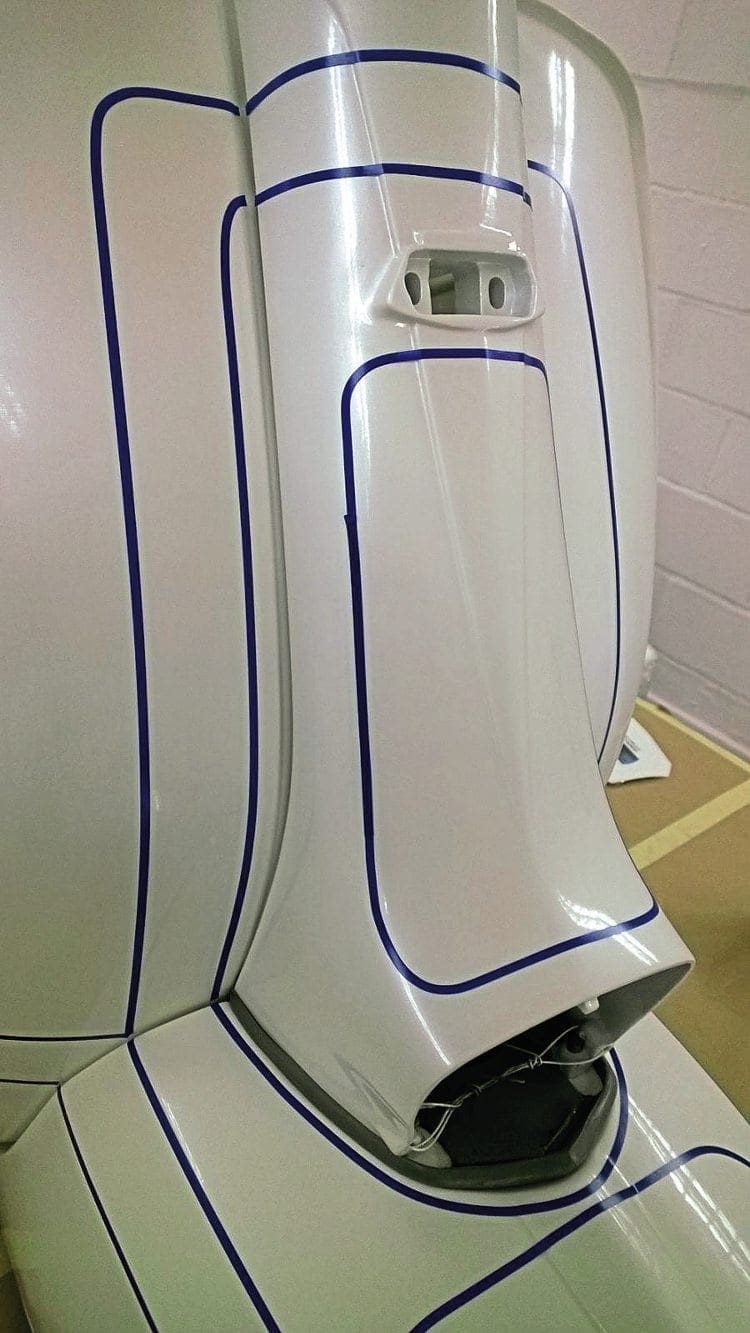
Once the colour and lacquer are hard-cured (this can be quite some time) Scotch pad all lacquer-work to achieve a surface key for the next layer of paint to adhere to. The scooter panels then need to be assembled; the reason for this is to map out all stripes and designs across the panels. A very important tip is to ensure panel rubbers are fitted, otherwise misalignment will occur. I have personally seen paint jobs where panel stripes which run across the chassis have been done without the panel rubbers fitted; the end result is a huge misalignment of the design when the scooter is complete.
Use pinstripe tape to create a rough outline, and make sure you measure both sides of the scooter for symmetry in the design. Don’t forget to warm the tape up gently, not too much or it will stretch and lines can then become thinner in certain areas, but just enough to make it adhesive. It can then be applied, removed and reapplied as required in order to achieve the correct design. It’s important to give yourself enough room to stand back and view the job properly, so work in an area which gives room to visually check alignment from a short distance. There is nothing worse than seeing a new paint job which is unsymmetrical and out of kilter due to working up close and not being able to see the lines.
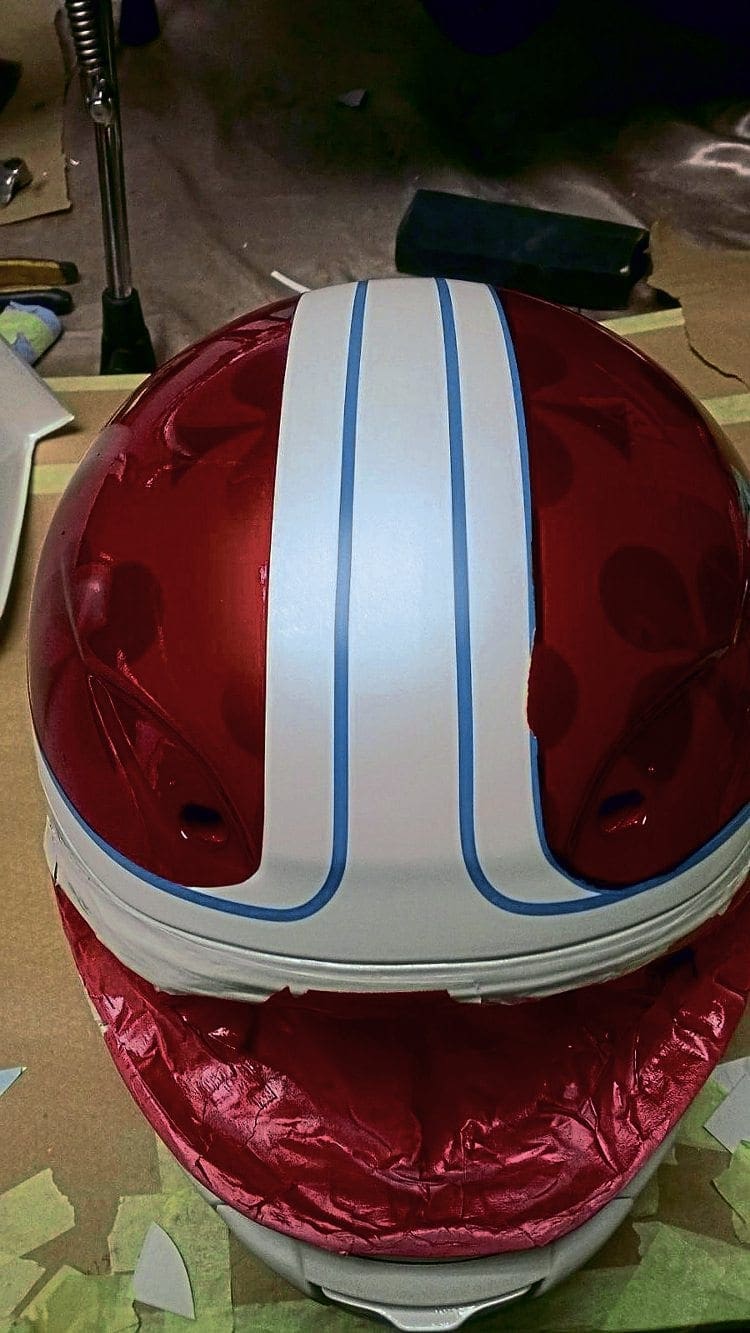
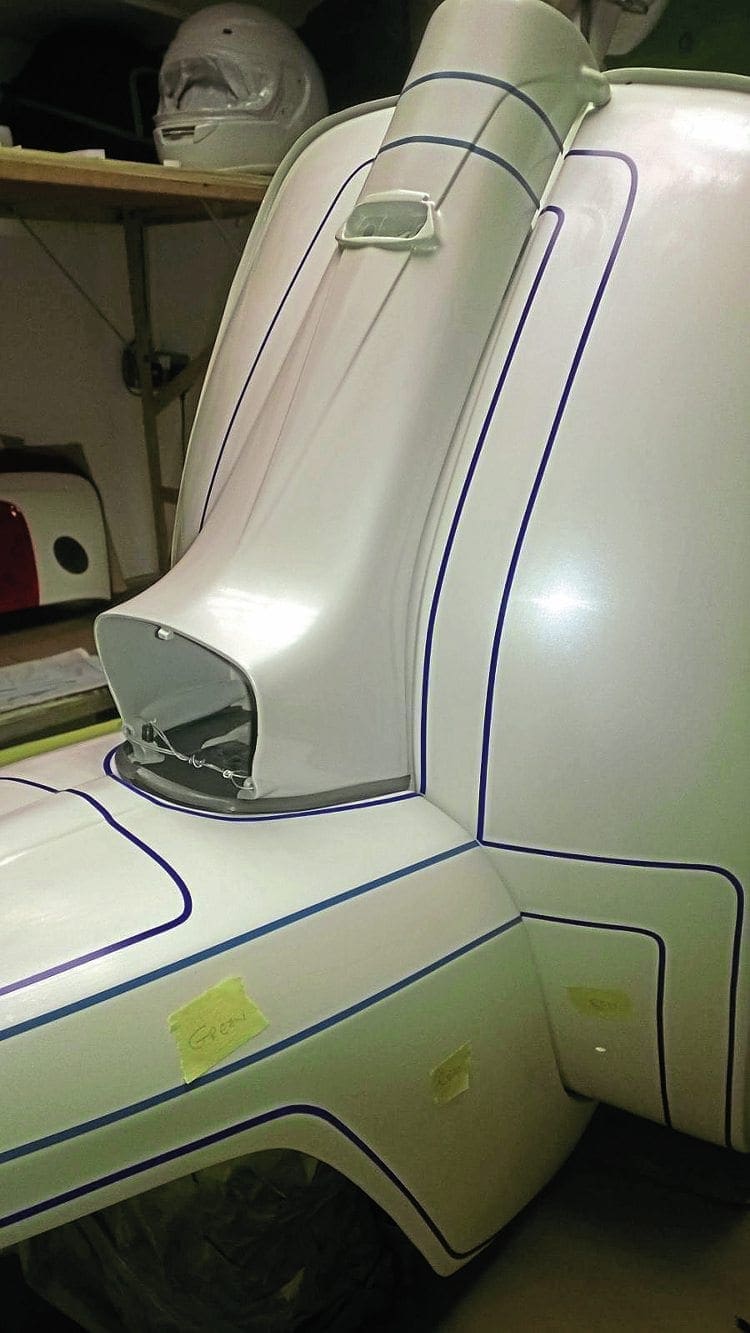
Mask off all areas where different colours are required and proceed with the next stage of paint, whatever the colour is for the relevant stripe or area to be covered. Then allow to dry, but not too long, and then de-mask. The safe way is to allow proper drying time before removing the masking, but most painters who are well practised like to de-mask a little sooner, while the paint has a little stretch about it. Once de-masked, allow to dry further before re-masking for more stripes and further design, using sufficient coats with every colour for correct coverage.

Important note: If painting candy ALL parts must be done at the same time, as each coat serves to act in the same fashion as a dye and makes the end result a darker shade. Again, I have seen first-hand here separate components have been sprayed, with the same paint, but on different days. And due to slight variations in temperature, conditions and number of coats on the day… the colour shades have then not matched properly.
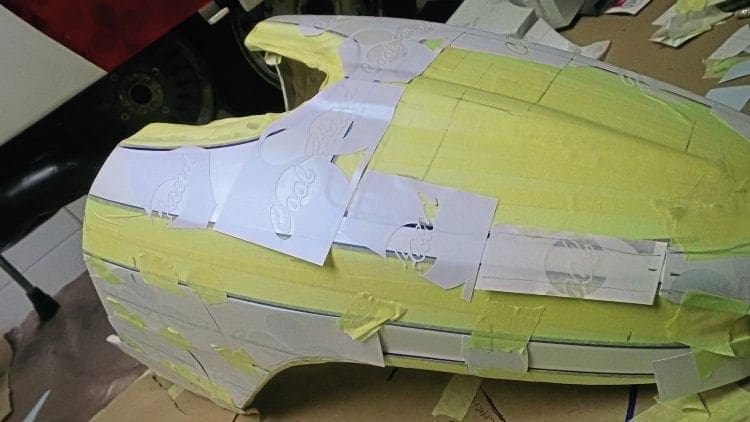
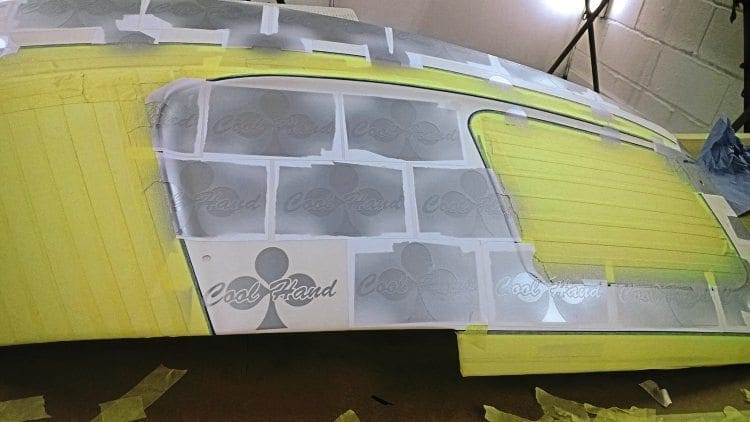
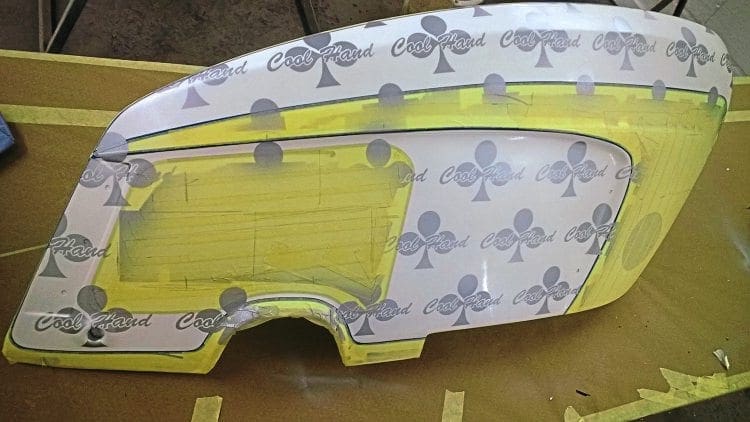
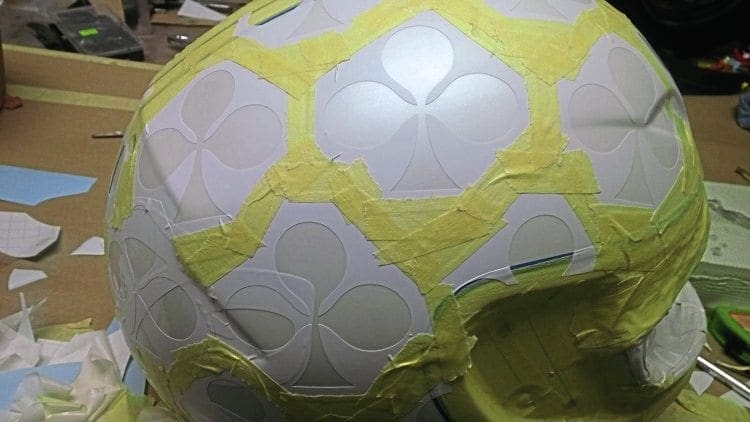
Stencil and graphics
Back in the old days, most painters and airbrush artists had to first draw the image by hand and then make multiple cut-out stencils in a manual fashion. Quite often this was just a simple scissors and paper process. However these days most graphics are now done on a computer using design software, with computer created/printed stencils which output to ‘lo-tack’ sheets. These can be produced by any reputable sign-writing company onto vinyl, which are then used to airbrush through a cutout, and can then be picked out with a scalpel. The lo-tack adhesive ensures the previous coat of paint is left unaffected as you build up each layer of your image/logo/stripe/design. After you have completed your multi-layered paint design, however simple (or intricate), then de-mask and check the results. You can then sort any imperfections. Lacquer to a satisfactory finish in order to achieve the required ‘depth of finish’. Some people like a ‘deep’ finish and can apply multiple coats of lacquer to ‘bury’ the design.
Coming instalments
Airbrushing by the masters, pearl, flake and candy… plus a look at home painting with aerosols, and the higher specification powder coating which is available.
SAFETY TIP
It is paramount to your safety and long term health to use air-fed equipment and sufficient extraction to supply clean air. Dust from sanding, especially filler, is not nice to breath in. Most paints are heavily solvent based, and contain isocyanates. Ventilation, extraction, and clean air to breath are paramount for your health.
Words: Dan Clare
Thanks to: Paul Hindle at Eyecandy for all technical information and images
This article was taken from the July 2016 edition of Scootering, back issues available here: www.classicmagazines.co.uk/issue/SCO/year/2016

Enjoy more Scootering reading in the monthly magazine. Click here to subscribe.
Scooter Trader